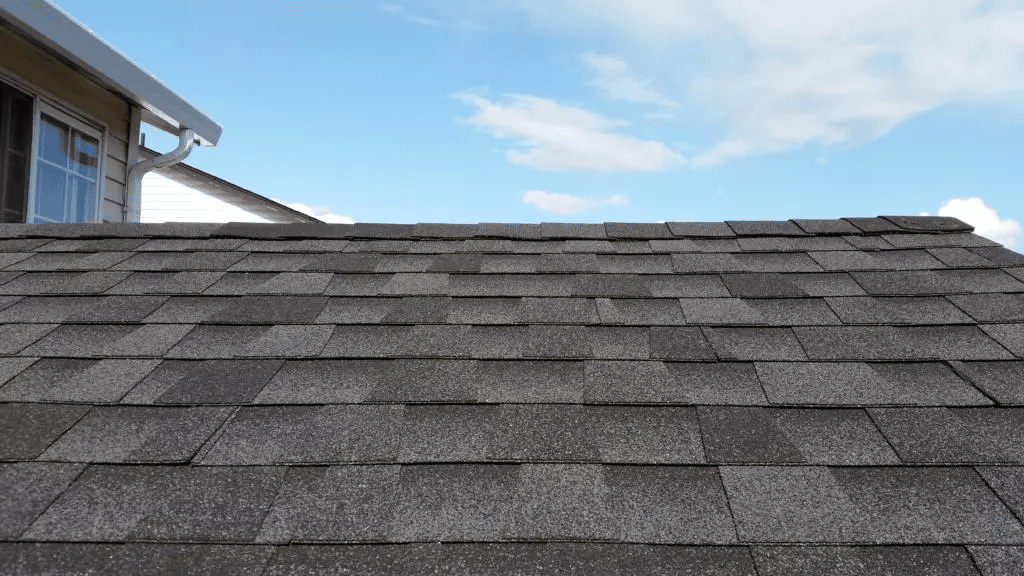
A solid roof is essential to the integrity of your home. It’s often said that a house is only as strong as its foundation, but a well-maintained roof is just as important. Unfortunately, many homeowners neglect their roofs until a problem arises. This can lead to serious and costly consequences. In this blog, we’ll discuss why regular roof maintenance is crucial to the longevity of your roof and the safety of your family.
First and foremost, regular roof maintenance is necessary to ensure your roof lasts as long as possible. A typical roof can last anywhere from 15 to 30 years, but this lifespan depends on various factors such as the type of material and proper installation. Regular maintenance can extend the life of your roof and protect your investment.
Additionally, neglecting roof maintenance can lead to small issues turning into much larger problems. For example, a small leak can eventually weaken your roof’s structure, leading to more significant damage. Similarly, a clogged gutter system can cause water to accumulate on your roof, leading to water damage and mold growth.
If you notice a problem with your roof, it’s essential to address it as soon as possible. Ignoring small issues can lead to more significant problems, which can be costly to fix. In some cases, delaying repairs can even lead to the need for a full roof replacement.
Failing to maintain your roof can be a costly mistake. For one, delaying repairs can lead to more significant issues and a higher repair bill. Additionally, neglecting roof maintenance can make it more difficult to file an insurance claim or warranty request if major damage occurs.
Regular maintenance may seem like a hassle, but it’s well worth the effort. By investing in routine inspections and small repairs, you can extend the life of your roof and protect your family and home.
At IBEX Roof, our mission is to deliver long-term quality to our clients. We pride ourselves on providing the best solutions without pushing unnecessary upgrades or services. Our team of experts can help you keep your roof in top condition, so you can avoid costly mistakes down the line.
Contact us today at (360) 218-3134 for our Vancouver, WA office or (360) 352-1885 at our Lacey, WA office to learn more about our roof maintenance services. Don’t wait until it’s too late – invest in your roof’s longevity today.
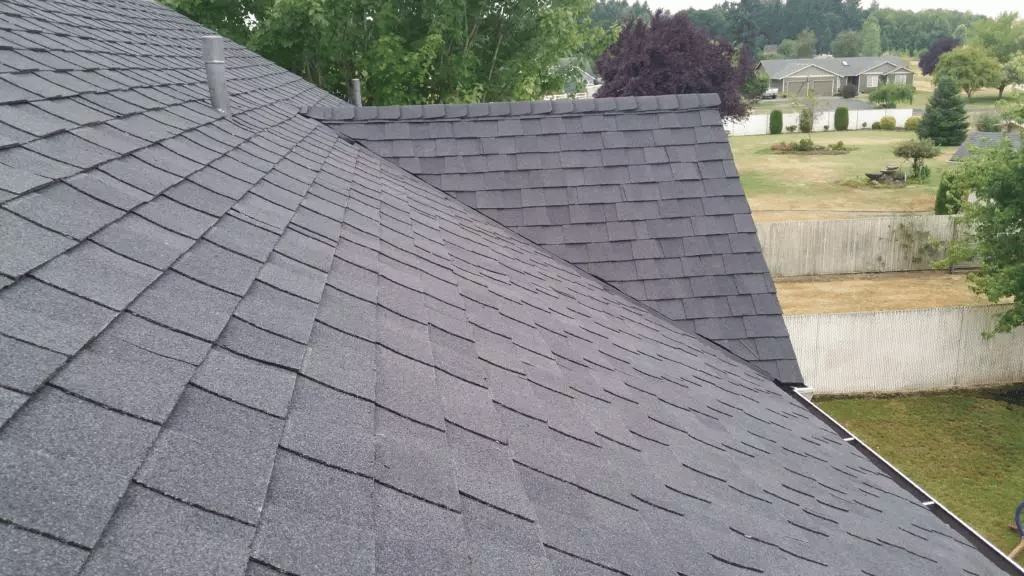
If you’ve noticed black streaks on your roof, it’s most likely algae growing on top of your house. It can be mistaken for mold and mildew, and it’s equally unappealing. Algae growth doesn’t begin when you can see it. In fact, black streaks on your roof likely means that it’s been there for months!
Humid climates around the coast are prime for algae growth. It’s common to see it on top of multiple houses that are close to each other because the spores can be spread by wind or animals. Over time, algae on your roof can damage your shingles or even cause further moss growth. Not to mention, black streaks on your roof most certainly do not add to your curb appeal. Luckily, IBEX is here to help!
If you’re thinking of getting rid of the black streaks on your roof, there are a few different chemical treatments that may help. Bleach and water are commonly used to get rid of growth. You can also try using oxygenated bleach or trisodium phosphate (TSP) mixtures.
When cleaning off your roof, it’s important to use your choice of treatment with caution to prevent any further damage to your roof or landscape. Some chemicals can be corrosive to metal or damage wood if used improperly. Be mindful of any water run-off from rinsing off your roof to protect your lawn or plants that surround your home.
NEVER pressure wash your roof. Not only can this spread the algae underneath the shingles, making it more difficult to clean in the future, but it can actually damage your roof and decrease its longevity.
As is key to preventing most roofing problems, proper maintenance can help keep your roof streak-free. Algae enjoy shady, moist areas. You can discourage their growth by trimming overhanging tree branches back and allowing direct sunlight to hit your roof. Cleaning your gutters and making sure there is proper drainage will also prevent a moist environment to cultivate algae growth. For homes that are highly prone to algae and moss growth, use some zinc powder on your roof before they get a chance to grow.
IBEX can help you get rid of those ugly, black streaks on your roof. Even if your roof is currently algae-free, we provide maintenance services to help keep your roof in good shape so it can continue to protect your home for many more years.
We understand how tempting it can be to use a pressure washer on your roof, but the truth is, it can be severely damaging! Pressure washing your asphalt roof can have costly consequences, from decreasing the lifespan of your roof to major tears and leaks. Because asphalt shingles are not designed for high pressure washing, doing so can actually void your roof’s warranty. Today, we discuss why pressure washing asphalt roofs is a bad idea and other ways to keep your roof in tip-top shape.
Everyone loves the satisfaction of water blowing away years of grime and revealing a pure, clean surface underneath. When pressure washing asphalt roofs, though, you’re not just washing away grime and debris. You’re also stripping away the granules that protect your home from sun, wind, and rain. While it’s normal for roofs to lose granules over their lifespan, you don’t want to hasten the process by pressure washing.
Another side effect of granule loss from pressure washing asphalt roofs is clogged gutters. After all, the granules have to go somewhere, don’t they? Many homeowners who make the mistake of pressure washing their roofs find their gutters full of granules, which inhibits proper water drainage.
If your roof is older in the years, a harsh water stream can uplift and damage shingles. This can result in holes in your roof and cause leaks into your home. Don’t turn a simple cleaning project into a major roof repair!
High pressure sprays are so strong that, instead of cleaning the moss and algae off your roof, it can actually spread the spores around. Even worse, it could push moss and algae underneath your shingles and be more troublesome to clean later.
While pressure washing is out of the question, there are other ways to keeping your roof immaculate.
The best way to keep your roof looking clean is to blow away any debris a few times a year. Leaves, flowers, twigs, branches, and other forms of debris could prevent water from flowing off your roof and cause leaks or rot.
Trimming your trees so that they aren’t touching your roof is another great way to keep your roof clear. As mentioned before, any debris or branches can prevent water flow and cause leaks and damage your shingles. Trimming tree branches hanging over your roof will also allow more sunlight to reach your roof and discourage the growth of moss and algae.
If your roof already has moss and algae, you can kill the existing growth using a bleach and water treatment. This will also prevent the spores spreading to neighboring houses. Avoid damaging your shingles by using a low-pressure spray to rinse off the treatment.
Pressure washing asphalt roofs may seem like a quick and easy way to get roof cleaning off your checklist, but the potential damage just isn’t worth it. While other cleaning methods may take a little bit more time and effort, it’s better to clean your roof correctly to avoid the cost of replacing your entire roof! IBEX is a one stop shop for your roof maintenance needs, and we work with homeowners to provide the best service for their homes. Give us a call today to see how we can make your roof the best on the block!
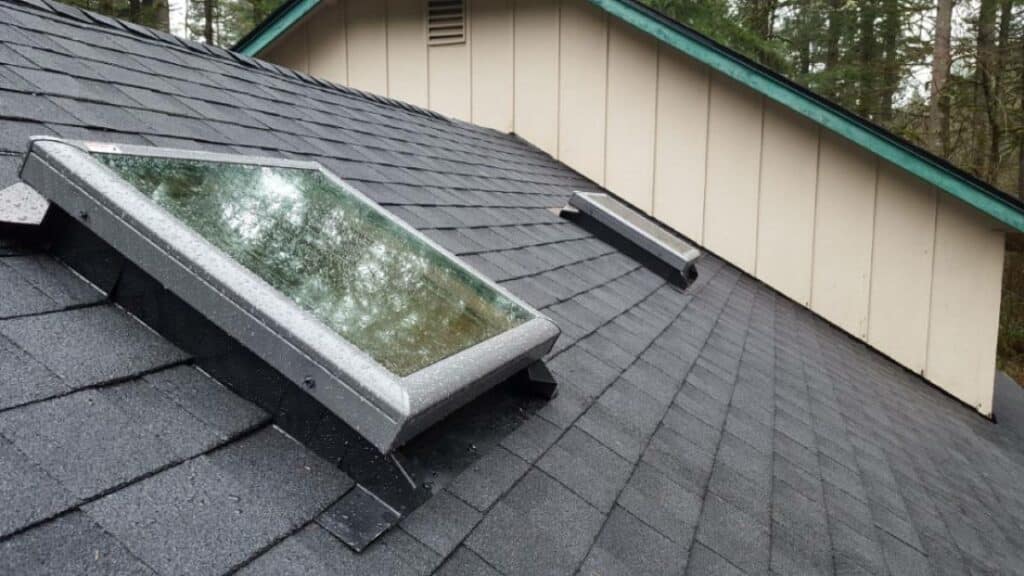
Building energy-efficient homes are becoming increasingly common. And one way to make your homes more energy efficient is to install skylights on your roofs. However, skylights are not only about getting aesthetic add-ons to let in natural light; they have many other aspects, like step flashing. But what exactly is step flashing, and how does it work with your skylight? In this article, we will tell you everything about it.
Skylight step flashing is a protective layer fitted around the skylight to make it waterproof. It’s like a seal that covers the gap between the skylight and the roofing material. Step flashing is made of metal that prevents leaks by keeping the water from getting into the skylight.
As we mentioned, step flashing works like a protective layer around the skylights. Its primary purpose is to keep the water or snow on the roofing surface on which the skylights are installed.
Most people use sealants to fill in the gaps between the skylight and the roof; however, this method is not viable as sealants can break down with time and cannot sustain harsh weather conditions for long. As a result, your roof can be damaged, in addition to water leakage.
Step flashing helps shed water or snow from the roof without needing any sealants. It is fitted underneath the shingles, tiles, or slates, giving a clean and polished look to the skylights and roof.
Therefore, whenever you purchase skylights, get a skylight flashing kit with it for a secure installation.
The longevity of skylight step flashing depends on the material used and its quality. The most common types of step flashing are made up of metal or rubber, and plastic.
The types of metals used for skylight flashing include lead, copper, zinc, aluminum, and steel. However, lead proves to be the most durable, lasting for as long as 500 years! Copper is a good option for buildings that need to look aesthetically pleasing, like historical buildings and classy houses.
But, if you’re looking for cost-effective yet durable metal skylight flashing, we suggest going for zinc, aluminum, and steel.
Rubber and plastic skylight flashing are suitable for temporary skylights, as they are cheap to install but tend to degrade in the sun quickly.
Most skylight step flashing lasts for decades and is only replaced when a new skylight is installed. However, if your step flashing has been around for quite a while, the material seems to be deteriorating, and frequent repairs have left nail holes in it, you can replace it with flashings specific to the skylights.
Here’s a storm damage checklist for your reference to clearly understand what type of damage your roof may have endured:
If you’re a resident of the Pacific Northwest, chances are that you have encountered rough weather more times than you can count.
From hailstorms to heavy winds and torrential rain, storms can cause a lot of potential damage to your homes, especially the roof!
So, once a storm has passed, the first thing you should do is check for storm damage.
Walk around the perimeter of your house to check for visible signs of roof damage. This includes broken or missing shingles, curled shingles, dented flashing, exposed roof deck, granule loss, etc.
If you spot these damages from ground level, it’s time to hire a roofing company to fix these issues as soon as possible.
Take note of the area around your house and look for damaged fences, fallen tree limbs, broken posts, and patio. Also, check the ground for shingles or other roofing components that might have blown off during the storm. This will help you identify roof damage that is not visible from the ground.
The gutters, roofing vents, and overhangs can get dented or filled with loose leaves and debris. If they are clogged or dented, you should clean them out and get them fixed to avoid further damage due to standing water.
The windows around your house can get damaged too. Check the windows for cracks, loose weatherstripping, and torn screens. If the windows are damaged, you should get them fixed or replaced soon, as cracked windows cannot sustain harsh weather for long.
Even if your roof seems apparently unharmed from the exterior, there are chances of unseen leaks present under the shingles, roof deck, or underlayment that can lead to serious damage later on. To spot leaks, inspect the ceiling, light fixtures, and attic of your home for brown water spots on the inside walls. If you find any seepage, it means the roof is leaking. Find the source of the leak, and get it repaired instantaneously.
Moisture can also seep into the structure of your house through the basement and crawlspace. Storms can lead to standing water in these spaces of your home that can weaken the foundation, seep into the walls, and cause moisture accumulation, which is a serious problem on its own!
If you find any of the discussed signs and symptoms for storm damage inside, outside, or on the roof of your home, you should hire a roofing contractor as soon as possible to fix all the major and minor issues.
Contact us for help with your Storm Damage!
Storm damage is imminent! However, if you inspect your roof and exterior right after a storm and take timely action, you can avoid further damage and save time, money, and lives!
Here is a full inspection checklist for a full view!
If you’re getting a new roof for your house or the old one renovated, you must have come across the term “Roofing Square” either from your contractor or the supplier. So, what is a roofing square? To put it simply, it’s a unit of measurement that helps in calculating the total amount of material required for roof building. How does one calculate the number of roofing squares, and how does it help estimate the total material required?
A roofing square is a 10 x 10 area on the roof that equals 100 square feet. The number of roofing squares helps contractors calculate the total square footage of your roof, and determine the exact amount of material required to build the roof. This includes the underlay and bundles of shingles.
As a homeowner or someone involved in the construction industry, understanding roofing squares is crucial. When planning a roofing project, having a grasp of this concept allows you to communicate effectively with contractors, suppliers, and other professionals involved. It enables you to make informed decisions, avoid costly mistakes, and ensure the project's success.
The number of shingles in a square can vary depending on the specific type and size of the shingle. A square refers to a measurement used in the roofing industry that equals 100 square feet. Roof shingles are typically sold in bundles, and the number of shingles in a bundle can also vary based on their size.
On average, a bundle of shingles can cover approximately 33 square feet of roof area. This means that three bundles are needed to cover one roofing square. So, if we consider a standard roof size of 100 square feet, we would need around nine bundles of shingles to completely cover it. However, it's important to note that these numbers can vary depending on the specific product and manufacturer. Therefore, it's always recommended to consult the product specifications or seek advice from a professional when determining the exact number of shingles needed for a specific roof.
The cost per square is a term used in the roofing industry to determine the price of a new roof or a roof replacement. A square, in this context, refers to a unit of measure equal to 100 square feet of roof area.
The cost per square is determined by various factors including the type of shingle you choose, the size of your roof, the pitch of your roof, and the difficulty of the job. Generally, the cost per square depends on the materials used and the labor required to install them. For example, if you opt for high-end shingles, the cost per square will be higher than if you choose a more budget-friendly option. Additionally, a steep roof will require more caution and specialized equipment, which can increase the cost per square. Therefore, when considering a new roof or roof replacement, it is important to consult with a roofer who can accurately estimate the cost per square based on the specific details of your roof.
The first step in calculating the number of roofing squares is to find out the total square footage.
For this, you have to measure the length and width of your roof planes. The number of roof planes depends on the style of your roof. For instance, a gable roof has two planes, one at the front and one at the back. Similarly, a shed or flat roof has just one plane. The length multiplied by the width of a roof plane gives you the square footage of that particular roof plane. If your house has three roof planes, add the square footage of all 3 to get the total square footage of your roof. Now, divide the total square feet by 100 to get the number of roofing squares.
It may seem like a lot of math, but trust us, it’s quite essential when it comes to roof building. Don’t worry, though. Our team will do the math for you! By calculating the right amount of materials, we can ensure that you have just enough left over at the end for future repairs. We’ll also order your materials for you. At IBEX Roof, we’ve got you covered every step of the way!
Roofing projects can vary significantly in cost due to several factors. Some of the key elements that influence roofing costs include:
Considering these factors and understanding the concept of roofing squares can help homeowners and contractors develop accurate cost estimates.
Roofing squares play a vital role in determining material costs and, consequently, overall project expenses. By knowing the number of roofing squares required, contractors can calculate the total cost of materials needed for the project. This information is crucial in budget planning and ensuring that the project remains within financial constraints.
When seeking bids from roofing contractors, providing them with accurate measurements in roofing squares is essential. It allows contractors to assess the scope of the project accurately and provide more precise quotes. Moreover, this ensures that all contractors are bidding on the same project specifications, making it easier to compare offers.
Choosing the right contractor is paramount to the success of any roofing project. It is advisable to research and gather recommendations from friends, family, or reputable online platforms. Additionally, check for licenses, insurance, and customer reviews to ensure the contractor's reliability and expertise.
If you are in need of roofing services, look no further than IBEX Roof. We are a trusted and reliable roofing company that specializes in all aspects of roof maintenance and repairs. Whether you need us to inspect, repair, or replace your roof, we have got you covered.
Our team of experienced and skilled roofers will ensure that your roof is in top shape, providing you with the protection and peace of mind you need. We understand that investing in a new roof can be a significant undertaking, which is why we are committed to delivering quality services at affordable prices. Our customer service team is always ready to answer any questions or concerns you may have, and our technicians are equipped with the latest tools and techniques to handle any roofing project efficiently and effectively. Don't wait until your roof is beyond repair, get in touch with IBEX Roof today and let us take care of all your roofing needs.
Is your roof leaking? Are its shingles falling off? Are you experiencing mold growth or roof algae on your shingles? If yes, it means your roof has completed its life cycle; it’s time to get a new roof! And when you’re getting a new roof, the first question that arises in your mind is: How many layers of shingles can I have on my roof?
Well, according to most building codes, you can have a maximum of two layers of shingles on your roof. Furthermore, based on the condition of your roof, you get to decide whether you need a complete roof replacement or just add a new layer of shingles on top of the existing ones. If you ask us, we suggest tearing down the existing roof and getting a new roof altogether! Let’s discuss the number of layers of shingles and tell you why you should do a complete tear-off rather than layering shingles on top of each other.
The number of layers of shingles allowed on a roof depends on the type of roofing material used. For instance, if you’re installing asphalt shingles, cedar shakes, or rubber shingles, the maximum number of layers can be two. On the other hand, metal roofs or concrete roofs will pretty much stop at one layer. Whether you’re getting a new roof or adding shingles on top of the existing ones, the highest you can go is two layers.
Now, let’s discuss why a tear-off replacement is better than multiple layers of shingles on your home.
While adding a new layer of shingles on top of the old ones seems like a good way to save time and money, it is not a viable option in the long run. Here’s why:
When building a roof from scratch or replacing an old one, people tend to avoid tearing it off completely to save time and money. However, while adding multiple layers of shingles seems a good idea in the short term, it can lead to more damage and cost a lot of money in the long run. The solution? Stick to the rules and keep your shingles limited to two layers.
If you want to make your home more energy efficient, we suggest installing skylights. They’re a good source of natural lighting and help reduce your energy bills significantly due to daylighting.
However, people tend to get confused when it comes to choosing the types of skylights for their roofs. Therefore, we have put together the different types of skylights and their purpose.
A skylight is a window installed on the roof of a building that provides natural light to its interior. Skylights come in a variety of shapes and sizes, including rectangular, circular, and pyramid-shaped.
They can be used in residential, commercial, and industrial buildings. Skylights allow natural light to flood a space, reducing the need for artificial lighting during the day. Some skylights come with a cover that can be opened and closed, allowing for ventilation.
In addition to providing natural light, skylights can also provide energy savings by reducing the need for artificial lighting and heating. However, improper installation or maintenance of skylights can lead to leaks, which can cause damage to a building's interior.
To avoid such issues, hiring a professional when installing or repairing skylights is important.
The most common types of skylights are fixed skylights. As the name suggests, they are fixed on the roof and do not open.
They are good for places like attics and stairwells, where you don’t need much ventilation. However, you can also get them installed in rooms with hard-to-reach high ceilings for some extra daylight and star-gazing.

If you want daylight in your rooms but would like some air as well, we suggest getting ventilated skylights.
They look exactly like fixed skylights; however, you can open them to let in some fresh air, and remove excessive moisture.
Ventilated skylights are good for kitchens, bathrooms, and living rooms.
If you don’t have much space on your ceiling to install fixed or ventilated skylights, you can still get the daylight to illuminate your home using tubular skylights. These skylights are in the shape of a small tube with a 10 to 15-inch diameter.
It starts from your roof and goes all the way to the room where you need natural light. The tube uses optical techniques to direct the sunlight down the shaft and into the room.
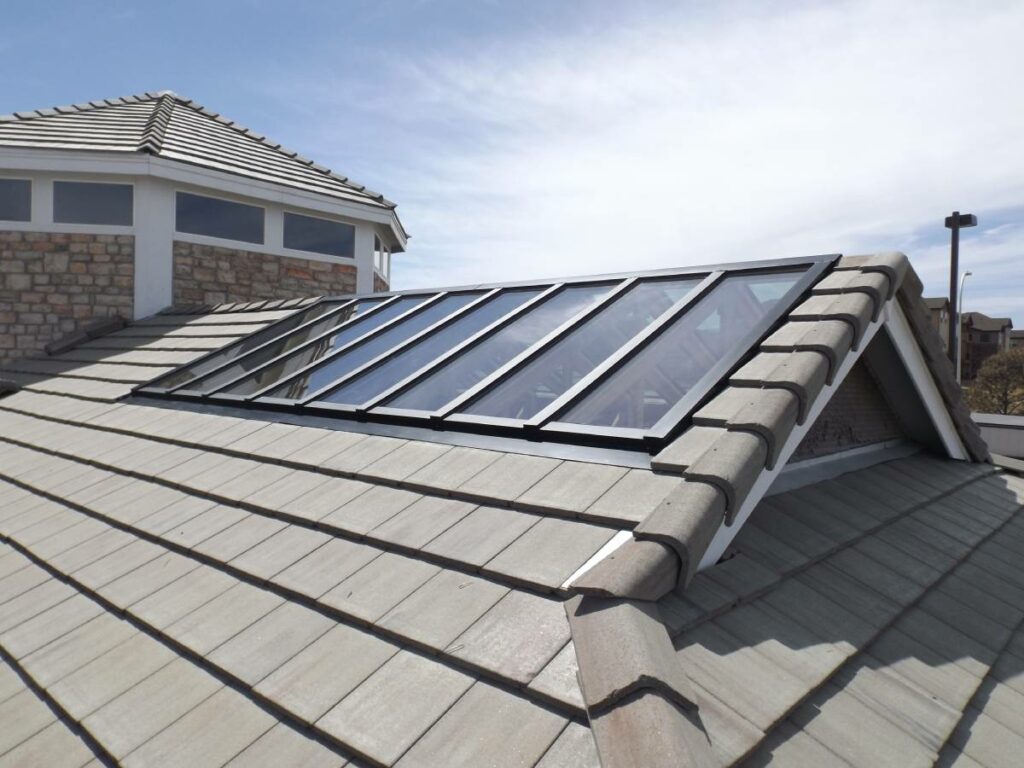
Custom skylights are uniquely designed as per your preference. They can be of any shape or size, tilted or straight, ventilated or fixed, and are usually installed to improve the aesthetic appearance of your home or building.
However, many people go for custom skylights in instances where regular skylights cannot be installed due to roofing conditions. And while these skylights make your home look trendy, make sure to use hurricane-resistant glass and rain sensors.
If you want the natural light to stream into your home even when the sun is not as bright, the dome acrylic skylights are a good option. They are made of flexible yet strong plastic that spread light evenly around the room. And, the shape is such that it brightens up your room even with little light. Most people use dome acrylic skylights in their entrances to highlight decorations like sculptures and paintings.
Barrel vault skylights are specific to non-residential buildings as they require almost 80% of the roof’s surface for installation. These skylights provide an economical and practical solution to brighten up lobbies, entrances, interiors, and passageways in buildings. Barrel vault skylights are also used as canopies to cover walkways between buildings.
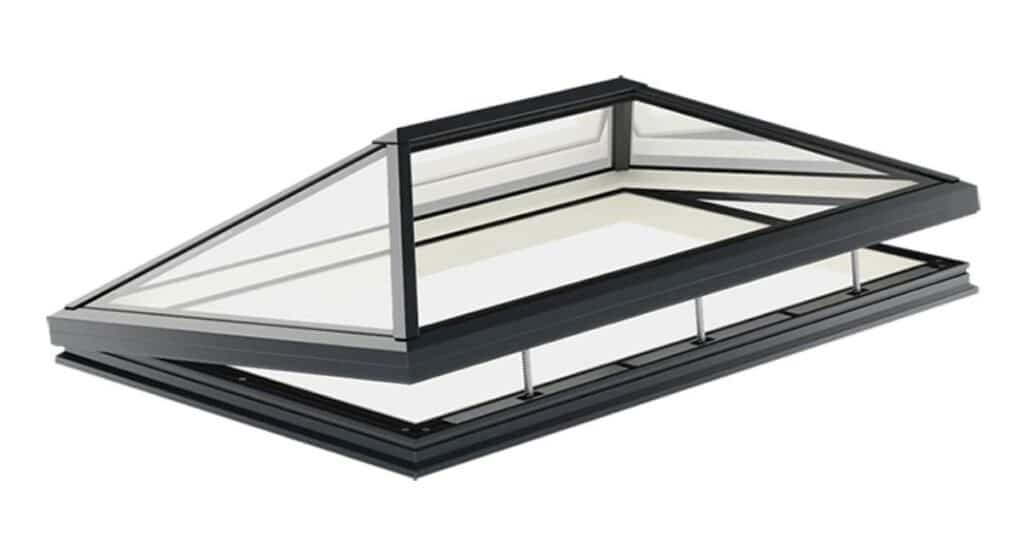
A pyramid skylight is a type of roof system that is designed to allow natural light to stream into an indoor space. It typically consists of a pyramid-shaped glass or polycarbonate structure that is placed on top of a roof.
Pyramid skylights are popular in commercial and residential buildings because they offer several benefits.
First, they make indoor spaces brighter and more inviting by allowing natural light to enter.
Second, they can help reduce energy costs by reducing the need for electric lighting during the daytime. Additionally, pyramid skylights can improve indoor air quality by allowing fresh air to enter and circulate.
Finally, they can enhance the aesthetics of a building and add value to the property. Overall, pyramid skylights are a practical and stylish way to bring more natural light and fresh air into a building while also improving its energy efficiency and value.
A hallway skylight is a great way to brighten up any dark or narrow hallways in your home. A skylight can bring in natural light and elevate the overall feel of the space. Not only does it provide a source of natural light, but it also adds an architectural feature to your hallway, creating a unique focal point for your guests.
A skylight can also save you money on electricity bills, as it can cut down on the need for artificial lighting during the day. Of course, the installation of a skylight requires proper planning, design, and execution.
It’s important to work with a professional to ensure that the skylight is installed correctly, as any mistakes could lead to leaks or other issues. With proper installation and maintenance, a hallway skylight can be a beautiful and functional addition to any home’s design.
A double skylight is a unique feature that consists of two skylights installed side by side on a roof. This is an excellent option for people who want to maximize the amount of natural light that enters their home or building.
Double skylights can be made from a variety of materials, including glass and acrylic, and are available in various shapes and sizes depending on the preferences and needs of the homeowner. They can also be installed in different locations, such as over a living room, kitchen, or bathroom, to create a bright and airy feel in those areas.
The advantages of having a double skylight are numerous, including reducing the need for artificial lighting, improving energy efficiency, and enhancing the aesthetics of a space. However, proper installation is necessary to ensure that the skylights are watertight and safe, and should always be carried out by a professional.
Everyone wants to have a home filled with natural light. It not only saves costs, but makes the interior look spacious, airy, and fresh. Not sure which skylight is the right one for you? No problem! Our team is here to help.
There are so many different options available, we’d love to learn more about what you’re envisioning for your home. Then, we’ll make the right recommendations for your home and budget. Give us a call today for your next skylight installation!
Do you have a room in your home that seems dull and gloomy? Why not install a skylight to add some cheery vibes to it? Skylights not only make a space bright and sunny but also make it appear spacious with fresh air ventilation. Here are some factors to consider if you are planning on adding a skylight to your roof.
Skylights are a good source of letting in natural light; however, on days when the sun is too bright, especially in summer, it can make your home excessively warm and uncomfortable. Not only this, but unfiltered sunlight can cause discoloration of upholstery, rugs, and curtains. Therefore, when installing skylights, get a UV filter or shade installed with them to lessen the impact of sun exposure.
Skylights come in different styles and shapes; however, if you want your home to be cool and bright, go for ventilated skylights, preferably with an automatic mechanism. When the weather gets too hot in summer, it’s nice to open the skylights to let in some fresh air. Not only does this lower the internal temperature of your home, but ventilation helps keep the interior fresh and moisture-free.
The shape of the skylight plays an important role in lighting up your room. For instance, if you want a skylight that spreads light all over the space, install a skylight with flares, like a pyramid or dome-shaped skylight. If you want to focus on a particular area of the room, get a skylight with straight sides so that the light can linearly enter the room.
Another thing you should consider when installing skylights is the type of roof your house has. If your home has a stick-framed roof built using individual rafters spaced 4 feet apart, there’s plenty of room to cut and fit a skylight between the rafters. However, if your house has a truss-framed roof, you cannot cut the trusses after installation, as it can weaken the roof’s structure. So, if you still want to get skylights, make sure they are less than 2 feet wide so they can fit in the space between the beams.
Skylight material is essential in keeping your home comfortable because the last thing you want is your home to become boiling hot. Therefore, when installing a skylight, ensure that it is made with tempered, double-insulated glass with a bronze tint and argon gas between the panes. This type of skylight reduces heat gain and can be installed on any side of the house.
Skylights are quite integral for illuminating your home and keeping it ventilated. However, there are certain factors you should consider before installing a brand new skylight so that it can benefit you and your home’s interior instead of causing issues. We hope these factors are helpful to keep in mind if you’re considering a new skylight. Our team at IBEX Roof is here to answer any of your questions. Just let us know what you need and we’ll make knowledgable recommendations to meet your needs.
If you’ve built a new roof for your house, we recommend inspecting it at least once a year. A bi-annual or annual inspection can help you spot potential issues and get them sorted before they become serious with a huge expense. As a homeowner, you can spot many underlying issues by just going around the house and checking out the roof from ground level or noticing other signs of damage from the inside.
So, how can you inspect your roof by staying on the ground, and what things can a roofer spot by getting up on the roof?
Here’s a list of things you can check for on your roof from the ground or inside:
If you see dark spots or circles on the ceiling or walls inside your home, your roof leaks, causing the water to seep into the walls.
If you notice small clusters of black, dark green, brown, grey, or white spots inside your home, it is a clear sign of mold growth. This is caused by excessive moisture inside the house, probably from the decking under the roof.
If you see your home’s ceiling sagging or light coming through the rafters, there’s either a hole in your roof or the moisture has caused the ceiling to sag. Both these issues are quite severe and call for immediate repairs.
At IBEX Roof, we have a very extensive list we use to evaluate your roof from the top down to inside and out. We never recommend climbing your roof to look for roof damage on your own. Here are the most common signs of damage a professional roofer might find on your roof:
Cracks and blisters in shingles are common and are caused by excessive water accumulation behind the roofing layers. They can also appear due to improper attic ventilation that causes the roof temperature to rise, resulting in cracks and blisters on the shingles.
Another thing to check for is loose nails. These are also caused by moisture and high temperature on the roof and are quite dangerous as loose nails can cause roof components to come undone.
Shingles are embedded with mineral granules that protect them from direct sun exposure and help retain their color. Heavy rainstorms can knock off the granules causing the shingles to wear off faster than usual. Therefore, checking the granule loss level when getting your roof inspected is important.
Flashing is the metal sheet placed under the shingles to prevent snow and water from entering the openings and cracks on the roof. Get your roof inspected for dented or missing flashing and get it repaired because it can lead to more serious issues like rotting wood and water infiltration.
If you’re investing a hefty amount in your home’s roofing, it should last its fullest service life. However, that’s only possible if you inspect your roof regularly, spot signs of underlying damage, and get it fixed right away. We hope our roof inspection checklist will come in handy to keep an eye out for anything funny on your roof. And if you suspect a problem, don’t hesitate to give us a call or reach out online.
