Emergency roof repairs can be necessary due to a variety of reasons, with weather-related damage being one of the most common causes. Severe storms, heavy rain, hail, and strong winds can all take a toll on a roof, leading to leaks, missing shingles, or even structural damage. Additionally, age and lack of maintenance can also contribute to the need for emergency repairs.
Over time, roofs can deteriorate, and if not properly maintained, they become more susceptible to damage. Other common causes include poor installation, improper ventilation, and damage from fallen trees or debris. Furthermore, extreme temperature fluctuations can cause materials to expand and contract, leading to cracks and leaks.
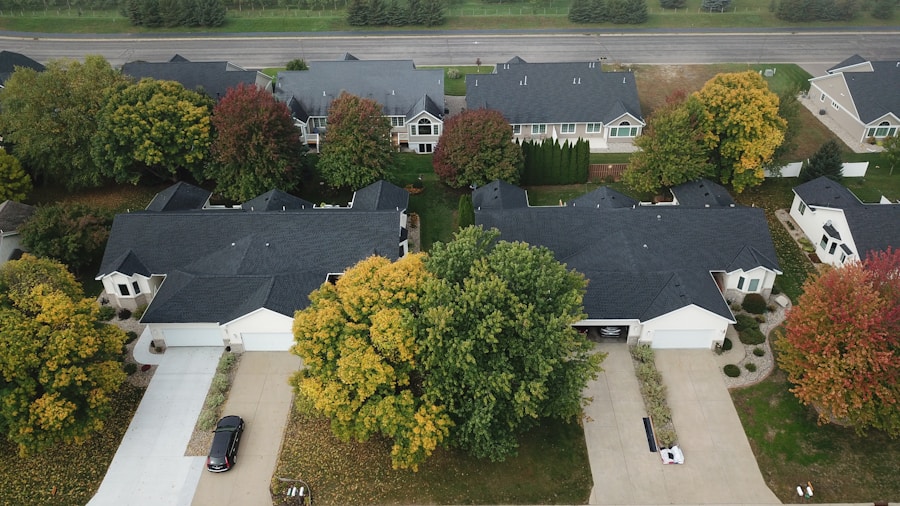
In Vancouver WA, where the weather can be unpredictable and often includes heavy rainfall, it's essential for homeowners to be aware of these common causes and to regularly inspect their roofs for any signs of damage.
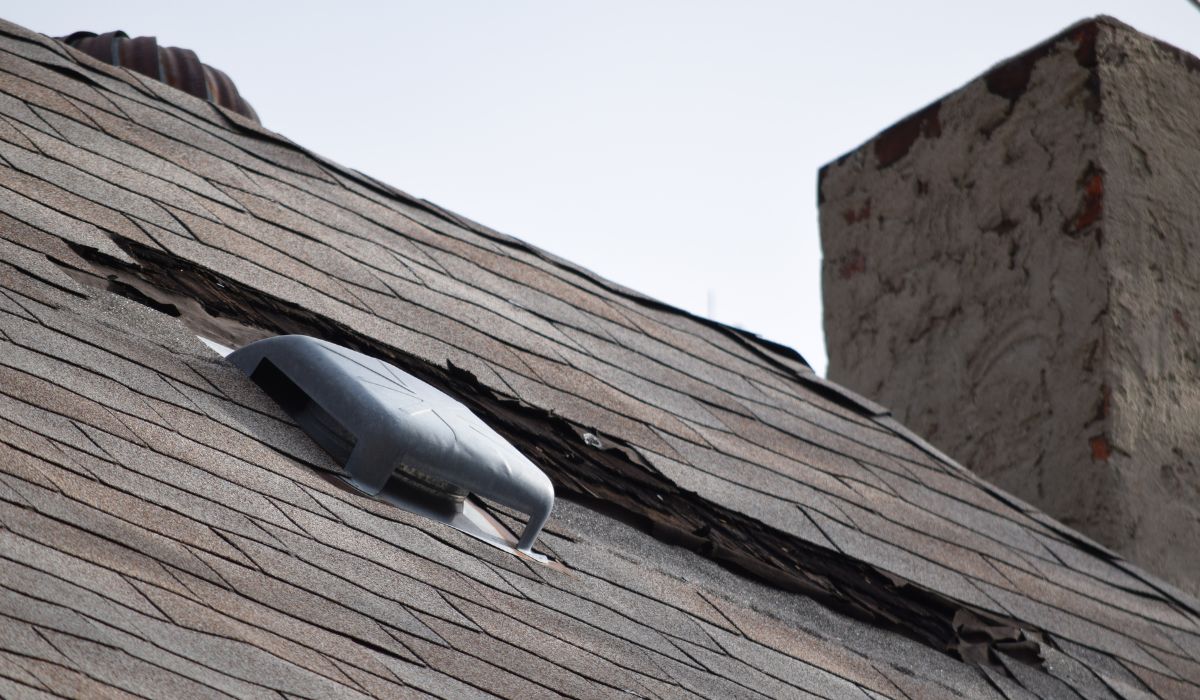
Water stains on the ceiling or walls, sagging areas on the roof, missing or damaged shingles, and visible signs of mold or mildew are all signs that emergency roof repairs are needed.
If there are granules from the shingles accumulating in the gutters or around the perimeter of the house, it could be a sign that the roof is deteriorating and in need of immediate attention.
If there are noticeable leaks during heavy rain or if the roof is visibly sagging in certain areas, it's important to seek emergency repairs to prevent further damage to the interior of the home. Being proactive and addressing these signs promptly can help prevent more extensive and costly repairs down the line. Regular inspections and maintenance can also help identify potential issues before they escalate into emergencies.
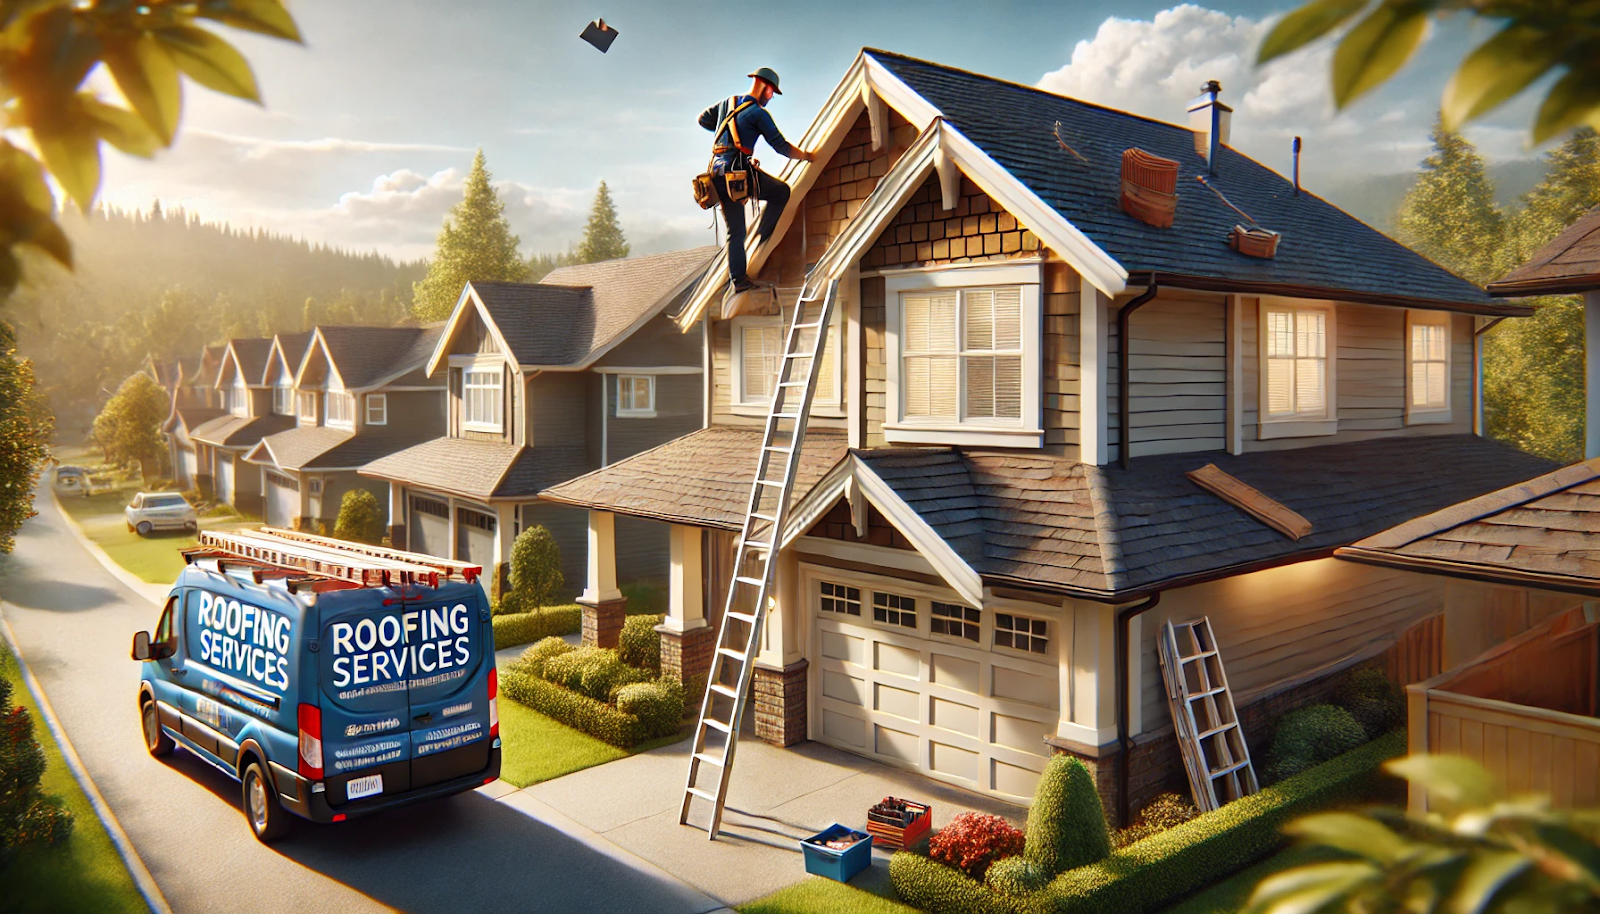
When faced with the need for emergency roof repairs in Vancouver WA, finding a reliable roofing contractor is essential. Homeowners should look for contractors with a solid reputation, proper licensing and insurance, and a track record of delivering high-quality work. It's also important to seek out contractors who specialize in emergency repairs and have experience dealing with the specific challenges posed by the local climate and weather conditions.
Word-of-mouth recommendations from friends, family, or neighbors can be valuable in finding a trustworthy contractor. Additionally, researching online reviews and checking with local business bureaus can provide insight into a contractor's reliability and professionalism. Once a few potential contractors have been identified, it's advisable to request quotes and compare their proposed solutions for the emergency repairs.
Ultimately, choosing a contractor who is responsive, transparent, and communicative can help ensure a smooth and satisfactory repair process.
| Emergency Roof Repair Process | Metrics |
| Response Time | Within 24 hours |
| Assessment Time | 1-2 hours |
| Repair Time | Depends on the extent of damage |
| Materials Used | Roofing shingles, sealant, plywood, etc. |
| Cost | Varies based on the repair needed |
The process of emergency roof repairs typically begins with an initial assessment by the roofing contractor to determine the extent of the damage and the best course of action. This assessment may involve a thorough inspection of the roof, including checking for leaks, identifying damaged areas, and assessing the overall condition of the roofing materials. Once the assessment is complete, the contractor will provide a detailed plan for the necessary repairs and discuss it with the homeowner.
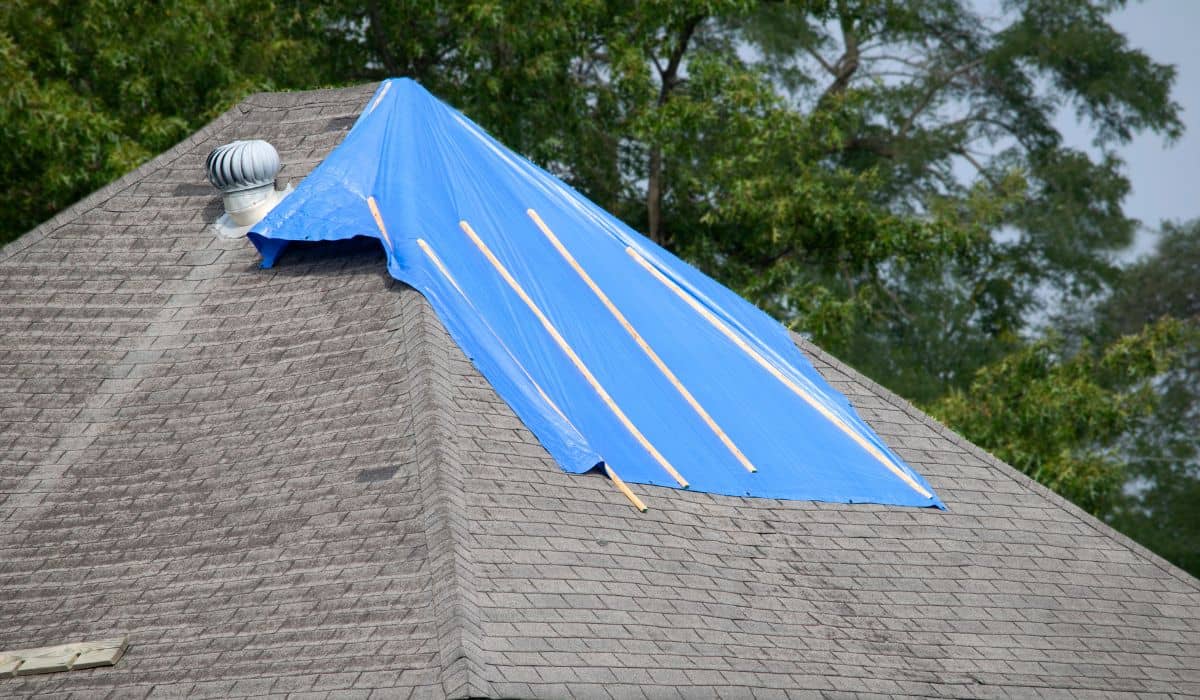
Depending on the nature of the damage, emergency repairs may involve patching leaks, replacing missing or damaged shingles, reinforcing weakened areas, or addressing structural issues. In some cases, temporary measures may be taken to prevent further damage while more extensive repairs are planned. Throughout the process, clear communication between the homeowner and the contractor is crucial to ensure that expectations are aligned and that any concerns are addressed promptly.
Emergency roof repairs can vary significantly in cost depending on the extent of the damage and the necessary repairs. Factors such as the size and slope of the roof, the type of materials used, and the complexity of the repairs all play a role in determining the overall cost. In Vancouver WA, homeowners should expect to receive detailed estimates from roofing contractors that outline the specific work to be done and the associated costs.
While emergency repairs may represent an unexpected expense, it's important for homeowners to prioritize addressing roof damage promptly to prevent further deterioration and more costly repairs in the future. Some roofing contractors may offer financing options or work with insurance companies to help homeowners manage the financial impact of emergency repairs. Exploring these options can provide homeowners with greater flexibility in addressing urgent roofing needs without undue financial strain.
When preparing for emergency roof repairs in Vancouver WA, homeowners should anticipate some disruption to their daily routines as the repairs are carried out. Depending on the nature of the damage and the required repairs, it may be necessary to temporarily vacate certain areas of the home or make accommodations for noise and construction activities. Clear communication with the roofing contractor about scheduling and logistics can help minimize inconvenience during this time.
Homeowners should take steps to protect their belongings and ensure that any valuable items stored in attics or upper floors are safeguarded from potential damage during the repair process.
Being proactive in preparing for these temporary disruptions can help ensure a smoother experience during emergency roof repairs. By taking the necessary precautions, homeowners can minimize the impact of the repairs on their daily lives and get back to normal as quickly as possible.
After undergoing emergency roof repairs in Vancouver WA, homeowners can take proactive steps to prevent future emergencies. Regular inspections and maintenance are key to identifying potential issues early on and addressing them before they escalate into emergencies. Keeping gutters clean and free of debris, trimming overhanging tree branches, and ensuring proper ventilation in the attic are all important preventive measures.
Furthermore, investing in high-quality materials and working with an experienced roofing company like IBEX Roof can significantly improve the longevity and performance of your roof. Our team is committed to helping homeowners in Vancouver WA handle emergency repairs efficiently while also focusing on long-term solutions that prevent future issues.
By staying proactive with regular maintenance and knowing what to watch for, you can reduce the risk of costly surprises down the road. Understanding the signs of damage, preparing for repairs, and choosing the right professionals are all key to protecting your home. At IBEX Roof, we’re here to guide you through every step and ensure your roof stands strong for years to come.
You hear it a steady drip in the middle of the night. You check the ceiling and find a dark stain spreading across your living room. Now you're wondering: does home insurance cover roof leaks, or is this coming straight out of your pocket?
Roof leaks aren’t just frustrating they can lead to expensive repairs and deeper structural issues if left unaddressed. Whether it’s a small patch of water damage or a bigger issue after a storm, knowing what your homeowners insurance policy actually covers can save you time, money, and stress. If you're searching for answers or even looking for Emergency Roof Repair in Vancouver WA this post will walk you through when you're protected, what’s not covered, and how to act fast.
Roof leaks don’t wait until it’s convenient. They can start small, then lead to water stains, damaged drywall, or even mold if ignored. That’s not just a mess, it’s a real cost to your home and your budget.
In fact, roof leak-related issues are among the more common reasons homeowners file a claim, according to recent data. Understanding how your homeowners insurance policy treats roof damage can help you avoid surprise expenses. This post will walk you through what your policy may cover, what’s excluded, and how to move forward if you’re facing damage to your home from a roof leak.
Most home insurance companies look at how and why the leak happened. If the roof damage was caused by something sudden, like a storm or fallen tree, your homeowners policy will likely help pay for repairs. These are called “covered perils.”
But if the source of the leak is gradual damage like a small hole that worsened over time it’s usually not covered. Insurance providers often expect homeowners to stay on top of routine maintenance.
Your policy type also matters. A named-peril policy only protects you from specific events listed in the contract. An open-peril policy covers all risks except those it clearly excludes. So, the kind of coverage you have plays a big part in whether your claim may be approved.
If the damage to your roof came from a sudden, unexpected event, your standard homeowners insurance policy will typically cover it. This means you might not have to pay out of pocket for repairs if your home was damaged by:
Let’s say your neighbor’s tree crashes onto your roof during a storm. That’s a situation where your insurance company would typically cover a roof replacement or repair.
Some roof leaks just aren’t covered under a standard homeowners insurance policy. These are the situations where insurance providers expect homeowners to prevent damage through care and maintenance.
For example, your homeowners insurance won’t usually pay for repairs if:
Picture this: a homeowner notices a slow drip in their ceiling but puts off calling anyone. Months later, the ceiling caves in. Since the damage built up over time, the insurance agent might deny the claim even if the problem got worse suddenly.
Being proactive and keeping up with regular inspections can make all the difference when the time comes to file a claim.
Whether your insurance will cover a full roof replacement depends on what your policy says and how the damage occurred. If your roof is covered under a replacement cost value (RCV) policy, your insurance may pay what it takes to restore the roof to its original state, without subtracting for age or wear. But if your policy uses actual cash value (ACV), it only pays what your roof was worth before the damage, which often means you’ll need to cover the rest.
Roof age matters a lot. A newer roof might be fully covered under many home insurance policies, but if yours is 15 to 20 years old, your payout could be reduced or denied entirely. Some policies also require specific endorsements for full roof replacement coverage, especially if you live in areas prone to storms or heavy rain.
Let’s say a homeowner with a 5-year-old roof experiences major storm damage. Their RCV policy may cover the full replacement cost. But another homeowner with a 22-year-old roof and ACV coverage might only get a fraction of what it costs to repair or replace it.
Filing a claim for a leaky roof isn’t always the best move. If you’re dealing with minor damage like a couple of shingles missing it might cost less to fix it out of pocket than to involve your insurance. Keep in mind that filing a claim may raise your premium, especially if you’ve made other claims recently.
But if your roof springs a major leak during a storm and causes damage to the structure of your home, the cost could run into the thousands. That’s when homeowners insurance may be worth tapping into.
For example, if a leak leads to $2,000 in repairs and your deductible is $1,500, you might think twice before making a claim. On the other hand, if you’re facing $12,000 in damage from a roof leak caused by wind or hail, filing a homeowners insurance claim could make much more sense financially.
When your roof is leaking, acting quickly can help prevent further damage and improve your chances of getting the coverage you need. Here’s how to file an insurance claim the right way:
If the damage from a roof leak is the result of a covered roof event like a storm your home insurance policy may cover the cost. Just remember that insurance policies cover only certain types of roof leaks, and maintenance on your roof plays a big role in whether your insurance company will approve the claim.
Staying organized and acting fast when your roof is leaking can help make the insurance process smoother and help protect your home from more costly repairs down the road.
Not every leaking roof needs to involve your insurance company. Before you make that call, it helps to figure out how serious the problem is and what caused it.
If the leak is small, coming from clogged gutters or a missing shingle, a local roofer can often fix it quickly without triggering a claim. But if your roof springs a leak after a storm and you see water damage spreading through your ceiling or walls, it’s worth checking whether your home insurance policy covers the damage.
Think about the source of the leak and your policy’s coverage. Some leaks are covered by insurance, especially if they’re the result of a sudden storm or falling debris. Others like those due to old flashing or cracked roof shingles usually aren’t. And filing a claim for a roof leak that isn’t covered could still impact your insurance claims history.
If you’re not sure what caused your roof to leak, have a roofer inspect your roof first. They’ll help you find the roof leak and determine whether it’s the kind of damage your homeowners insurance typically pays for. That step could save you from filing a claim that your insurance company may not pay.
Staying ahead of roof maintenance can prevent roof leaks before they start. These simple steps help keep your roof in good shape and reduce the risk of water damage to your home:
A little upkeep now can mean avoiding the need for a claim later and making sure your insurance cover for your roof is there when you really need it.
If you're not sure whether to call your insurance or a roofer first, IBEX Roof can help. We’ll inspect your roof, help you understand the source of the leak, and walk you through what your home insurance policy may or may not cover.
Whether your roof needs a small repair or it’s time to consider a new roof, we’ll make sure you get clear answers. And if the damage from a leaking roof is the result of something your policy covers, we’ll guide you in how to file a claim for a roof leak confidently. Let us help you protect your home, without the guesswork.
When your asphalt roof begins to show signs of wear and tear—missing shingles, leaks, or aging materials—getting a free estimate for repairs is the first step toward protecting your home and budget. This process not only helps you identify the scope of the repair work needed but also allows you to compare contractors, ensuring you make the most informed choice. By taking advantage of free estimates, you can avoid unnecessary expenses, secure quality service, and prevent costly mistakes down the line.
But how do you go about it? From finding the right contractors to preparing for their visit, there’s a method to the madness. In this post, we’ll walk you through a step-by-step process to simplify the journey and ensure you’re set up for success. Whether you’re a first-time homeowner or a seasoned property manager, these steps will help you navigate the complexities of roof repair with confidence.
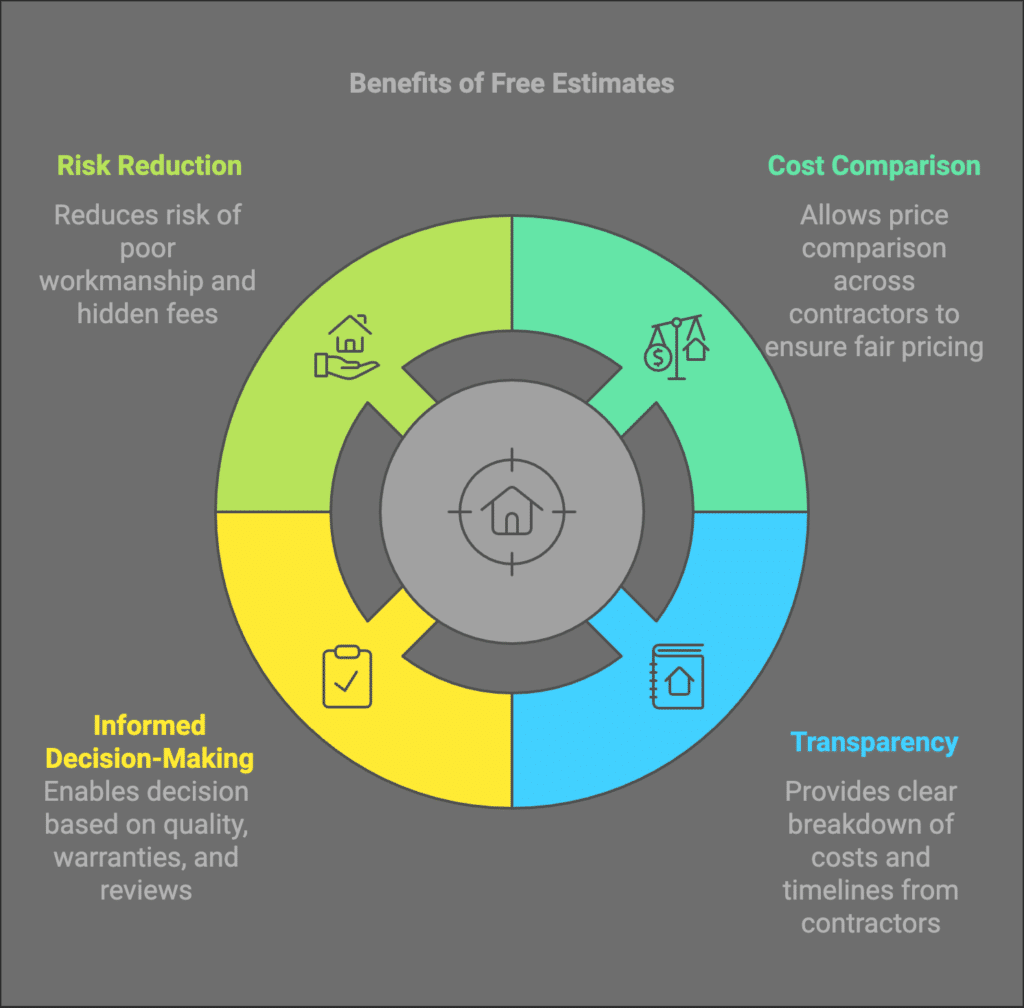
Getting a free estimate for asphalt roof repair offers more than just cost savings—it’s a vital part of making an informed decision. Here’s why:
Ultimately, free estimates are about more than numbers—they empower you to choose a contractor who aligns with your budget and quality expectations. Taking the time to go through this process ensures peace of mind and a durable roof repair solution tailored to your needs.
Finding the right contractor is the cornerstone of a successful roofing repair experience. Begin by researching local contractors with a strong reputation. Check online reviews on platforms like Angie’s List, Google, and Yelp for insights into their reliability and customer satisfaction. Don’t overlook recommendations from friends, family, or neighbors who’ve had similar roofing work done.
Local contractors have an advantage—they understand the regional climate and roofing challenges better than out-of-town companies. By choosing a contractor with a good reputation in your community, you can trust their expertise and commitment to maintaining their local standing.
For a comprehensive understanding of the market, reach out to at least three different roofing contractors. This ensures you get a variety of perspectives on pricing, materials, and repair approaches. It also allows you to compare their customer service and responsiveness. Companies like Authentic Restoration, known for specializing in asphalt roofing, often offer free estimates and inspections tailored to your specific needs. This variety will help you make a well-informed decision.
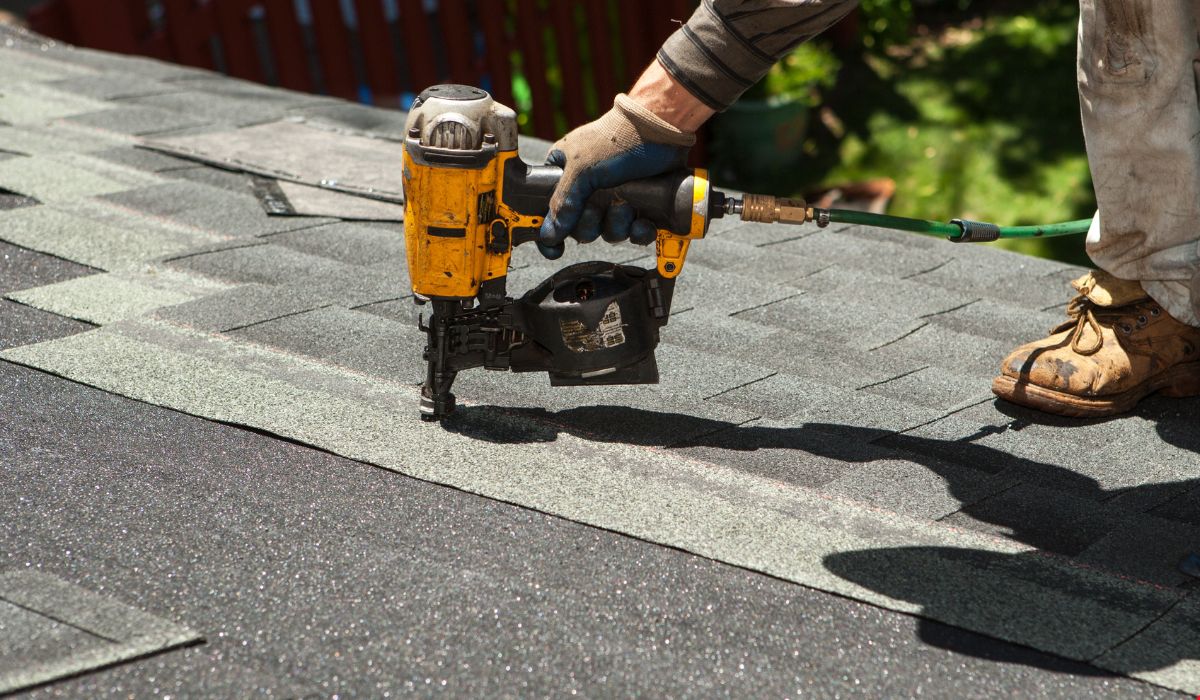
Preparation is key to maximizing the accuracy and value of your roofing estimate. Start by documenting existing roof issues. Take clear photos of visible damage, such as missing shingles, leaks, or sagging areas, and note any recurring problems, like water stains on ceilings.
Next, prepare a list of questions to ask contractors during their visit. These questions might include:
Being prepared demonstrates your seriousness and ensures you don’t overlook critical details.
Once you’ve contacted contractors, schedule inspections at a time that’s convenient for you. During the inspection, contractors will assess your roof’s condition, identify problem areas, and discuss potential repair options. This is also an opportunity for you to gauge their professionalism and communication skills. A good contractor will explain their findings in detail and answer your questions thoroughly.
Ask each contractor to provide a detailed written estimate. The estimate should include:
A detailed estimate ensures there are no surprises down the line and provides a basis for comparison.
Once you have multiple estimates, compare them beyond just the price. Look at the quality of materials, the scope of the proposed work, and the timeline. Pay attention to any unclear terms or hidden fees that might affect the final cost. This comprehensive evaluation will help you choose a contractor who offers the best value, not just the lowest price.
Before committing to a contractor, verify their credentials. Check their licensing and insurance to ensure they are qualified and capable of handling your project. Licensed contractors are held to industry standards, while insurance protects you from liability in case of accidents during the repair process. Skipping this step can lead to costly risks.
After comparing estimates and verifying credentials, it’s time to choose the contractor that best fits your needs. Consider factors like price, service quality, timeline, and warranty terms. A contractor who communicates well and demonstrates professionalism is likely to deliver a better overall experience.
Once you’ve selected a contractor, review the agreement carefully. Ensure that all details, including cost, scope of work, and timeline, align with what was discussed during the estimate process. Don’t hesitate to ask for clarification on any terms you don’t fully understand. Only sign the contract when you are confident that it covers all your expectations.
By following these steps, you’ll not only secure a free estimate but also ensure that you’ve chosen a contractor who can deliver quality repairs for your asphalt roof.
Online estimators are an excellent starting point for homeowners who want a quick, preliminary idea of what their asphalt roof repair might cost. These tools use basic inputs—such as your roof’s size, material type, and the extent of visible damage—to generate an estimated range. Websites like NovaShield and Innovative Roofing offer user-friendly calculators tailored to roofing projects.
To use these tools effectively:
While helpful for ballpark figures, online estimators should not replace professional inspections. Instead, use them to guide your expectations before reaching out to contractors.
If your asphalt roof damage results from a covered peril, such as storm damage or falling debris, your homeowner’s insurance might help cover the repair costs. Working with your insurance provider effectively involves these steps:
Navigating insurance claims can feel daunting, but it’s worth the effort if it offsets your repair costs significantly. Always maintain open communication with both your contractor and insurance provider to ensure smooth coordination.
Securing a free estimate for asphalt roof repair doesn’t have to be overwhelming. By following a structured approach—researching local contractors, contacting multiple professionals, preparing for inspections, and comparing estimates—you can make an informed decision that protects your home and your wallet.
Remember, a free estimate is about more than just saving money. It’s an opportunity to understand your roof’s condition, vet reputable contractors, and ensure the repairs meet your expectations. By leveraging tools like online estimators and consulting with your insurance provider when applicable, you can further streamline the process.
Don’t wait for roofing issues to escalate. Start your journey toward a well-maintained asphalt roof today. Reach out to local contractors, request your free estimate, and take the first step toward safeguarding your home with confidence.
Most reputable roofing contractors provide free estimates without any obligation or hidden fees. However, always confirm this when contacting a contractor to avoid surprises. A trustworthy company will clearly outline their policy upfront.
The timeline varies depending on the contractor and the complexity of the inspection. On average, a contractor can inspect your roof and provide a detailed estimate within 1-3 business days after the inspection.
Some key questions to ask include:
Are you licensed and insured?
What warranties do you offer on materials and labor?
How long will the repair process take?
Can you provide references or reviews from past clients?
Online estimators are a great starting point for understanding approximate costs, but they cannot replace a professional inspection. Contractors assess factors like structural integrity, specific damage, and local material costs that online tools cannot capture accurately.
Yes! Most contractors are happy to work with homeowners who plan to file an insurance claim. Be sure to inform your contractor about your insurance coverage upfront, as they can help document the damage and provide the necessary information for your claim.
Garages often go unnoticed until there’s a problem, especially when it comes to the roof. Ignoring issues with your garage roof can result in costly repairs or even require a full roof replacement. In this blog post, we will explore everything you need to know about garage roof repair and garage roof replacement costs, empowering you to make informed decisions for the longevity and safety of your garage.
The first and most obvious sign of garage repair roof issues is a roof leak. Water stains on the ceiling, walls, or rafters can indicate that there is a leak somewhere in your garage roof. Look out for:
Your garage roof endures the same harsh weather conditions as your home’s roof. Regularly inspecting for signs of wear and tear can save you a lot of hassle and money in the long run. Warning signs include:
Regular inspections can help you identify issues before they become major problems. Here's a step-by-step guide:
The cost of garage roof repair varies widely depending on the extent of the damage and the type of materials needed. Here's a general breakdown:
| Type of Repair | Average Cost (2024) |
| Shingle Replacement | $200 - $700 |
| Fixing Leaks | $300 - $800 |
| Structural Repairs | $500 - $1,500 |
Several factors can affect garage roof replacement costs, including:
Sometimes, repairing your garage roof isn’t enough, and a full replacement is required. Here’s a simple comparison:
| Repair vs Replacement | Average Cost (2024) |
| Basic Repairs | $300 - $1,500 |
| Full Replacement | $2,000 - $10,000 |
When considering a garage roof replacement, it's essential to choose the right roofing material. A professional roofing contractor can conduct roof inspections to identify signs of damage like damaged shingles or moisture buildup, which can lead to mold growth if not addressed.
When considering new shingles for your garage repair roof, there are different types to choose from:
Durability is a key factor when choosing roofing materials. Here's a comparison of their lifespans:
| Material | Average Lifespan (Years) |
| Asphalt Shingles | 15-30 |
| Wood Shingles | 30-50 |
| Metal Roofing | 40-70 |
If you are on a budget, here are some cost-effective materials for your garage roof replacement:
Recognizing when to replace rather than repair can save you from recurring expenses. Signs include:
Knowing the average lifespan of your roofing material can help in planning for replacement:
Expect some disruption during the process. Here’s what typically happens:
Hiring the right contractor ensures a quality job and peace of mind. Tips include:
Ask important questions to make an educated choice:
Make sure to understand the warranties provided:
Considering a diy project for your garage roof? While it may seem tempting to save on roof cost, it's crucial to assess the extent of damage and any structural issues. If you're not experienced, hiring a professional roofing contractor offers several benefits.
Properly caring for your garage roof is essential to maintain its curb appeal and ensure the roof’s integrity. If you notice signs of roof damage, take action to prevent further damage. For extensive repairs, consider contacting a local roofing company with garage roof repair services.
When deciding on whether to replace or repair, evaluate the materials used and the repair needs. A well-repaired flat garage roof not only enhances the look but also keeps your garage safe. Be sure to follow roof repair tips to ensure your garage roof is repaired effectively.
Maintaining your garage roof can extend its lifespan. Tips include:
Only attempt minor repairs if:
Avoid these mistakes when doing DIY repairs:
By keeping these tips and information in mind, you are better prepared to tackle garage repair roof issues and manage garage roof replacement costs effectively. Always consider whether professional help might be the wiser option, especially for extensive damage or complicated installations.
At IBEX Roof, we offer both the expertise and experience to handle all your roofing needs, ensuring quality and satisfaction every time.
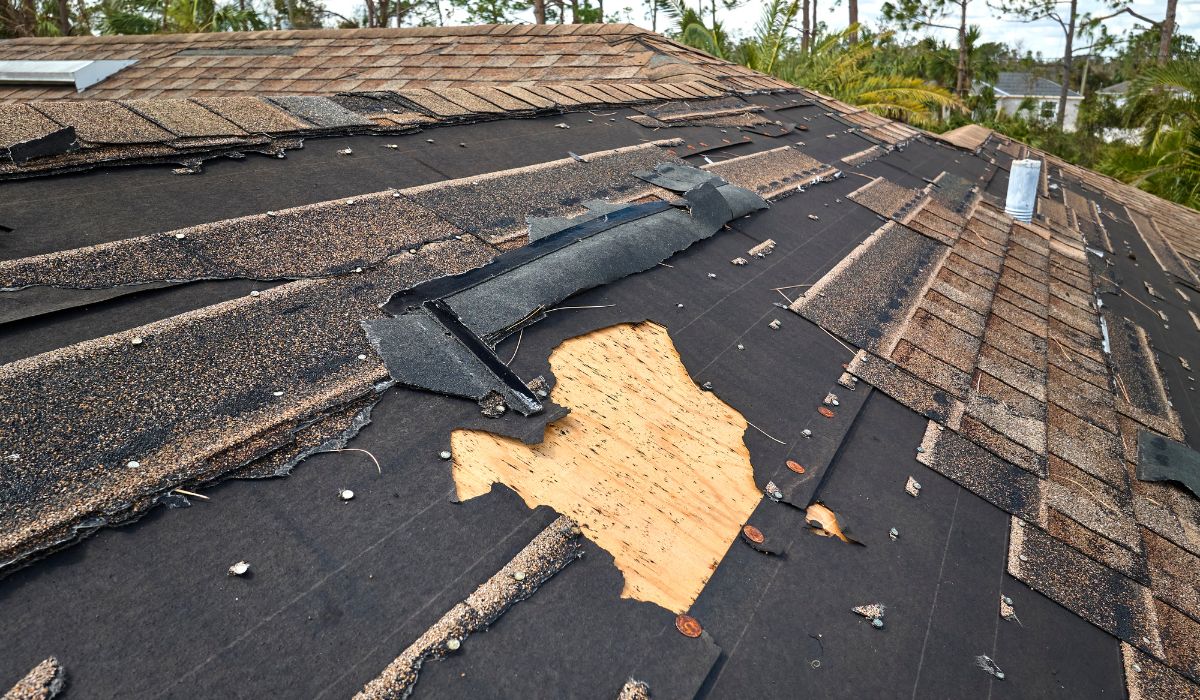
When a storm hits, your roof is the first line of defense for your home against hail damage and wind damage. While roofs are built to withstand a lot, they can still sustain damage from severe weather events. Identifying and addressing storm damage on your roof promptly, including wind damage and hail damage, is crucial to prevent further issues like leaks, mold, and structural damage. In this blog post, we'll discuss the 5 signs of storm damage on your roof that every homeowner should know.
Before we dive into the specific signs of storm damage, let's first understand how different types of severe weather can impact your roof. From heavy rain and wind to hail and snow, storms can wreak havoc on your roof's integrity. Regular roof inspections, especially after a storm, are essential to catch any damage early on and prevent more extensive issues down the line.
One of the most common signs of storm damage is missing or damaged shingles. When shingles are compromised or missing, they can expose your roof to water infiltration, leading to leaks, damage to your roof, and further damage. Look out for curled, cracked, or lifted shingles, as these are indicators of bad roof condition and potential signs of hail damage.
If you notice leaks or water stains on your ceilings, it could be a sign of a roof leak, indicating damage to your roof. Addressing leaks promptly is crucial to prevent water damage to your home's insulation, attic, and structure. Keep an eye out for signs of roof leaks, especially after a storm, to catch them early.
Asphalt shingles losing granules can be a visible sign of roof damage, often indicative of hail damage. Check your gutters and downspouts for granule buildup, as this can indicate granule loss from your shingles. Granule loss, often a sign of hail damage, can weaken your roof's protection against the elements, so it's essential to address this issue promptly.
If you have a metal roof, dents or dings can be a common outcome of hail storms. Inspect your metal roof for any visible damage after a storm, as dents can compromise its integrity. Look out for signs of shingle damage, as they can impact the overall performance of your roofing system.
Storm damage can also lead to structural issues like roof sagging. Inspect your roof for any sagging or uneven areas, especially along the roof edge. If you notice any signs of roofing damage, it's crucial to address them promptly to prevent further structural issues.
Delaying repairs for storm damage, including hail damage and wind damage, can worsen the situation and lead to more costly repairs down the road. When you notice any signs of storm damage on your roof, it's essential to find a reputable roofing contractor to assess and repair the damage promptly. Proactive maintenance and timely repairs, including addressing wind damage and missing shingles, can help protect your home and prevent further damage.
In conclusion, being aware of the signs of storm damage on your roof is crucial for every homeowner. By staying vigilant and addressing any signs of damage, including missing shingles and hail damage, promptly, you can protect your home and ensure the longevity of your roof. Remember to conduct regular roof inspections, especially after severe weather events, to catch any issues early on. Your roof, a vital part of your home's structure, so don't overlook the signs of storm damage, including missing shingles and signs of hail damage. Stay proactive and keep your roof in top condition, considering a new roof or roof replacement if necessary, to safeguard your home for years to come.
Introduction:
A sound and well-maintained roof is essential for the overall integrity and protection of your home. However, when it comes to deciding between roof repair and replacement, it can be a daunting task. The goal of this blog post is to provide you with comprehensive information and insights so that you can make an informed decision that aligns with your budgetary needs.
We will delve into various factors to consider, advantages and disadvantages, and cost comparisons to help you determine if your roof needs repair or it needs to be replaced, ensuring the best action for your budget.
Before determining whether to repair or replace your roof, it is crucial to assess its current condition. Here are some key factors to consider:
Inspect your roof for any visible signs of wear and tear. Look for the following signs that your roof needs repair or replacement.
Consider the age of your roof as it plays a significant role in the decision-making process. Different roofing materials have varying lifespans. Here's a general guideline:
The age of your roof will help you determine whether it is reaching the end of its lifespan and if repair or replacement is the most viable option.
If your roof has minor damage or is still relatively new, repairing it might be the more cost-effective choice. Here's what you should know about roof repairs:
Roof repair projects can include the following:
The cost of roof repairs will depend on the extent of the damage and the required materials. Here's a rough estimate:
| Repair Type | Cost (Average) |
| Patching Damaged Shingles | $150 - $400 |
| Fixing Leaks and Repairing Flashing | $200 - $600 |
| Addressing Deterioration/Rot | $300 - $800 |
It's important to note that these are rough estimates, and costs can vary depending on your location and the specific repairs needed. Additionally, consider whether your homeowner's insurance may cover any of these repair costs.
Before opting for roof repair or replacement, it's essential to weigh the advantages and disadvantages:
Pros:
Cons:
Repairing your roof can be a suitable option if the damage is limited and your roof's overall condition is still relatively good.
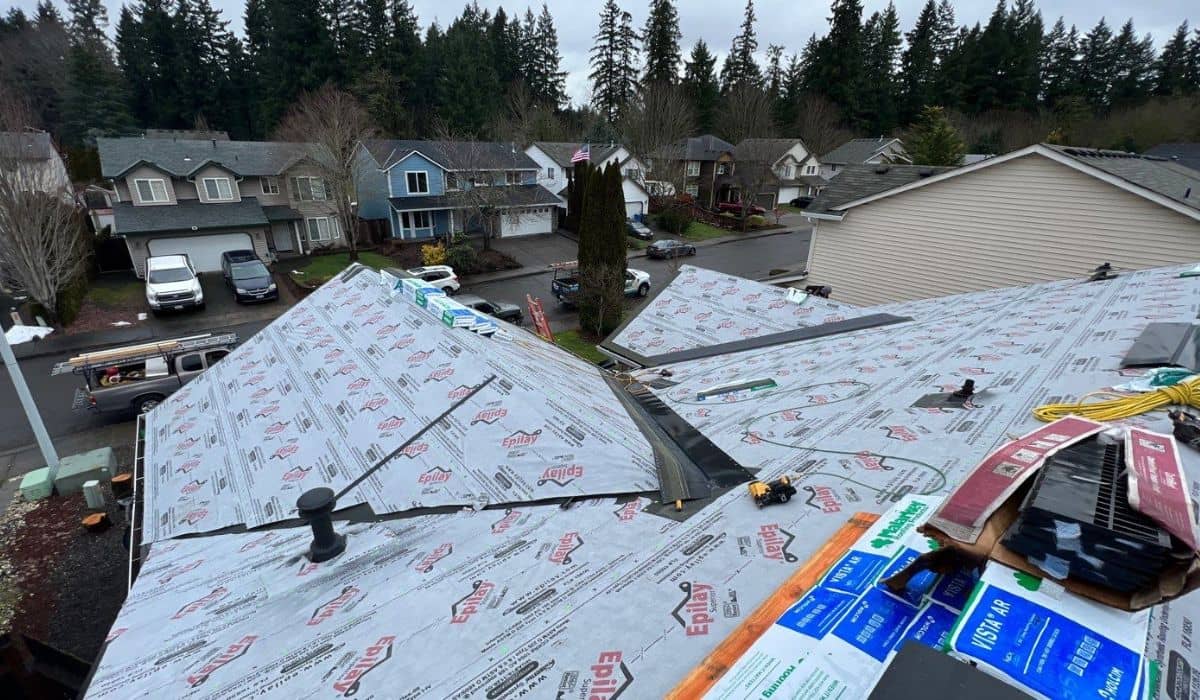
When repairs are no longer effective or your roof is approaching the end of its lifespan, a roof replacement is often the best long-term solution. Here's what you should know:
Consider various roofing materials based on your budget, climate, and aesthetic preferences. The most common options include:
Researching the benefits and costs of each material will help you choose the most suitable one for your needs.
The cost of a roof replacement will depend on various factors, including the size of your roof, chosen material, and local labor costs. Here's a rough estimate:
| Roofing Material | Cost per Square (100 sq ft) | Average Total Cost (2,000 sq ft roof) |
| Asphalt Shingles | $80 - $100 | $8,000 - $15,000 |
| Metal Roofing | $200 - $900 | $20,000 - $45,000* |
| Tile or Slate Roofing | $600 - $1,200 | $60,000 - $120,000* |
| Wood Shakes/Shingles | $700 - $1,200 | $70,000 - $120,000* |
The cost range for metal, tile, and wood roofing reflects the higher-end materials and includes the complexity of the installation.
It's important to consider the long-term benefits and return on investment (ROI) when comparing the costs of roof repair versus replacement.
Understanding the advantages and disadvantages of a roof replacement can help you make an informed decision:
Pros:
Cons:
A full roof replacement can provide long-term peace of mind, improved home value, and reduced maintenance needs.
Determining whether to repair or replace your roof requires careful consideration. Here are some steps to help you make an informed decision:
Seek the advice of a professional roofing contractor to assess the condition of your roof thoroughly. Consider their expertise, experience, and credentials when choosing a reliable contractor.
Take your budget into account when deciding between repair and replacement. Evaluate the short-term affordability against the long-term benefits and potential savings in maintenance costs.
Explore financing options, such as home improvement loans or government incentives for energy-efficient roof replacements. These can alleviate the financial burden associated with a full roof replacement.
Consider the projected maintenance needs of your roof. While repairing might offer a short-term solution, a replacement may reduce the frequency of future repairs and provide greater peace of mind.
Additionally, think about your future plans. If you plan to sell your home in the near future, a new roof can increase both curb appeal and resale value.
Deciding between roof repair and replacement is a significant investment that requires careful consideration. By assessing the condition of your roof, obtaining professional advice, analyzing costs, and weighing the pros and cons, you can make an informed decision that suits both your budget and long-term needs.
Remember, every roof is unique, and what works for one homeowner may not be the best solution for another. Take the time to evaluate your specific circumstances before deciding whether to repair or replace a roof, consult with roofing companies, and prioritize the long-term health and value of your home.
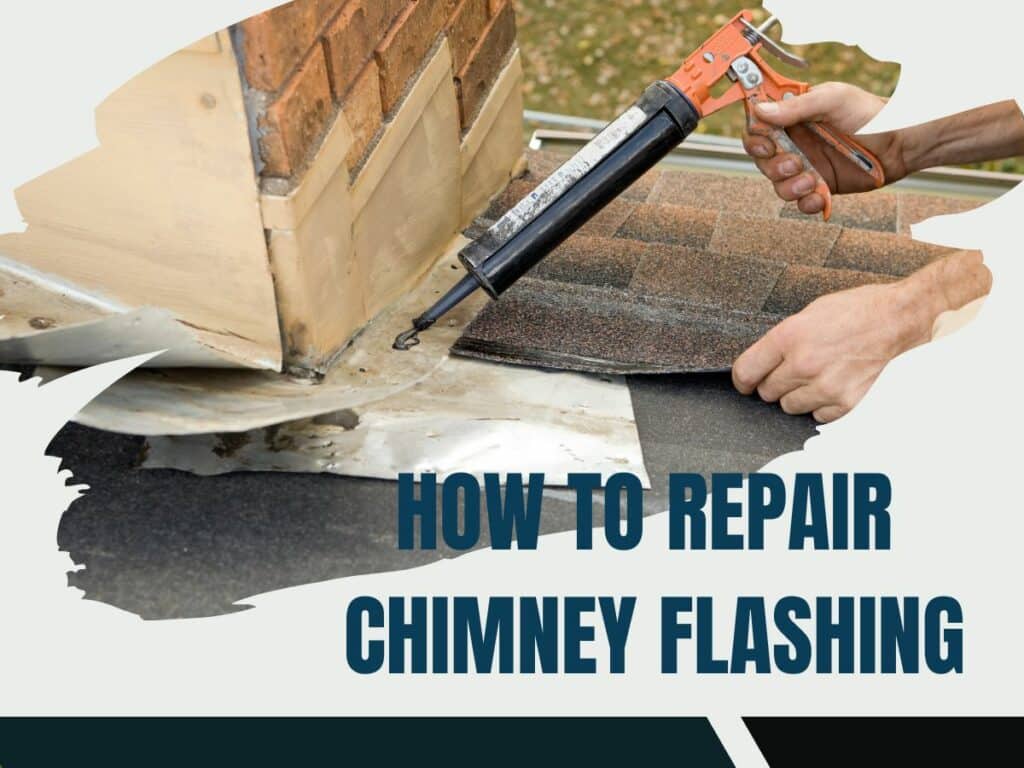
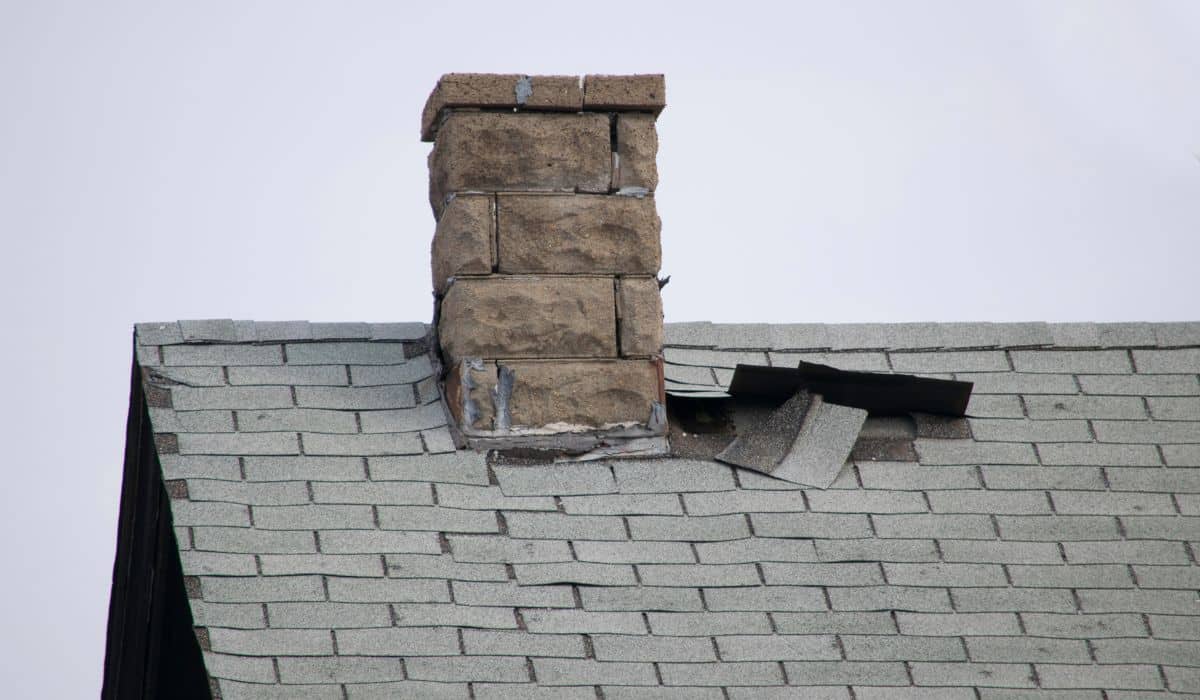
Chimney flashing, a crucial component of roof architecture, plays a vital role in maintaining the health and safety of every home. It prevents water leakage around the base of your chimney, averting potential water damage.
A well-maintained chimney flashing can significantly reduce costs, headaches, and dangers down the line. In this blog post, we're going to dive deep into the world of chimney flashing repair and unpack everything you need to know about it.
Chimney Flashing is a layer of waterproof material—often made of sheet metal—that's installed where the chimney meets your roof slope. Its function is to direct water away from the chimney. There are two main types of flashing: base flashing and cap flashing, both of which are sometimes referred to as step flashing. Understanding roofing terms like these can be invaluable when assessing your roof and chimney's needs.
A leaking chimney flashing might be the culprit if you are noticing water around your chimney area. Flashing problems often stem from regular wear and tear. For example, old flashing might corrode over time, or installed flashing might not be watertight due to poor installation, thereby causing a leaky chimney. It's essential for homeowners to recognize the signs of faulty flashing and address them promptly.
To repair chimney flashing, you will need the following tools and materials:
Every chimney and home may have unique requirements, so be flexible and reactive to the demands of your repair process.
If the flashing is bent, damaged beyond repair, or complex in design, it may be time to call in flashing repair services. A roofing professional can provide proper flashing techniques, install a roof if necessary, and ensure the flashing is installed neatly.
Regular maintenance can help prevent leaky chimneys and water damage. Inspecting your chimney system a couple of times a year wouldn’t hurt. Look out for signs of wear on the flashing and the mortar joints. If problems arise, a timely repair or replacement of a damaged chimney flashing can save much does it cost later on.
Maintaining your chimney flashing is proactive homeownership. With vigilant monitoring, the right tools, and, if necessary, professional help, you can keep your home healthy and leak-free. So, whether you are looking to install flashing around the chimney, repair your chimney flashing, or merely understand how your home functions, consider your chimney flashing.
Roofs are one of the most crucial components of any structure, protecting us from the elements. However, over time, roofs may develop leaks that require prompt repair to prevent further damage and costly repairs.
In this comprehensive guide, we will delve into the factors that influence roof leak repair costs and provide an estimated breakdown of expenses. By understanding these cost factors, homeowners can make informed decisions about addressing roof leaks and potentially save on repair costs.
Before exploring the cost factors, let's briefly understand the common causes of roof leaks. Some of the most common causes include:
It's crucial to accurately identify the source of the leak to ensure effective repairs. Water stains on ceilings, dampness in the attic, or visible water intrusion are signs that your roof may have a leak.
Various factors affect the cost of roof leak repairs. Here are some key elements to consider:
The type of roof you have plays a significant role in repair costs. Different roofing materials require unique repair techniques and materials. Let's explore a few common roof types:
| Roof Type | Description |
| Shingle Roof | The most common roofing material, cost-effective and versatile. |
| Tile Roof | Environmentally friendly and durable but can be more expensive to repair. |
| Metal Roof | Long-lasting and resistant to fire and extreme weather, costly to repair. |
| Flat Roof | Commonly found in commercial buildings, requires specialized repair methods. |
Ensure you hire a professional experienced in repairing your specific roof type to avoid further damage or improper repairs.
The severity and location of the leak can significantly impact repair costs. Some leaks may be minor and easily accessible, while others may be more extensive and harder to reach. For example:
The size of your roof influences repair costs. Larger roofs require more labor, materials, and time for repairs. Contractors may charge based on the square footage of the roof, so be aware of this when estimating repair expenses.
The accessibility of the damaged area also affects repair costs. Factors such as roof pitch, height, or obstacles like trees or power lines can increase labor and equipment requirements, potentially driving up costs.
In some cases, roof leaks can cause additional damage that needs repair. Common additional repairs may include:
It's vital to address these additional repairs in conjunction with fixing the roof leak to avoid future problems and expenses.
Accurately estimating roof leak repair costs involves considering multiple factors. Let's break down the key cost components:
To assess the extent of the damage and determine the repair requirements, it's advisable to enlist the help of a professional. While some contractors provide free or low-cost inspections, be cautious of potential upselling. Obtain multiple quotes and consider the reputation and experience of the roofing professionals.
Different roofing materials vary in cost. Here's an estimate of typical roofing materials and their costs:
| Roof Material | Average Cost per Square Foot |
| Asphalt Shingle Roof | $1.50 - $5.00 |
| Metal Roof | $5.00 - $12.00 |
| Tile Roof | $7.00 - $20.00 |
| Flat Roof | $5.00 - $10.00 |
Keep in mind that these costs are approximate and can vary depending on factors such as material quality and location.
Labor costs depend on various factors like location, contractor expertise, and the complexity of the repair. Contractors may charge hourly rates, fixed rates, or per square foot rates. Obtaining multiple quotes is crucial to compare labor costs and ensure you're getting a fair price.
Besides materials and labor, there may be additional expenses involved, such as permits, equipment rentals, or disposal fees. Discuss these potential costs with your contractor to avoid surprises in the final bill.
Providing an exact figure for roof leak repair costs is challenging due to the numerous influencing factors. However, as a rough estimate, minor repairs may cost anywhere between $200 and $500, while more extensive repairs can range from $500 to $1500 or more. Additionally, addressing additional repairs, such as insulation or wood replacement, will increase the overall cost.
Roof repairs can sometimes be expensive, but there are ways to save on the cost. One way is to regularly inspect your roof and address any minor issues before they become major problems. Small leaks or loose shingles can worsen over time and lead to more extensive damage, so fixing them promptly can help prevent costly repairs down the road. Another way to save is to compare quotes from multiple roofing contractors.
Prices can vary greatly, so getting several estimates can help you find the best deal. Additionally, consider using quality materials that may have a higher upfront cost but can save you money in the long run. Investing in durable materials can increase the lifespan of your roof and decrease the need for frequent repairs.
Finally, consider scheduling your repair during the off-season or during slower times for roofers when prices may be more competitive. By taking these steps, you can save money on the cost of roof repair and ensure the longevity of your roof.
When it comes to roof repair, homeowners often face the dilemma of deciding whether to tackle the project themselves or hire a professional. Cost is a significant factor that plays into this decision-making process. DIY roof repair generally results in lower expenses as it eliminates the need for labor costs. Homeowners have the opportunity to purchase materials at a lower price and a chance to save on contractor fees. However, it is crucial to consider the quality of the repair work.
Professionals have the necessary skills and experience to ensure the job is done right the first time, reducing the risk of further damage and costly repairs in the future. Additionally, they often have access to higher-quality materials and equipment.
Hiring a professional also brings the advantage of insurance coverage, relieving homeowners of financial responsibility for any accidents or injuries that may occur during the repair process. While DIY repair may seem cost-effective initially, the potential for mistakes and the need for future repairs make hiring a professional a worthy investment for long-term roof maintenance.
There are several signs that indicate your roof may be damaged and in need of repair. One of the most obvious signs is a leaky roof. If you notice water stains on your ceiling or walls, it is likely that there is a problem with your roof.
Another sign of roof damage is missing or loose shingles. If you see shingles that are cracked, curled, or completely missing, it is important to have them replaced as soon as possible to prevent further damage.
Additionally, if you notice any sagging areas or dips in your roof, this may be a sign of underlying structural damage.
And finally, if you see any signs of moss or algae growth on your roof, it is a sign that there may be moisture trapped underneath, which can lead to rot and decay. It is important to address these signs of roof damage promptly to avoid more serious problems down the line.
The cost of repairing a roof leak can be influenced by several factors. Firstly, the extent of the damage plays a significant role. If the leak is minor and localized, the repair costs would likely be lower compared to a major leak that has caused extensive damage to the roof structure. Secondly, the type of roofing material used can impact the cost of repairs.
Materials like slate or tile tend to be more expensive to repair due to their higher cost and the specialized skills required. In contrast, repairing asphalt or metal roofs can be relatively less expensive. Additionally, the accessibility of the roof can affect the cost.
If the roof is difficult to access, such as in multi-story buildings or with limited workspace, the repair costs may be higher due to the extra time and effort required. Lastly, the geographical location can also be a factor.
In areas with a higher cost of living, such as cities, the repair costs may be higher due to increased labor and material costs. Overall, a combination of these factors determines the cost of repairing a roof leak.
Roof leak repairs are essential to safeguard your property and prevent further damage. By addressing leaks promptly, you can save on costly repairs in the long run. IBEX Roof, as a licensed, insured, and bonded roofing contractor in Washington and Oregon, specializes in comprehensive roof leak repairs.
No matter the size or complexity of the repair, IBEX Roof is equipped to handle the task. Our transparent pricing, free estimates, and commitment to using high-quality materials make us the trusted choice for all your roofing needs. Don't let a minor leak turn into a major issue. Contact IBEX Roof at (360) 637-4065 for a free estimate or consultation.
This post was written in collaboration with IBEX Roof, specialists in roof leak repairs and trusted roofing contractors in Washington and Oregon.
Grab the toolkit! In this comprehensive guide, we will walk you through the process of repairing your shed roof like a pro. A sturdy shed roof is crucial in protecting your belongings from the elements and maintaining the structural integrity of your shed. With our step-by-step instructions and expert tips, you'll be able to repair your shed roof with ease.
Before diving into the repair process, it's essential to assess the current state of your shed roof.
Inspecting your shed roof involves examining various components to identify common roofing issues. Here's what you should look for:
To conduct a thorough inspection, use a ladder and binoculars to get a closer look at the roof's condition.
Once you've identified potential issues, it's crucial to determine the extent of the damage. This step helps you plan for the necessary repairs and materials required. Consider the following:
Make sure to document the damages by taking photos or making sketches for future reference.
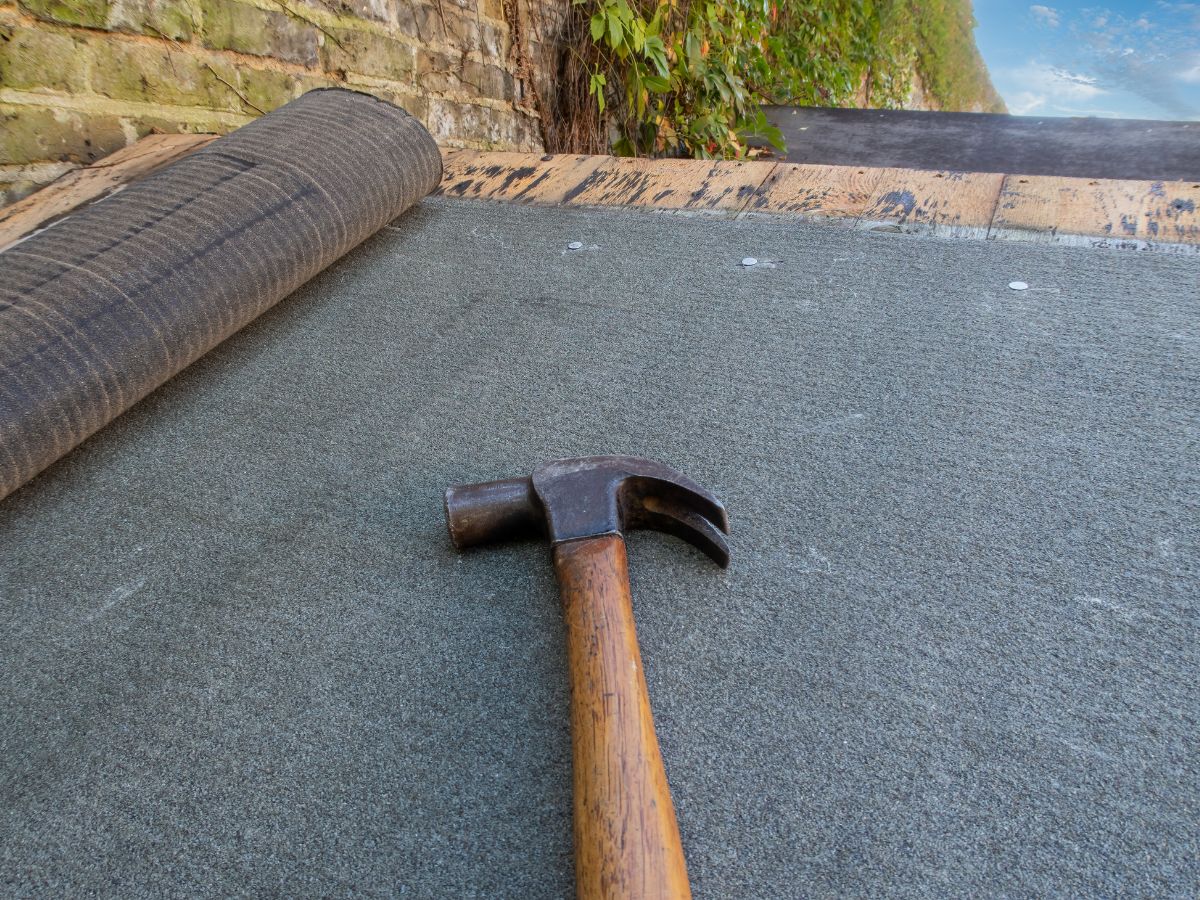
Now that you've assessed the damage, it's time to gather the necessary tools and materials and prepare your workspace for the repair process.
To fix your shed roof effectively, you'll need the following tools and materials:
Tool List:
Material List:
Having all the required tools and materials ready beforehand will streamline the repair process.
Before you start repairing your shed roof, it's important to create a safe and clutter-free workspace:
Now it's time to roll up your sleeves and begin repairing your shed roof. We'll walk you through three crucial aspects - fixing leaks, replacing damaged or missing shingles, and addressing structural issues.
Leaking roofs can lead to significant damage if not promptly repaired. Follow these steps to fix any leaks in your shed roof:
Damaged or missing shingles compromise the integrity of your shed roof. Here's how you can replace them:
If your shed roof has sagging areas or underlying structural issues, it's crucial to address them for long-lasting repairs. Follow these steps:
Once you've successfully repaired your shed roof, it's important to implement preventive maintenance measures and perform regular inspections to ensure its longevity.
Schedule regular roof inspections to identify potential issues before they worsen. Here's what you can do:
To prolong the life of your shed roof, consider the following:
Repairing your shed roof doesn't have to be an overwhelming task. By following our step-by-step guide, you'll be able to assess the damage, gather the right tools and materials, and successfully repair your shed roof. Regular maintenance and inspections will help prevent future issues and ensure the long life of your shed roof. Remember to prioritize safety throughout the repair process and seek professional assistance if needed. Now go out there and fix that roof like a pro!
Roof shingles are an essential part of any home's protection against the elements. However, over time, they can get damaged due to weather conditions, wear and tear, or accidents. In this blog, we will guide you through the process of repairing a roof shingle. Whether you are a seasoned DIY enthusiast or a beginner, these step-by-step instructions will help you restore the integrity of your roof and prevent further damage.

Inspecting your roof regularly is crucial to identify any signs of damage. Look for the following indicators:
Roof shingles can suffer various types of damage, including:
Before you begin the repair, make sure you have the following tools:
To repair a damaged roof shingle, you will need the following materials:
Safety should be your top priority when working on a roof. Follow these precautions:
Carefully inspect the damaged shingles to determine the extent of the problem. Ensure there are no underlying issues that require professional assistance.
Using a pry bar or flat bar, lift the shingles above the damaged one to expose the nails. Carefully remove the damaged shingle by gently prying it up. Take caution not to damage neighboring shingles in the process.
Measure the dimensions of the damaged shingle and purchase a replacement that matches the size, type, and color of your existing shingles. This ensures a seamless repair that blends with the rest of your roof.
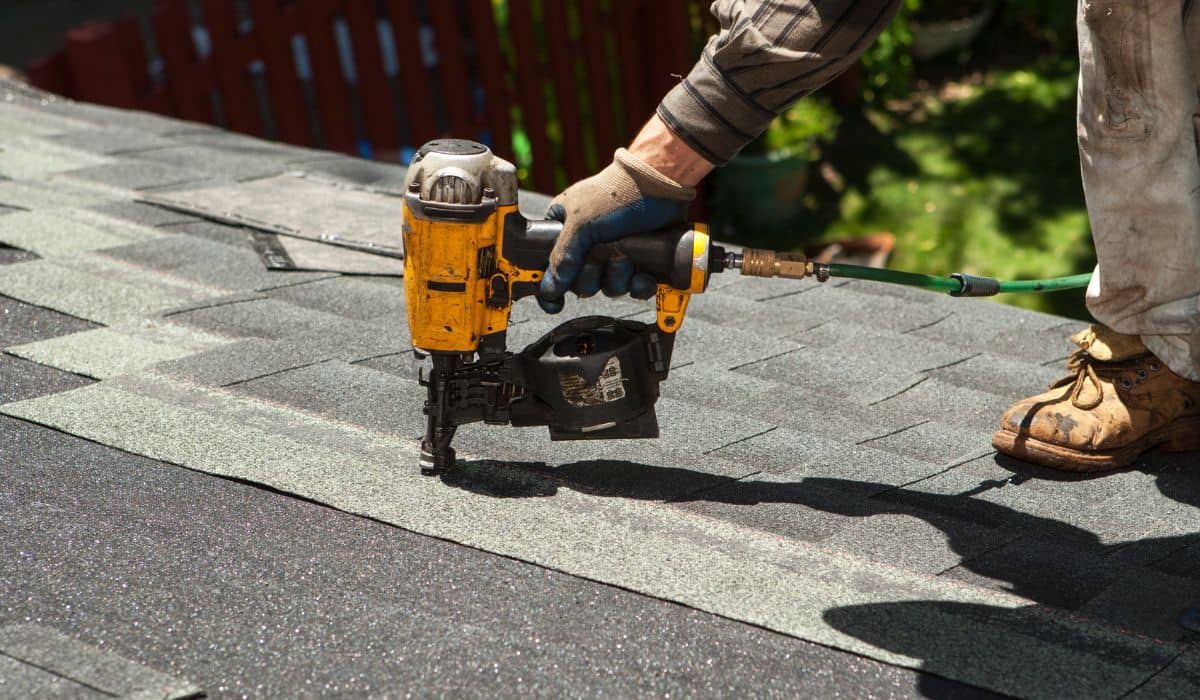
Place the replacement shingle in the vacant spot, aligning it with the surrounding shingles. Use roofing nails to secure the shingle in place, ensuring it lies flat and flush with the adjacent shingles. Hammer the nails into the designated nail line on the replacement shingle, taking care not to damage the shingle or surrounding area.
Apply a thin layer of roofing cement on the backside of the replacement shingle. This helps create a watertight seal and prevents leaks. Press the shingle firmly into place, ensuring it adheres securely to the roof. Use a roofing adhesive if necessary to reinforce the bond.
Perform routine inspections of your roof to catch any signs of damage early on. Look for missing or damaged shingles, loose flashing, or any other issues that may compromise the integrity of your roof. Addressing minor problems promptly can prevent more significant damage and costly repairs in the future.
Keep your roof clean and free from debris, such as leaves, branches, and moss. Regularly remove accumulated debris to prevent water pooling, which can lead to shingle deterioration and leaks. Additionally, consider using zinc or copper strips along the ridges of your roof to inhibit the growth of algae and moss.
If you notice any minor damage, such as cracked or curled shingles, address them promptly. Replace or repair damaged shingles to maintain the protective barrier of your roof. Ignoring minor issues can lead to more extensive damage and compromise the overall integrity of your roof.
Repairing a roof shingle is an important task to ensure the longevity and protection of your home. By following the step-by-step guide provided in this blog you can successfully replace a damaged shingle and maintain the overall health of your roof. However, if you prefer to entrust the job to professionals, I highly recommend considering IBEX Roof as your roofing contractor. With their expertise, experience, and commitment to quality, IBEX Roof can provide reliable and top-notch roofing services to meet your needs. Our skilled team of professionals will ensure that your roof repair is done efficiently and effectively, giving you peace of mind knowing that your home is in good hands.
