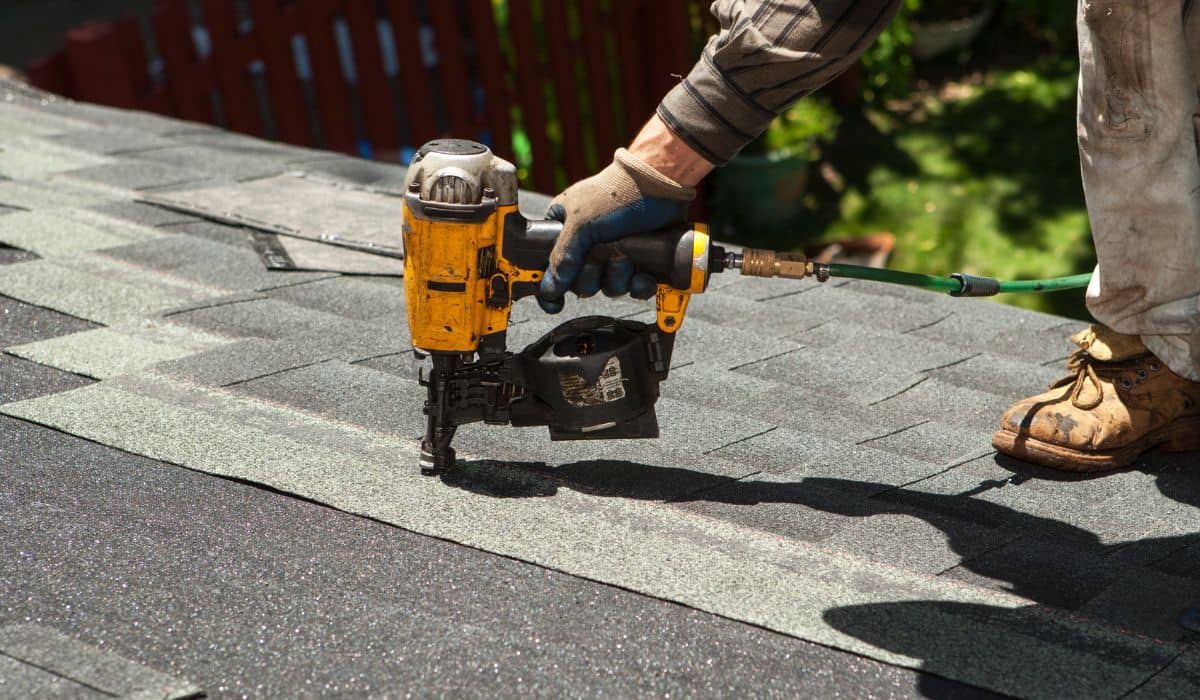
In the realm of home maintenance, one often overlooked yet crucial task is roof cleaning. Your roof is not just a protective shield against the elements; it is also a key component in the overall aesthetics and structural integrity of your home. Regular roof cleaning is essential to ensure the longevity and performance of your roof. In this blog post, we will delve into the significance of roof cleaning and why it is a necessary step in caring for your home.
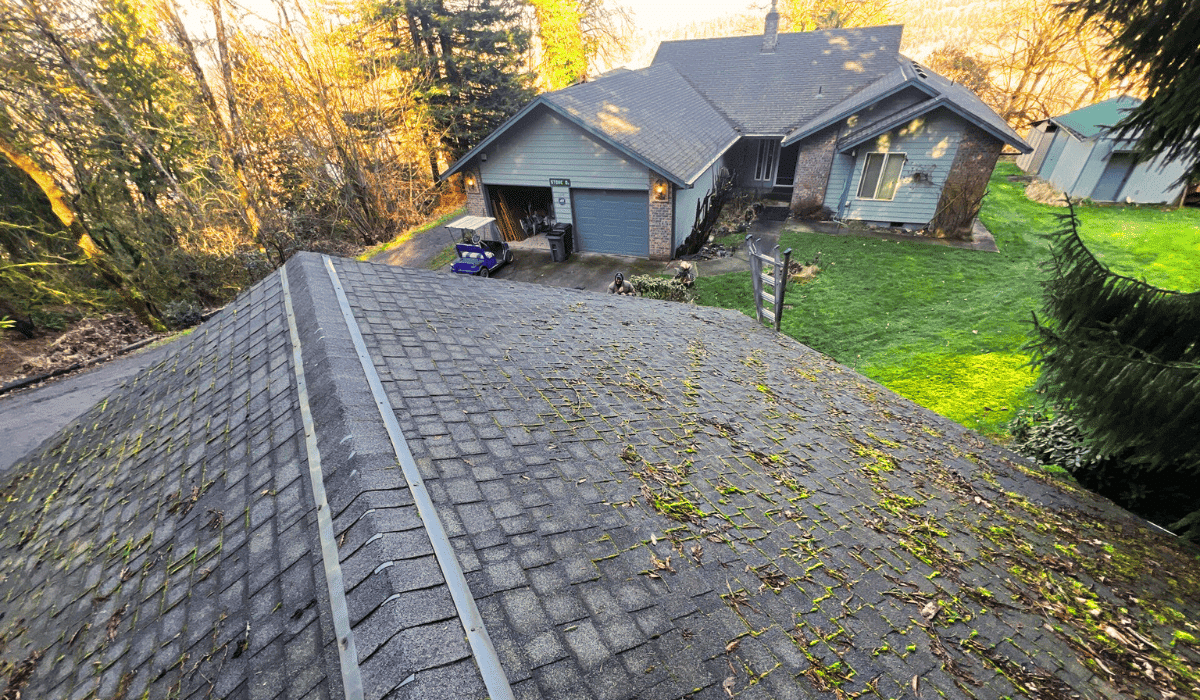
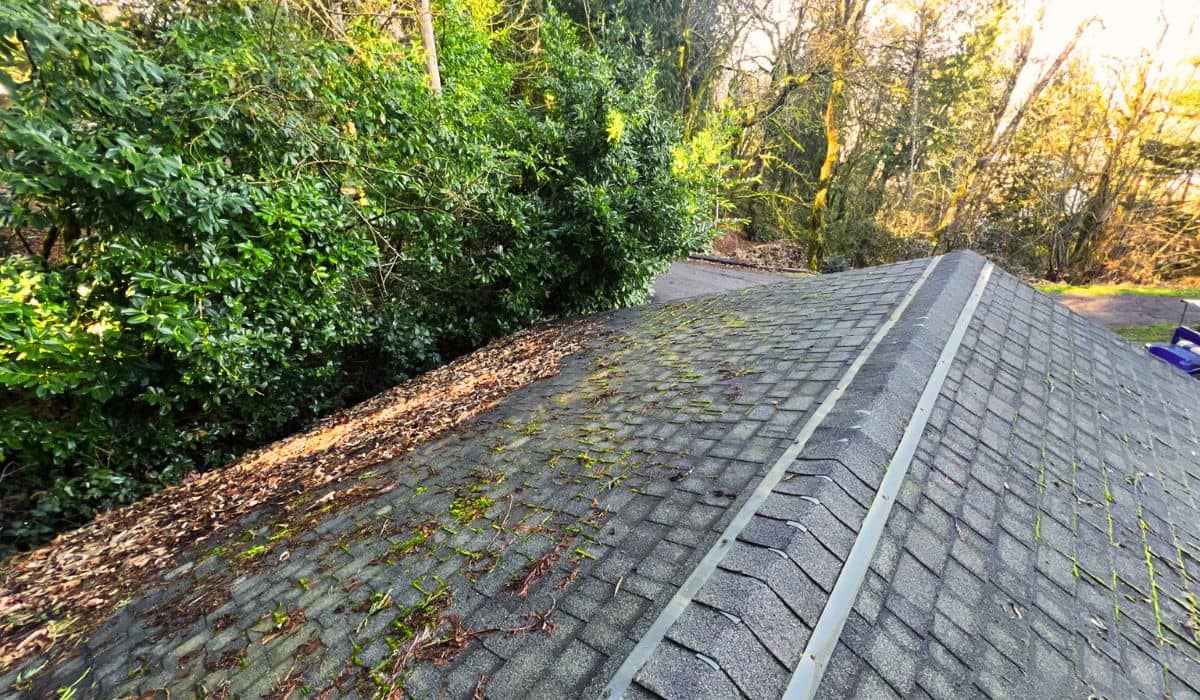
Your roof is subjected to a barrage of elements such as rain, wind, snow, and UV rays on a daily basis. Over time, dirt, debris, moss, algae, and other pollutants can accumulate on the surface of your roof, leading to potential damage if left untreated. Roof cleaning is not just about enhancing the appearance of your home; it is about protecting your investment and ensuring the safety and comfort of your family.
Here are some key reasons why roof cleaning is essential:
Regular roof cleaning can prevent the buildup of debris and organic growth that can compromise the integrity of your roof. Moss and algae, for example, can retain moisture and cause shingles to deteriorate over time. By removing these contaminants, you can extend the lifespan of your roof and avoid costly repairs.
A clean roof can significantly improve the overall curb appeal of your home. Whether you are planning to sell your home or simply want to maintain its beauty, roof cleaning can make a noticeable difference in the appearance of your property.
A dirty roof can absorb more heat, leading to higher energy bills during the hot summer months. By cleaning roof shingles and removing dirt and debris, you can improve the energy efficiency of your home and reduce your cooling costs.
Neglecting roof cleaning can result in a variety of issues such as leaks, mold growth, and structural damage. Addressing these problems early on through regular maintenance can save you time and money in the long run.
| Benefits | Description |
| Enhanced Curb Appeal | Boost the aesthetic appeal of your home |
| Improved Energy Efficiency | Reduce cooling costs by maintaining a clean roof |
| Increased Property Value | Enhance the marketability of your home |
| Prevent Costly Repairs | Address issues early to prevent extensive damage |
When it comes to roof cleaning, there are various methods that homeowners can choose from. It is important to select the right approach based on the type of roof and the level of contaminants present.
Soft washing involves using low-pressure water mixed with cleaning agents to remove dirt, algae, and mold from the roof surface. This method is gentle and suitable for delicate roofing materials such as asphalt shingles.
On the other hand, pressure washing utilizes high-pressure water to clean more stubborn stains and debris. While effective, pressure washing should be done cautiously to prevent damage to the roof.
If you prefer to tackle roof cleaning on your own, consider the following tips:
For homeowners who prefer to leave roof cleaning to the experts, professional roof cleaning services offer a convenient and effective solution. Experienced roof cleaners have the necessary equipment and expertise to safely and efficiently clean your roof.
To determine if your roof requires cleaning, watch out for the following signs:
If you notice any of these indicators, it is important to address them promptly to prevent further damage to your roof.
While roof cleaning is essential, it is important to prioritize safety when performing this task. Here are some precautions to keep in mind:
For steep or hard-to-reach roofs, consider hiring a professional roof cleaning service to ensure a safe and thorough cleaning process.
In conclusion, roof cleaning is not just a cosmetic procedure; it is a vital aspect of home maintenance that can protect your investment and enhance the overall appeal of your property. By prioritizing roof cleaning and addressing issues early on, you can ensure the longevity and performance of your roof for years to come. Remember, a clean roof is a happy roof!
Don't wait any longer to give your roof the care it deserves. Contact a shingle cleaner or asphalt shingle cleaner today to schedule a roof wash and enjoy a clean and healthy roof for your home.
By incorporating regular roof cleaning into your home maintenance routine, you can ensure the longevity and performance of your roof for years to come. If you have any questions or would like to learn more about the benefits of cleaning roof shingles, feel free to reach out to our team of experts. We are here to help you maintain a clean and healthy roof for your home.
Skylights are a wonderful addition to any home, bringing in natural light and enhancing the overall aesthetics of a room. However, skylight leaks can be a cause for concern and require immediate attention. In this blog post, we will provide you with an in-depth guide on how to identify and fix skylight leaks effectively.
Before we delve into the repair process, it's important to understand the causes and signs of skylight leaks.
Skylight leaks can occur due to various factors, including:
To identify a skylight leak, keep an eye out for the following signs:
| Signs of Skylight Leaks |
| Visible water drips or stains around the skylight area |
| Mold or mildew growth on the ceiling or adjacent walls |
| Increased humidity or condensation indoors |
| Water pooling or sagging near the skylight |
If you notice any of these signs, it's crucial to address the issue promptly to prevent further damage to your property.
Before starting the repair process, gather the necessary tools and materials and ensure safety precautions are in place.
To fix a skylight leak, you'll need the following tools and materials:
Safety should be your top priority during any repair work. Take the following precautions:
To fix the skylight leak effectively, a homeowner must first identify the source of the problem. This requires a thorough inspection both externally and internally.
Start by conducting a visual inspection around the skylight area outdoors. Look for:
Proceed with an interior inspection to further investigate the source of the leak. Look for:
Once you've identified the source of the skylight leak, you can proceed with the necessary repairs. The repair process can vary based on the severity of the leak.
For minor leaks, you can apply temporary patches using the following steps:
Significant leaks or severe damage require more extensive repairs. Follow these steps:
To prevent future skylight leaks and maintain the longevity of your skylights, regular maintenance is necessary. Consider the following preventive measures:
Skylights can significantly enhance your home's beauty and bring in natural light, but a leaking skylight can cause serious damage if left unattended. By following the steps outlined in this comprehensive guide, you can diagnose and repair skylight leaks effectively.
Remember, safety is crucial during any repair work, and hiring a professional roofing contractor or roofer is recommended for complex repairs or extensive damage. Regular maintenance and inspections will help prevent future leaks, a faulty skylight and ensure your skylights provide years of enjoyment and functionality in your home.
Don't let a skylight leak dampen your spirits; take action today to address any existing issues and enjoy a leak-free skylight for years to come!
Introduction:
A sound and well-maintained roof is essential for the overall integrity and protection of your home. However, when it comes to deciding between roof repair and replacement, it can be a daunting task. The goal of this blog post is to provide you with comprehensive information and insights so that you can make an informed decision that aligns with your budgetary needs.
We will delve into various factors to consider, advantages and disadvantages, and cost comparisons to help you determine if your roof needs repair or it needs to be replaced, ensuring the best action for your budget.
Before determining whether to repair or replace your roof, it is crucial to assess its current condition. Here are some key factors to consider:
Inspect your roof for any visible signs of wear and tear. Look for the following signs that your roof needs repair or replacement.
Consider the age of your roof as it plays a significant role in the decision-making process. Different roofing materials have varying lifespans. Here's a general guideline:
The age of your roof will help you determine whether it is reaching the end of its lifespan and if repair or replacement is the most viable option.
If your roof has minor damage or is still relatively new, repairing it might be the more cost-effective choice. Here's what you should know about roof repairs:
Roof repair projects can include the following:
The cost of roof repairs will depend on the extent of the damage and the required materials. Here's a rough estimate:
| Repair Type | Cost (Average) |
| Patching Damaged Shingles | $150 - $400 |
| Fixing Leaks and Repairing Flashing | $200 - $600 |
| Addressing Deterioration/Rot | $300 - $800 |
It's important to note that these are rough estimates, and costs can vary depending on your location and the specific repairs needed. Additionally, consider whether your homeowner's insurance may cover any of these repair costs.
Before opting for roof repair or replacement, it's essential to weigh the advantages and disadvantages:
Pros:
Cons:
Repairing your roof can be a suitable option if the damage is limited and your roof's overall condition is still relatively good.
When repairs are no longer effective or your roof is approaching the end of its lifespan, a roof replacement is often the best long-term solution. Here's what you should know:
Consider various roofing materials based on your budget, climate, and aesthetic preferences. The most common options include:
Researching the benefits and costs of each material will help you choose the most suitable one for your needs.
The cost of a roof replacement will depend on various factors, including the size of your roof, chosen material, and local labor costs. Here's a rough estimate:
| Roofing Material | Cost per Square (100 sq ft) | Average Total Cost (2,000 sq ft roof) |
| Asphalt Shingles | $80 - $100 | $8,000 - $15,000 |
| Metal Roofing | $200 - $900 | $20,000 - $45,000* |
| Tile or Slate Roofing | $600 - $1,200 | $60,000 - $120,000* |
| Wood Shakes/Shingles | $700 - $1,200 | $70,000 - $120,000* |
The cost range for metal, tile, and wood roofing reflects the higher-end materials and includes the complexity of the installation.
It's important to consider the long-term benefits and return on investment (ROI) when comparing the costs of roof repair versus replacement.
Understanding the advantages and disadvantages of a roof replacement can help you make an informed decision:
Pros:
Cons:
A full roof replacement can provide long-term peace of mind, improved home value, and reduced maintenance needs.
Determining whether to repair or replace your roof requires careful consideration. Here are some steps to help you make an informed decision:
Seek the advice of a professional roofing contractor to assess the condition of your roof thoroughly. Consider their expertise, experience, and credentials when choosing a reliable contractor.
Take your budget into account when deciding between repair and replacement. Evaluate the short-term affordability against the long-term benefits and potential savings in maintenance costs.
Explore financing options, such as home improvement loans or government incentives for energy-efficient roof replacements. These can alleviate the financial burden associated with a full roof replacement.
Consider the projected maintenance needs of your roof. While repairing might offer a short-term solution, a replacement may reduce the frequency of future repairs and provide greater peace of mind.
Additionally, think about your future plans. If you plan to sell your home in the near future, a new roof can increase both curb appeal and resale value.
Deciding between roof repair and replacement is a significant investment that requires careful consideration. By assessing the condition of your roof, obtaining professional advice, analyzing costs, and weighing the pros and cons, you can make an informed decision that suits both your budget and long-term needs.
Remember, every roof is unique, and what works for one homeowner may not be the best solution for another. Take the time to evaluate your specific circumstances before deciding whether to repair or replace a roof, consult with roofing companies, and prioritize the long-term health and value of your home.
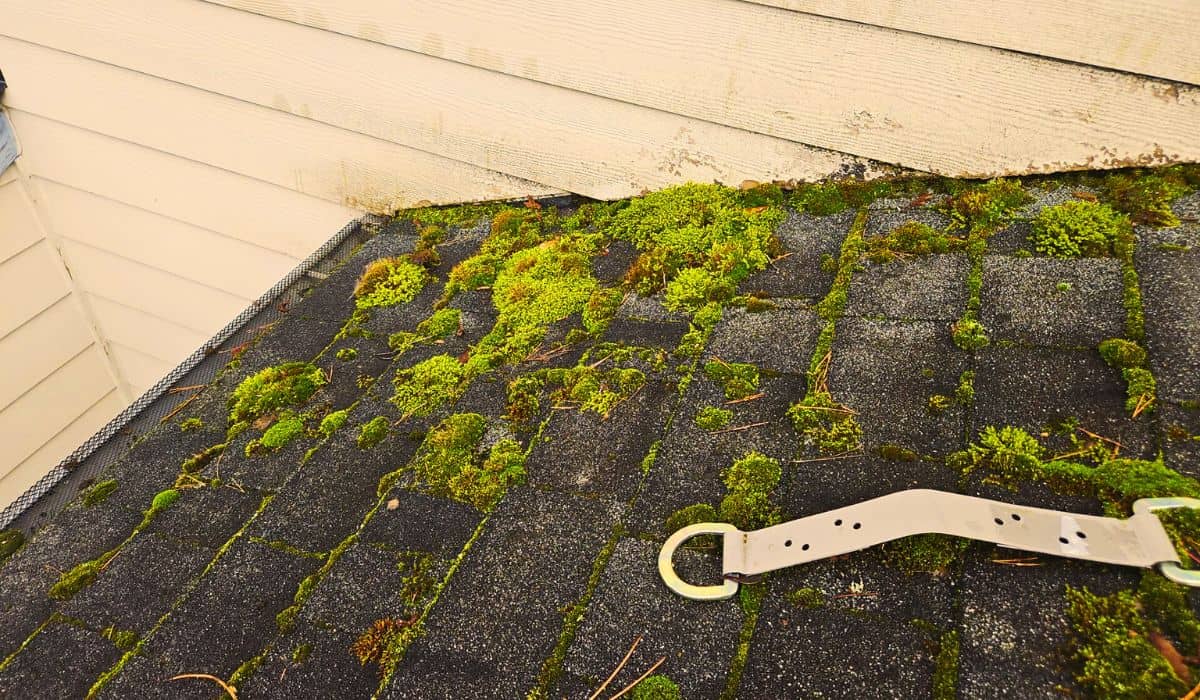
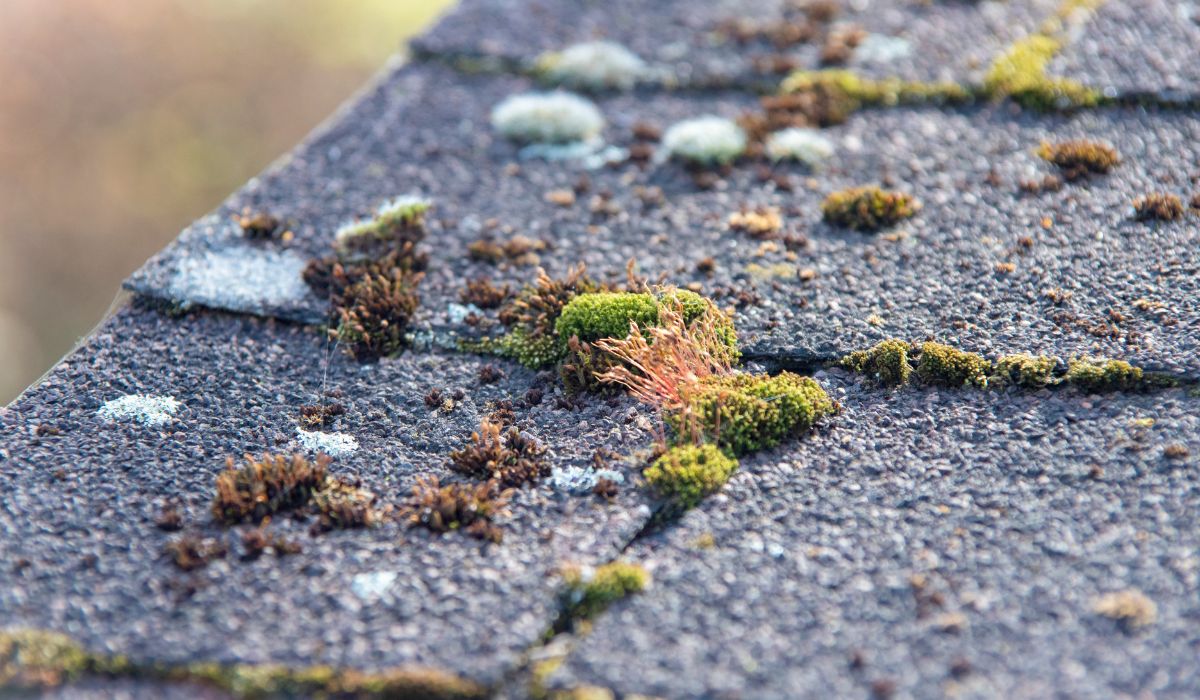
Have you noticed unsightly moss growth on your roof? Apart from impacting the aesthetics of your home, moss can lead to serious structural damage and reduce the lifespan of your roof. But fear not! In this blog post, we will dive into the various methods you can employ to effectively kill moss on your roof and maintain a cleaner and healthier living space.

Moss is a non-vascular plant that thrives in damp and shaded environments, making roofs an ideal breeding ground.
It can quickly spread and cause significant damage if left unchecked. But understanding how moss forms and the ideal conditions for its growth will give you an upper hand in tackling this issue.
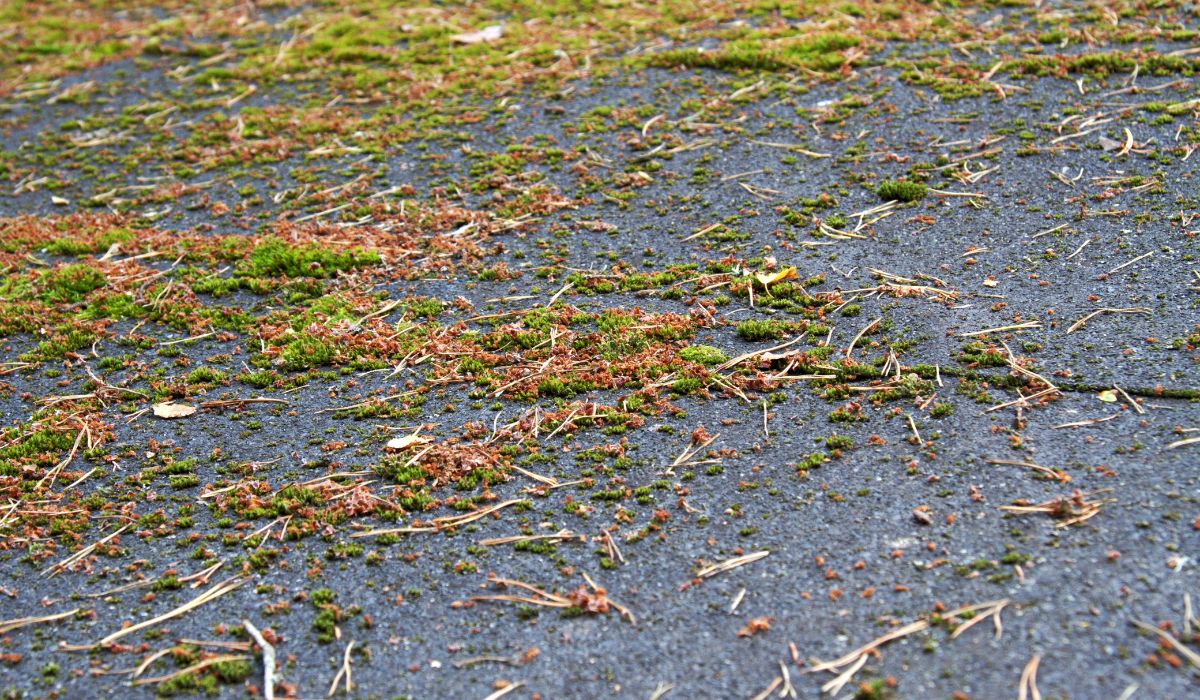
Neglecting moss growth on your roof can lead to several problems. From water leaks and clogged gutters to structural damage and decreased property value, the consequences of allowing moss to flourish are substantial.
Additionally, moss can pave the way for the growth of algae, lichen, and fungi, further deteriorating your roof's condition.
Prevention is the key to maintaining a moss-free roof. Implementing the following methods will help minimize the chances of moss growth and keep your roof in great shape for years to come:
If moss has already taken hold of your roof, it's crucial to remove it promptly to prevent further damage. Here are several effective methods for moss removal:
To ensure moss doesn't return after you have eradicated it, follow these essential maintenance tips:
While DIY moss removal may seem like a cost-effective option, professional moss removal services often provide more thorough and long-lasting results.
Professional services have access to specialized equipment and products that effectively remove moss and prevent it from coming back.
Additionally, professionals have the expertise to assess the underlying causes of moss growth and address them, ensuring a more permanent solution.
While DIY methods like using bleach or a hose may provide temporary relief, investing in professional moss removal can save time and money in the long run by preventing recurring moss growth.
Keeping your roof moss-free is essential for maintaining a clean, healthy, and structurally sound home. By understanding the dangers of moss on roofs and applying prevention methods like proper roof design, regular maintenance, and the installation of zinc or copper strips, you can minimize and control moss growth. If moss has already taken hold, utilize manual removal methods or eco-friendly moss killers. And remember, professional assistance is always available for more severe cases. Stay proactive and keep your roof moss-free for a long-lasting and beautiful home.
Now that you have the power to defeat moss on your roof, take action and protect your home from its harmful effects. Share your experiences and questions below—we're here to help!
Remember: A clean roof is a happy roof, and a happy roof means a happy home.
Disclaimer: This blog is intended for informational purposes only. Always take the necessary precautions and consult professionals for complex or dangerous tasks.
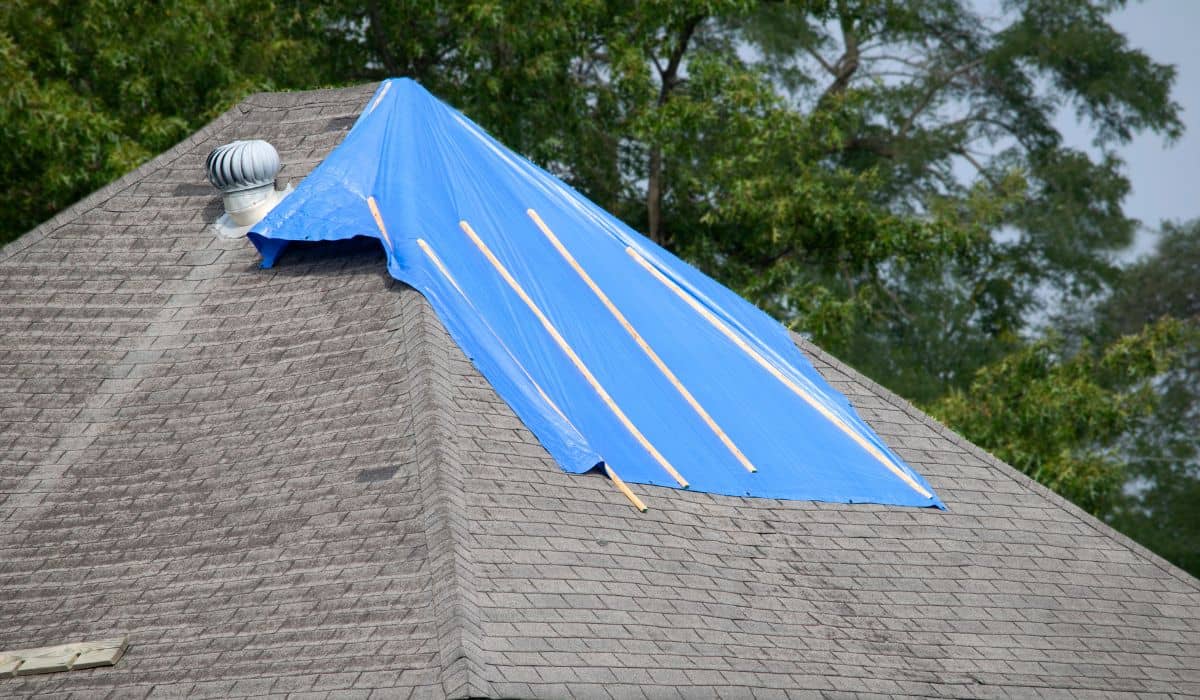
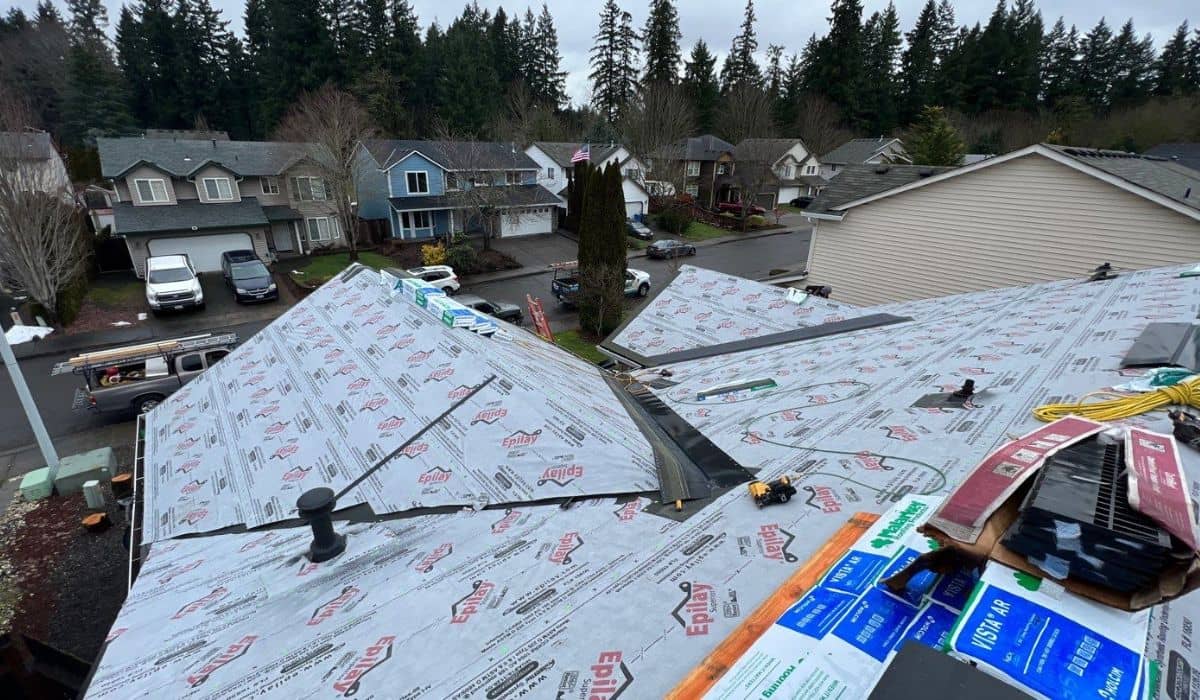
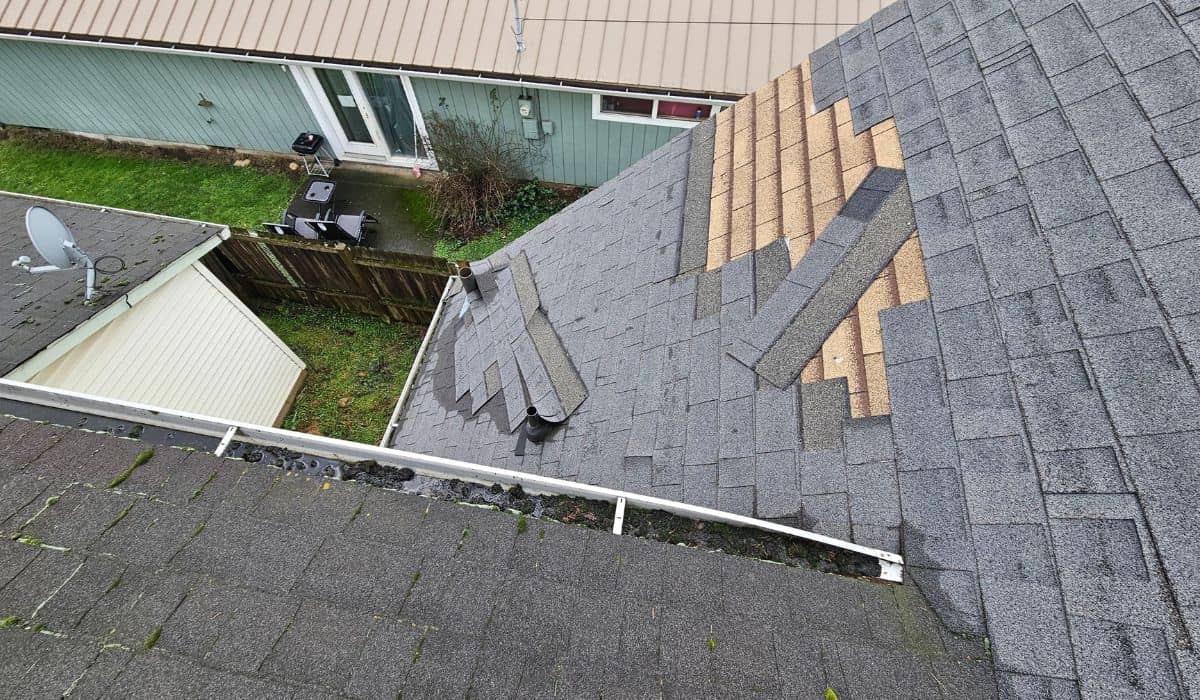
Imagine waking up to a leaky roof during a heavy downpour. The urgency to fix it becomes imminent, and you wonder, "How long will it take to replace my roof?" In this blog post, we will explore the various factors that determine the timeline of a roof replacement project.
Replacing a roof is a significant undertaking for any homeowner. It not only ensures the safety of your home but also protects you from the elements. However, one burning question that often arises is, "How long does it take to replace a roof?"
The duration of a roof replacement project depends on several factors, including the size of your roof, its complexity, the materials used, weather conditions, and the expertise of your roofing contractor. By understanding these factors, you can better plan and anticipate the timeline for your roof replacement.
Before diving into the world of roof replacement timelines, it's essential to begin with a thorough assessment of your roof. Engaging a professional roofing contractor to inspect your roof will provide crucial insights into its condition, material, and overall complexity. During the assessment, potential issues such as hidden damage or structural defects may also be uncovered, which can impact the timeline.
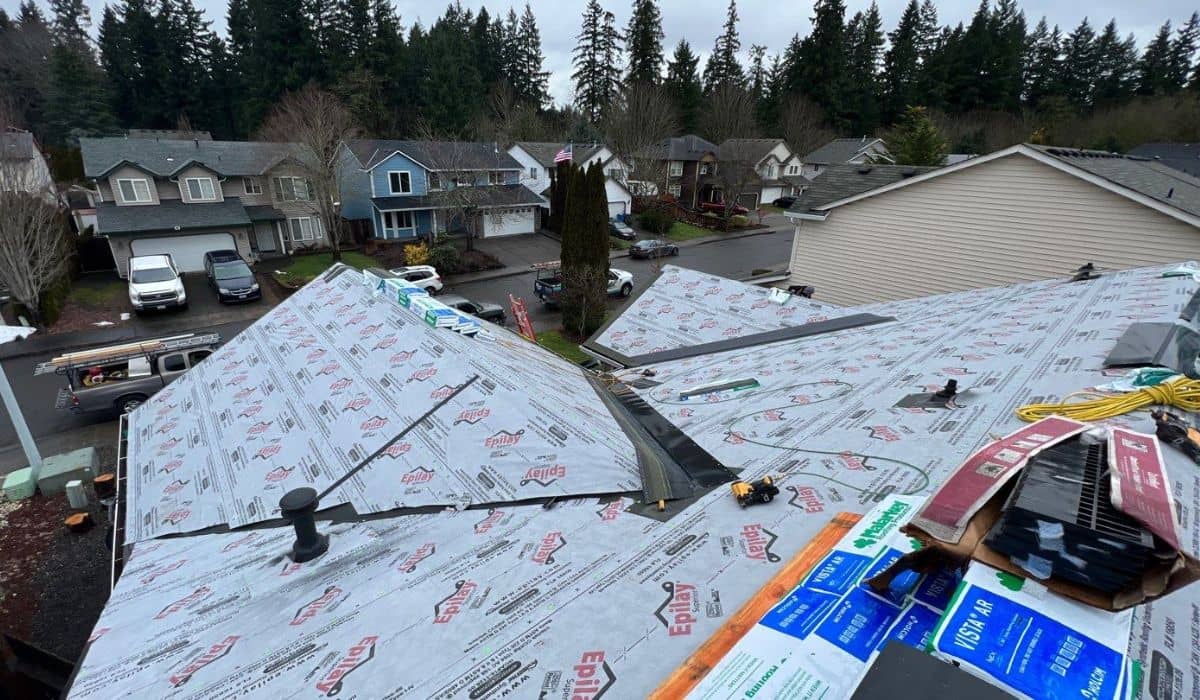
Adequate preparation is key to ensuring a smooth and efficient roof replacement process. Before the project commences, several steps need to be taken, including obtaining any necessary permits, scheduling the project with your contractor, and selecting the appropriate roofing materials.
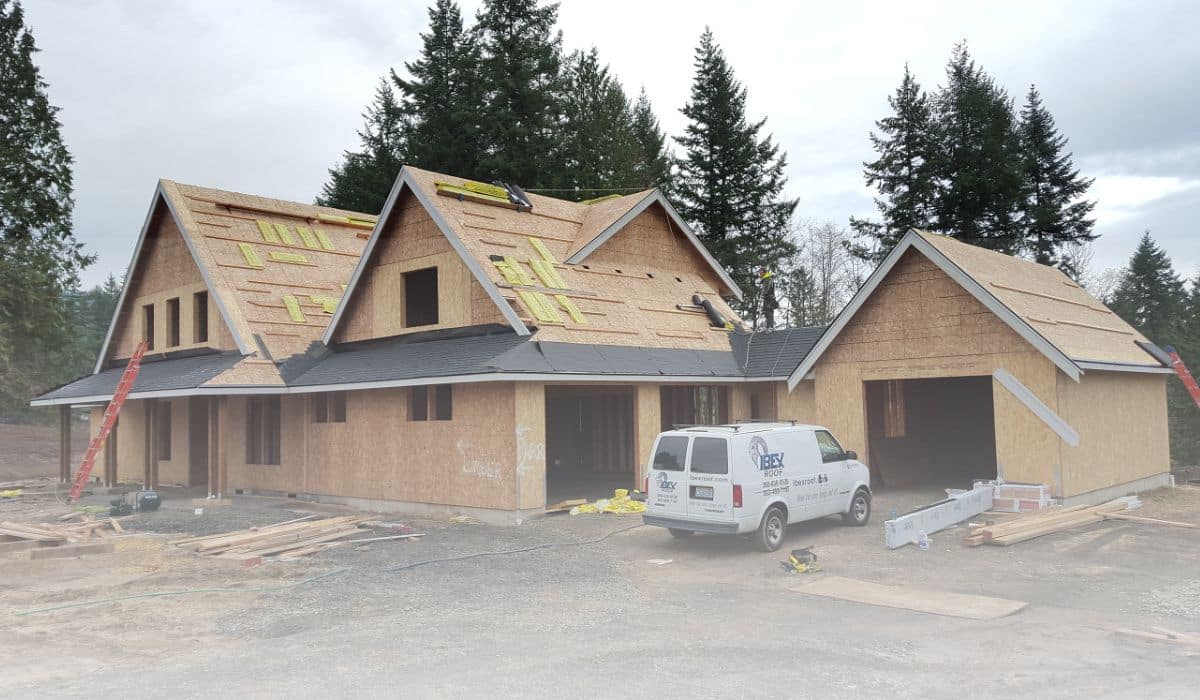
The size and complexity of your roof play a significant role in the overall timeline of the project. Roofs with multiple pitches, chimneys, skylights, or dormers require extra time for precise installation. Here is a breakdown of how the size and complexity of your roof can affect the timeline:
| Roof Size | Time for Replacement |
| Small (1,000-1,500 sq. ft.) | 1-2 days |
| Medium (1,500-3,000 sq. ft.) | 2-3 days |
| Large (3,000+ sq. ft.) | 3+ days |
Weather conditions can significantly impact the duration of a roof replacement project. Extreme temperatures, rain, or high winds may require adjustments to the schedule. It is crucial to have a flexible plan if inclement weather arises during the project. Here's how weather conditions can impact the timeline:
| Weather Condition | Impact on Timeline |
| Rainy Days | Delayed project; work may need to be rescheduled |
| High Winds | Unsafe working conditions; work may be halted |
| Extreme Temperatures | Limited working hours to avoid issues with adhesive materials |
The choice of roofing material is another critical factor affecting the timeline. The installation process varies for each type of material. Here are some common roofing materials and their respective installation durations:
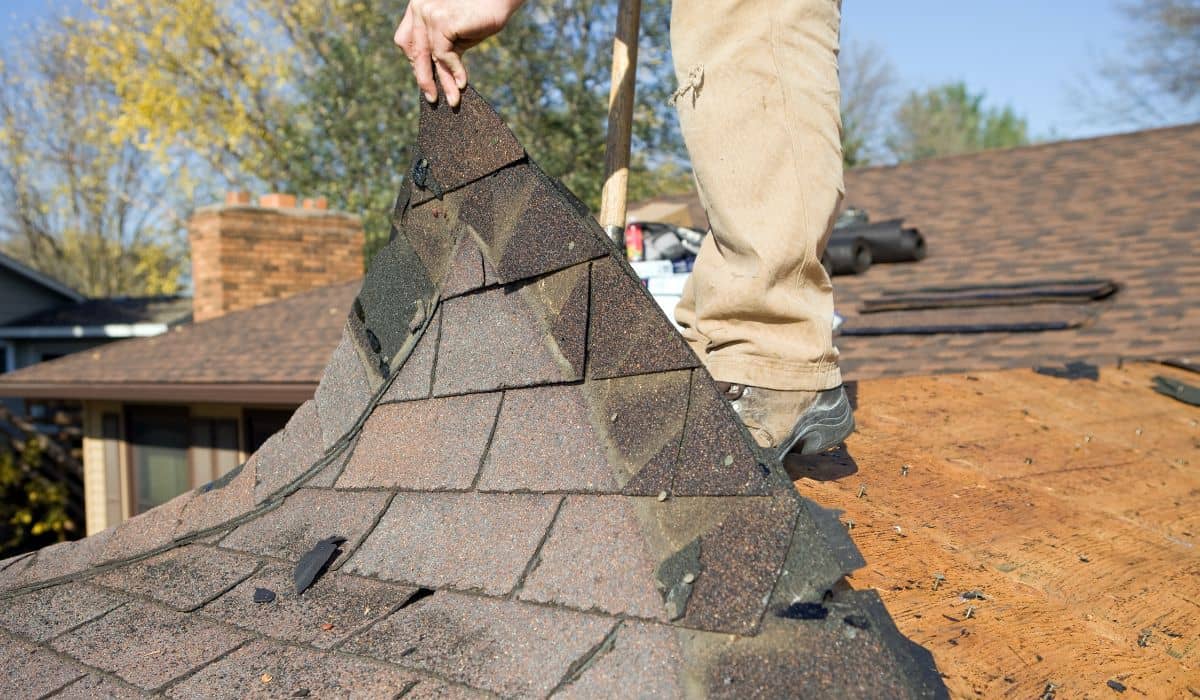
The process of removing the existing roofing materials and disposing of them properly can also impact the timeline. Factors such as the number of old layers, damaged underlayment, or the presence of hazardous materials can add extra time to the project. A thorough roof inspection will help determine the extent of removal and disposal work required.
Now that we have covered the factors that influence the timeline, let's take a closer look at the roof replacement process itself. The entire process generally consists of the following stages:
To ensure a smooth and efficient roof replacement process, it's essential to hire a reputable and experienced roofing contractor. A skilled contractor will not only provide expertise but also complete the project within the estimated time frame. Conduct thorough research, read customer reviews, and seek recommendations when selecting a roofing contractor.
When a roof needs replacement, the question of how long it will take is often at the forefront of a homeowner's mind. By considering factors such as the size and complexity of the roof, weather conditions, material selection, and engaging the right contractor, you can gain a better idea of the timeline for your roof replacement.
Remember, a timely roof replacement is crucial for preventing further damage and protecting your home. While individual circumstances may vary, an average roof replacement project can take anywhere from a few days to a few weeks. To obtain a more accurate estimate for your specific project, it's best to consult with a professional roofing contractor.
By investing the necessary time and effort into understanding the factors that affect the timeline, you can plan accordingly and ensure a successful roof replacement that will safeguard your home for years to come.
Your roof is one of the most essential components of your home. It protects you from the elements, keeping you safe and comfortable. However, over time, wear and tear may take a toll, necessitating a roof replacement. While the idea of replacing your roof can be overwhelming, understanding the cost factors involved can help you make an informed decision.
In this blog post, we will delve into the various factors that determine the cost of replacing a roof, helping you budget effectively for your home improvement project.
Several factors come into play when determining the cost of replacing a roof. From the type of roofing material to the size and complexity of your roof, each element influences the overall expenses. Below, we will explore the essential factors to consider when estimating the cost of a new roof.
The type of material you choose for your new roof is a significant cost determinant. Here are some popular roofing materials and their price ranges:
| Roofing Material | Average Cost Per Square Foot |
| Asphalt Shingles | $1.50 - $5 |
| Metal Roofing | $5 - $12 |
| Tile and Slate | $10 - $20 |
| Wood Shakes | $6 - $12 |
| Synthetic Options | $8 - $15 |
Note: The cost per square foot can vary depending on several factors such as location and complexity of the project.
The size of your roof directly affects the overall cost. Larger roofs require more materials and labor hours, resulting in higher expenses. Additionally, the complexity of your roof, such as multiple levels, steep slopes, and the presence of chimneys or skylights, can increase the cost due to the additional work involved.
Before installing a new roof, the existing one needs to be removed. The costs associated with removing and disposing of the old roofing materials should be factored into your budget. The labor and disposal fees can vary depending on the size of the roof and the local disposal regulations.
A solid foundation is crucial for the longevity of your new roof. If the underlayment or decking is damaged, additional costs may be incurred for replacement. It is essential to have a professional roof inspection to assess the condition of the underlying structure before proceeding with the replacement.
The cost of labor depends on various factors, including the region, roofing company, and project complexity. While DIY roof replacement may seem cost-effective, it is not advisable unless you have prior experience and expertise. Hiring skilled and reputable roofing contractors ensures the quality and durability of the replacement.
It is essential to have an idea of the average cost range for roof replacement to help you budget appropriately. Below is a breakdown of the average cost per square foot for specific roofing materials:
| Roofing Material | Average Cost Per Square Foot |
| Asphalt Shingles | $3.50 - $5.50 |
| Metal Roofing | $7 - $12 |
| Tile and Slate | $10 - $20 |
| Wood Shakes | $9 - $14 |
| Synthetic Options | $10 - $18 |
Note: The costs provided are approximate averages and may vary depending on various factors.
In addition to the main cost factors discussed above, several other considerations can impact the overall cost of a roof replacement project.
Before replacing your roof, you may need to obtain permits from your local authorities. The costs associated with permits should be considered, along with any other local regulations that may affect the project.
When replacing your roof, it is essential to consider warranties and insurance coverage. Opting for high-quality materials often comes with extended warranties, offering peace of mind in case of any issues. Additionally, up-to-date homeowner's insurance will protect your investment in case of damage or unforeseen circumstances.
While energy-efficient roofing materials may have higher upfront costs, they can lead to long-term savings on energy bills. Proper insulation and ventilation can also contribute to cost savings in the long run. Consider the energy efficiency ratings of various roofing materials when making your decision.
Now that you have an understanding of the factors influencing the cost of a roof replacement, it's time to consider budgeting options and financing possibilities.
Start by assessing your financial capabilities and planning for the cost of replacing your roof. Consider setting aside a portion of your savings specifically for this purpose. Researching different roofing materials and costs can help you establish a realistic budget.
If upfront payment is not feasible, several financing options are available to help you finance your roof replacement project. Options such as personal loans or home equity lines of credit (HELOC) can provide the necessary funds while allowing you to repay over time. Explore these options and determine which best suits your financial situation.
Replacing a roof is a significant home improvement project that requires careful consideration and planning. By understanding the various factors that influence the cost of a roof replacement, you can make an informed decision.
Remember, the cost will vary based on the size, material, and complexity of your roof, among other factors. Take your time to research and obtain multiple quotes from reputable roofing contractors.
Ensure that you invest in high-quality materials and skilled labor to guarantee a long-lasting and durable roof for your home. With proper budgeting and financing options, your roof replacement venture can be a successful and stress-free experience.
When it comes to taking care of your home, your roof is one of the most crucial elements to protect. That's why finding a reputable residential roofing contractor is essential. A reliable contractor will ensure that your roof is in good hands and that any repairs or replacements are done to the highest standards. Follow these 10 must-know tips to hire a residential roofing contractor that you can trust with your valuable investment.
Before hiring any residential roofing contractor, do your due diligence and conduct thorough research. Start by asking for recommendations from friends, family, or neighbors who have recently had their roofs serviced. Additionally, utilize online resources such as review websites and professional associations to find reputable roofing contractors in your area.
Obtaining multiple quotes from different roofing contractors allows you to compare prices and services offered. This process gives you a better understanding of what to expect in terms of costs and helps you make an informed decision. Ensure that each quote is detailed and includes the scope of work, materials to be used, estimated timeline, and payment terms.
| Contractor | Quote Amount (USD) | Scope of Work |
| ABC Roofing | $5,000 | Replace shingles, inspect roof for potential repairs |
| XYZ Roofing | $6,500 | Install new roof, replace damaged fascia |
| JKL Roofing | $4,800 | Repair leaks, perform thorough roof inspection |
Ask potential roofing contractors for references from past clients. Contact these references and ask about their experience with the contractor, including work quality, communication, and adherence to timelines. Viewing a contractor's portfolio can also give you a glimpse of their past work and help you determine if they are suitable for your roofing project.
Ensure that the residential roofing contractor you choose has sufficient experience and expertise in handling different roof types and services. A contractor with ample experience will be well-equipped to address any challenges that may arise during the project. Inquire about their knowledge of various roofing materials, installation techniques, and familiarity with local building codes.
Before signing a contract, verify that the residential roofing contractor is fully licensed, insured, and bonded in your state. Proper licensing ensures that the contractor has met all the necessary requirements and is qualified to carry out roofing work. Adequate insurance coverage protects you from liability in case of any accidents or damage that may occur during the project.
A reputable residential roofing contractor will offer warranties on both labor and roofing materials. Prioritize contractors who provide comprehensive warranties that cover potential defects and workmanship issues. Inquire about the duration and terms of the warranties, as well as any exclusions or limitations that may apply.
Effective communication is key to a successful roofing project. A reliable contractor will establish clear lines of communication and keep you informed about the progress, any potential changes, and the timeline for completion. Look for contractors who are easily accessible, responsive to inquiries, and willing to provide regular updates.
Always insist on a detailed, written contract before starting any roofing work. The contract should include important details such as the scope of work, materials to be used, timeline, payment terms, and warranty information. Review the contract carefully and seek clarification on any unclear aspects before signing.
Discuss payment terms with the contractor and avoid making upfront payments or paying in full until the project is completed to your satisfaction. Negotiate a payment schedule based on project milestones. Additionally, inquire about financing options that may be available to help ease the financial burden of the roofing project.
Finally, trust your instincts when selecting a residential roofing contractor. If something doesn't feel right or you have concerns about a particular contractor, it's okay to seek alternatives. Your peace of mind and confidence in the contractor's ability to deliver quality work should be a top priority.
Remember, your roof plays a vital role in protecting your home and family. By following these 10 must-know tips for hiring a residential roofing contractor, you can ensure that your roofing needs are met by a trusted professional who will provide top-quality service and exceed your expectations.
Don't hesitate to reach out to IBEX Roof, a reputable residential roofing company based in Vancouver, WA. With their 20 years of experience, fully licensed status, and commitment to customer satisfaction, they can help you find the right roofing contractor for your needs. Schedule a free roof inspection today and take the first step in securing a durable and reliable roof for your home.
Disclaimer:
The information provided in this blog post is for informational purposes only. The mentioned tips are general recommendations, and readers should exercise their own discretion while hiring a residential roofing contractor. It is always advisable to do thorough research, conduct interviews, and ask for references when making significant home improvement decisions.
Imagine having your very own rooftop oasis, a space where you can escape the hustle and bustle of everyday life and enjoy breathtaking views. In this blog post, we will explore the concept of a roof deck, a versatile and valuable addition to any building or home. As roof decks continue to grow in popularity, especially in urban areas, we will delve into the various types, benefits, and design considerations that come with creating this amazing outdoor space.
A roof deck is a unique outdoor space situated on the roof of a building. It offers a distinct experience compared to regular outdoor patios or balconies. As with any deck, a roof deck consists of several key elements, each contributing to its functionality and aesthetics.
The basic structure of a roof deck includes:
Roof decks can be classified into several categories, each with its own unique characteristics and purposes. Let's explore some of the common types:
Intensive green roof decks go beyond the traditional deck space and support heavier vegetation and plant growth. These decks offer a range of ecological benefits and can even be converted into recreational spaces.
Key features of intensive green roof decks include:
Extensive green roof decks are a low-maintenance alternative to intensive green roof decks. They are designed to support lightweight plantings that require minimal watering and upkeep.
Notable features of extensive green roof decks include:
Roof decks can also be transformed into fully accessible outdoor living spaces, offering endless possibilities for leisure and entertainment activities.
Popular options for usable living spaces on roof decks include:
Adding a roof deck to your property offers numerous advantages that extend beyond just creating an additional outdoor space. Let's explore some of the key benefits:
Roof decks provide an excellent solution for limited outdoor space in densely populated areas. Instead of wasting valuable real estate, a roof deck utilizes otherwise unused space to create a functional and attractive outdoor oasis.
With a roof deck, you can:
Adding a roof deck to your property can significantly increase its market value. Studies and real estate statistics consistently demonstrate that properties with well-designed and functional roof decks command higher rental prices and resale values.
By investing in a roof deck, you:
Roof decks provide a range of environmental benefits, making them a sustainable option for homeowners and property developers.
Some noteworthy advantages include:
Designing and constructing a roof deck requires careful planning and consideration of several factors. Let's explore some key considerations to keep in mind:
Before venturing into a roof deck project, it is essential to assess the structural capacity of your building. Consult with a professional engineer or architect to ensure the existing roofing structure can accommodate the additional load.
Additionally, check with local authorities regarding permits and regulations governing the construction of roof decks. Building codes and requirements may vary depending on your location, so it's crucial to adhere to relevant guidelines.
Choosing the right materials for your roof deck is essential for durability, aesthetics, and functionality. Consider the following aspects when selecting materials:
Ensuring the safety of your roof deck is of utmost importance. Take appropriate measures to create a secure and hazard-free environment:
To provide further clarity, let's address some common questions related to roof decks:
1. What size plywood should be used for roof decking?
2. What material is best for roof decking?
3. Can you put a roof over an existing deck?
4. What are the parts of a roof deck called?
5. What type of plywood is used for roofing?
A roof deck offers a unique and versatile outdoor space that can significantly enhance your property's value, maximize your outdoor living area, and make a positive impact on the environment. Whether you choose to create an intensive green roof deck, an extensive green roof deck, or a usable living space, careful planning, material selection, and compliance with safety regulations are essential to ensure a successful and enjoyable project.
Embrace the opportunity to turn your rooftop into an oasis, and explore the countless possibilities a roof deck presents. Consult with professionals roofing contractors experienced in roof deck design and implementation to make your dream outdoor space a reality.
Don't let your roof go to waste – transform it into a captivating and functional area where you can relax, entertain, and enjoy the stunning views.
Reach out to us today to start planning your perfect roof deck!
Disclaimer: The information provided in this blog post is for informational purposes only and should not be considered as professional advice. Always consult with experts and professionals when undertaking any construction or renovation project.
Your roof, more than any other part of your home, shields you from the elements. But have you ever wondered what lies beneath those stylish and durable architectural shingles?
In this blog post, we will delve into the world of architectural shingles, exploring their construction, benefits, how to choose the right one for your home, and essential maintenance tips. So let's dive in and discover everything you need to know about architectural shingles!
Architectural shingles, also known as laminated or dimensional shingles, are a type of roofing material that offers both durability and aesthetic appeal. Unlike the traditional 3-tab shingles, architectural shingles are constructed with multiple layers of asphalt and fiberglass, resulting in a more robust and visually interesting product.
The design and construction of architectural shingles are what set them apart. These shingles are notable for their dimensional appearance, with a more textured surface that adds depth to your roof. The layers of asphalt and fiberglass are bonded together, creating a stronger and longer-lasting roofing material compared to standard shingles.
When it comes to protecting your home from the elements, architectural shingles are a top choice. These shingles are designed to withstand harsh weather conditions, including strong winds, heavy rain, and even hail. With their multiple layers and high-grade materials, architectural shingles offer a longer lifespan compared to traditional shingles, giving you peace of mind and a roof that will last for years to come.
Aside from their durability, architectural shingles also elevate the visual appeal of your home. The dimensional design and textured surface create a more luxurious and eye-catching roof. Whether you prefer a classic or modern style, architectural shingles come in various shapes, patterns, and colors to suit your aesthetic preferences.
The aesthetics of your home play a significant role in its curb appeal and resale value. Architectural shingles can dramatically enhance the overall look of your property, making it more attractive to potential buyers. The visual impact of a well-designed architectural shingle roof can increase the value and desirability of your house in the real estate market.
In addition to their aesthetic and durability benefits, architectural shingles also provide improved insulation for your home. The multiple layers of asphalt and fiberglass increase the thermal efficiency of your roof, helping to regulate indoor temperatures and potentially reducing energy costs. The enhanced insulation properties make architectural shingles an eco-friendly choice and can contribute to sustainability efforts in the long run.
Now that you understand the many benefits of architectural shingles, it's important to know how to select the right ones for your home. Several factors should influence your decision, including:
It's also essential to choose reputable manufacturers known for offering high-quality architectural shingles. Some well-regarded manufacturers include GAF, CertainTeed, Owens Corning, and Tamko. Research their product lines, read reviews, and consult with roofing professionals to select the most suitable architectural shingles for your home.
To ensure the optimal performance and longevity of your architectural shingle roof, proper installation and regular maintenance are crucial.
By following these maintenance tips and being proactive in addressing shingle issues, you can ensure the longevity and optimal performance of your architectural shingle roof.
Architectural shingles offer a winning combination of durability, aesthetics, and energy efficiency, making them an excellent choice for homeowners looking to enhance their home's roof. By understanding the construction, benefits, and factors to consider when selecting architectural shingles, you can make an informed decision that suits your needs and preferences.
Remember to consult with reputable roofing professionals and consider the suggestions given by manufacturers. With proper installation and regular maintenance, your architectural shingles will provide years of protection and beauty to your home. So why wait? Explore the vast array of architectural shingle options available and start reaping the benefits of this exceptional roofing material today!
When it comes to your residential roof, you want to ensure you're hiring the best professionals in town. That's why choosing a local roofing contractor in Camas is the right decision for your roofing needs. With their knowledge of local regulations and weather conditions, prompt response to emergencies, and commitment to superior customer service, a local roofer can provide the expertise and quality workmanship you deserve. In this blog post, we'll delve into the many benefits of hiring a local roofing contractor in Camas.
One of the significant advantages of hiring a local roofing contractor is their familiarity with local regulations and building codes. They understand the specific requirements and permits needed for residential roofs in Camas, ensuring that your roof installation or repairs meet all necessary standards. This knowledge saves you time and avoids any potential issues or rework down the line. You can trust that a local roofer operates within the guidelines to provide you with a safe and compliant roof.
Roofing emergencies like leaks or storm damage can occur unexpectedly and require immediate attention. Hiring a local roofer in Camas ensures prompt response times during such emergencies, allowing them to address the issue quickly and prevent further damage to your residential roof. With their proximity to your location, a local roofer can be on-site swiftly, providing effective solutions to mitigate any potential risks.
Camas experiences a range of weather conditions throughout the year, from heavy rain to strong winds and occasional hailstorms. Local roofing contractors in Camas have extensive knowledge and experience dealing with these weather patterns. They can recommend roofing materials and systems that are specifically designed to withstand the local climate. By choosing a local roofer, you can have peace of mind knowing that your residential roof will be durable and perform well under the region's unique weather conditions.
When you hire a local roofer in Camas, you receive personalized and reliable services. Local roofing contractors often focus on building strong relationships within their community. They take pride in their work and strive to deliver exceptional customer service to maintain their reputation. By hiring a local roofer, you can expect open communication, attention to detail, and a commitment to completing your roofing project to your satisfaction.
Local roofing contractors in Camas offer a comprehensive range of residential roofing services to meet your needs. Whether you require roof repairs, roof replacement, roof inspections, or maintenance, a local roofer can handle it all. They have the expertise and experience to diagnose problems, recommend the best solutions, and ensure the longevity and integrity of your residential roof. With a local roofer, you can rely on their skills and knowledge to provide top-notch roofing services tailored to your specific requirements.

Now that you understand the benefits of hiring a local roofing contractor, let's explore some tips for finding the best local roofer in Camas:
Start by researching local roofing contractors in Camas. Look for well-established companies with a proven track record of excellence. Check their websites, read online reviews from previous customers, and verify their certifications, such as being certified by GAF, the largest roofing manufacturer in North America.
Reach out to your friends, family, and neighbors who have recently had their residential roofs repaired or replaced. They can provide valuable insights and recommendations based on their personal experiences with local roofers in Camas.
Once you have a list of potential local roofers, schedule consultations to discuss your roofing needs. During the consultation, ask about their expertise in residential roofing services, their approach to projects, and the materials they recommend. Make sure to obtain detailed quotes that outline the scope of work and associated costs.
Before making a final decision, verify that the local roofing contractor is licensed and insured. Confirm that they carry liability insurance and worker's compensation coverage to protect you from any liability in case of accidents or property damage during the project.
Reputable local roofers in Camas offer warranties or guarantees on their workmanship and materials. Ensure that the roofing contractor provides written warranties that specify the duration and coverage details. A reliable local roofer stands behind their work and offers guarantees to provide you with peace of mind.
Ask for references or portfolios of past projects completed by the local roofing contractor. This will give you an idea of their work quality, attention to detail, and the types of projects they have successfully undertaken. Additionally, you can request to visit some of their completed projects if possible.
Are you in need of reliable and top-quality residential roofing services in Camas? Look no further than IBEX Roof. As a local roofer dedicated to serving the Camas community, we have years of experience and a strong reputation for delivering exceptional results. Our team of skilled roofers is committed to excellence, from carrying out roof inspections to complete roof replacements and everything in between. We believe in transparent communication, personalized services, and exceeding customer expectations.
Contact IBEX Roof at (360) 386-6278 to schedule a free consultation for your residential roofing needs. You can also visit our website to learn more about our services and read testimonials from our satisfied customers. Trust IBEX Roof for all your roofing needs in Camas, and let us provide you with a strong and reliable residential roof that will protect your home for years to come.
Remember, when it comes to your residential roof, hiring a local roofing contractor in Camas offers numerous benefits. Their familiarity with local regulations, prompt response to emergencies, extensive knowledge of local weather conditions, personalized services, and access to a wide range of residential roofing services make them the ideal choice for your roofing needs. Choose a local roofer that you can trust and rely on to ensure the safety and durability of your residential roof. Get in touch with IBEX Roof today!
