Are you trying to figure out how many roofing nails to buy before the job starts, or checking whether your installer is using the right amount? For most asphalt shingles, the quick answer is 320 nails per square, since one roofing square covers 100 square feet and usually follows a standard 4-nail pattern.
That number can change depending on wind exposure, roof slope, the shingle product, local code, and the manufacturer’s instructions, so the right total is not always based on your entire roof's square footage alone. That is why many homeowners and trusted roofing contractors look at both the shingle system and the installation requirements before ordering materials.
If you are trying to order the right amount of roofing nails, the fastest answer is this: one roofing square equals 100 square feet, and most standard asphalt shingles use about 320 nails per square with a 4-nail pattern. That gives you a solid starting point before you get into the details of your roof.
Some roofs need more than that, especially when the installation calls for 6 nails per shingle instead of 4. In those cases, the total usually goes up to about 480 nails per square, which is why it is important to look at the shingle type, roof conditions, and installation requirements instead of relying on a rough guess.
The goal is not just to buy enough nails, but to make sure your roof is installed the right way from the start. A simple number can save time during planning, help avoid material shortages, and make it easier to talk with your roofer about what your project actually needs.
Once you know the quick answer, the next step is understanding how that number is worked out. This helps you avoid buying too little, and it also makes it easier to see why one roof may need more nails than another.
For most homeowners, this part should feel simple. You do not need to get deep into roofing math to understand the difference between a standard nailing pattern and a heavier fastening pattern.
This breakdown gives you a more practical way to estimate materials without making the process harder than it needs to be. It also helps you plan ahead so you are not stopping the job just because you came up short on something as basic as roofing nails.
The reason you may see different answers online is because not every roof is installed under the same conditions. The size of the roof matters, but it is only one part of the calculation.
Things like slope, weather exposure, shingle design, and installation rules can all change the number of nails needed. That is why a quick estimate is useful, but the final number should always match the roof system being installed.
When you look at all of these factors together, the estimate becomes much more accurate. That matters because getting the nail count right is not just about buying materials, it also helps protect the roof’s performance and keeps the installation in line with the product requirements.
A lot of homeowners get stuck on this part because both numbers show up online, and both can be correct depending on the roof. In many standard asphalt shingle installations, 4 nails per shingle is common, but some roofs need 6 nails for a stronger hold.
The difference usually comes down to wind exposure, roof slope, local code, and the shingle manufacturer’s instructions. If the wrong fastening pattern is used, the shingles may not perform the way they should, and that can also create problems with warranty coverage.
The main benefit of knowing the difference is simple: it helps you ask better questions before materials are ordered or work begins. It also gives you a clearer way to check whether the roof is being installed the way it should be, instead of relying on assumptions.
Getting the nail count right is important, but using the right nail size matters just as much. If the nails are too short, too weak, or not made for roofing use, the shingles may not hold the way they should.
Most asphalt shingle roofs use roofing nails that are chosen to match the shingle thickness and roof deck. The goal is to make sure the nail penetrates properly into the deck, holds firmly, and stands up to moisture without breaking down too early.
A good roofing nail is not just about length. It also needs the right head size, the right material, and corrosion resistance that fits the job, especially on roofs exposed to rain, humidity, or coastal air.
Buying roofing nails sounds simple until you are standing there trying to figure out how much is actually enough for the job. Nails may be sold by box, coil, or weight, so it helps to know how your roofing system is being installed before you buy.
It is also smart to plan for more than the basic field shingles alone. Starter rows, ridge caps, waste, and small installation errors can all increase the total, which is why buying a little extra is usually better than coming up short halfway through the project.
This part of the planning process can save time, reduce extra trips for materials, and keep the job moving. Whether the roof is a smaller home project or a larger contractor job, a better estimate makes the whole install easier to manage.
It is easy to focus on the main shingle area and still miss a few details that change the total nail count. Small estimating mistakes can lead to extra trips for materials, delays during the job, or fastening issues that affect how the roof performs.
Paying attention to these details helps the project stay on track and helps the roof perform the way it should. A more careful estimate at the start usually means fewer problems once the work begins.
If you want a quick way to estimate roofing nails, the easiest method is to multiply the number of roof squares by the expected nails per square. Then add a little extra for ridge caps, starter shingles, and normal waste so your estimate is closer to what the job will actually require.
This simple approach makes planning faster and gives you a better starting point before materials are ordered. It is a practical way to avoid coming up short and helps you size the job with more confidence.
Having the right number of nails is only part of the job. If the nails are driven too high, too low, at an angle, or with too much force, the shingles may not hold the way they should.
That is why nail placement matters just as much as nail count. A properly fastened roof depends on both, and getting both right helps support better wind resistance, better durability, and a cleaner installation overall.
Yes, different roofing materials can use different fastening patterns, which is why one rule does not apply to every roof. Even within shingle roofing, standard asphalt shingles, architectural shingles, and specialty products may have different installation instructions.
This section should help readers understand that the article is mainly focused on asphalt shingles, while still making it clear that other roofing materials may follow different fastening requirements. That added context helps prevent confusion without pulling the blog away from its main topic.
If you want help figuring out how many nails, shingles, and other materials your roof may need, IBEX Roof can help you get a clearer estimate for the job. Every roof is different, and a more accurate material list can help you plan better and avoid unnecessary delays.
Our roofers can review your roof, help you account for the right fastening pattern, and give you a free estimate based on your project. To get started, call (503) 287-5552 and talk with IBEX Roof about the materials needed for your roof.
Securing the right financing for a new roof can seem daunting, but understanding your roof financing options is the first step toward a successful roof replacement. Many homeowners face the challenge of unexpected roof needs, and financing a new roof becomes essential when a full roof repair or replacement is necessary. This article explores the various roof loan options available to help you finance your new roof and make informed decisions.
Roof financing refers to the various loan options and financial products available to homeowners to cover the cost of a new roof or a major roof repair. Understanding what roof financing entails helps homeowners to cover the cost of replacing a roof. These roof financing options range from personal loans and home equity loans to credit cards and contractor financing, each with its own interest rate and credit requirements. The goal is to find affordable financing that aligns with your budget and roof project needs, ensuring you can pay for your roof without undue financial strain.
Financing a new roof involves exploring several options. When considering how to pay for this significant home improvement, remember that some options include:
Additionally, some roofing companies offer financing, providing convenient, albeit potentially pricier, loan products directly through the roofing contractor.
Choosing to finance a new roof offers numerous benefits, particularly when faced with urgent roof needs. Financing allows you to replace your roof promptly, preventing further damage to your home and maintaining its structural integrity. By securing the best roof financing options, you can manage the cost of a new roof through manageable monthly payments, making it easier to budget and avoid significant upfront expenses. Furthermore, many home improvement loans offer competitive interest rates, especially if you have excellent credit, enabling you to get the best deal possible and ensuring that your roof project doesn't become a financial burden.
Personal loans present a viable financing option for a roof replacement, especially if you're looking to avoid using your home as collateral. These loans offer a lump sum that you can use to finance your new roof, with fixed monthly payments spread over a set period. The interest rate on a personal loan will largely depend on your credit score, so having excellent credit can help you secure a better deal. While personal loans may have higher interest rates than home equity loans, they offer a quick and straightforward way to finance your new roof without affecting your home equity options. For many homeowners needing roof repair or replacement, personal loans provide a practical solution to cover the cost.
Credit cards can be a suitable financing option for smaller roof repair projects or if you need a new roof but can pay off the balance quickly. Many credit cards offer promotional periods with 0% interest rates, allowing you to finance a new roof without incurring additional interest charges, provided you pay it off within the promotional timeframe. However, it’s crucial to consider the credit limit and interest rate after the promotional period ends, as high interest rates can make this a costly financing option. Despite potential drawbacks, responsible use of credit cards can be an effective way to manage immediate roof needs and finance your new roof efficiently, especially when roofing companies offer financing this way.
A home equity line of credit (HELOC) is a flexible loan option that uses your home equity as collateral, providing a revolving credit line you can draw from as needed for roof projects. This type of roof financing allows you to borrow only what you need for the roof replacement, making it ideal if you're unsure about the total cost of a new roof. The interest rate on a HELOC is typically variable, which means it can fluctuate with market conditions. While HELOCs can offer competitive interest rates, they also require careful budgeting to manage the monthly payments and avoid the risk of losing your home if you can't pay for your roof. Exploring home equity options can be a strategic way to finance a new roof, particularly for extensive roof repair or replacement.
Selecting the right roof loan requires careful consideration of several factors to ensure you can finance your new roof effectively. Your credit score plays a crucial role, as it significantly influences the interest rate and loan terms available to you. Understanding your credit requirements will help you determine which roof financing options are within reach. Assess your budget to determine how much you can afford in monthly payments, ensuring that you can comfortably pay for your roof without straining your finances. Compare different loan options, such as personal loans and home equity loans, to find the best fit for your roof project and overall financial situation, aiming for affordable financing that meets your roof needs.
Comparing interest rates and terms is essential when evaluating roof financing options to secure the best deal for your roof replacement. Different types of roof loans, such as home equity loans and personal loans, come with varying interest rates, depending on your credit and the lender. Shorter loan terms may mean higher monthly payments but lower overall interest paid, while longer terms reduce monthly payments but increase the total interest. Understanding these trade-offs allows you to choose a loan product that aligns with your budget and financial goals. Always compare interest rates from multiple lenders and carefully review the loan terms to ensure you finance your new roof in the most cost-effective manner. Getting the best deal involves diligent research and a clear understanding of the different loan offers available for replacing a roof.
Working with roofing companies that offer financing can provide a convenient way to finance your new roof. Some roofing contractors have partnerships with lenders, allowing them to offer financing options directly to homeowners. While this can streamline the roof replacement process, it’s crucial to compare these offers with other roof financing options to ensure you’re getting the best roof financing options. Roofing company financing might come with competitive interest rates, but it’s important to carefully review the loan terms, fees, and conditions. Always do your due diligence and compare multiple loan offers to make an informed decision that aligns with your budget and roof needs. Exploring these alternatives ensures you can pay for your roof without overpaying and secure affordable financing for your roof project.
When you need a new roof, understanding various payment plans can make roof replacement more manageable. Many roofing companies offer financing with different types of roof loan options, including installment plans that break down the cost of a new roof into affordable monthly payments. These plans can be a convenient financing option if you don't want to use your home equity or apply for a personal loan. Carefully reviewing the loan terms, including the interest rate and any associated fees, is crucial to ensure the payment plan aligns with your budget and you can finance your new roof without added financial strain. Exploring these affordable financing plans helps homeowners manage their roof needs.
Exploring replacement financing options is essential when considering how to finance your new roof. Home equity loans offer a lump sum using your home as collateral, while a home equity line of credit (HELOC) provides a revolving credit line. Personal loans and credit cards are other financing options, each with different interest rates and credit requirements. Roofing companies also offer financing, streamlining the process with potential benefits. Comparing these roof financing options helps you find the best deal, considering your credit score, loan amount, and monthly payment capacity. Understanding these choices ensures affordable financing that suits your roof project needs and helps you pay for your roof efficiently.
Using a home equity line of credit (HELOC) for roof financing can be a smart financing option if you need flexibility. This type of roof loan allows you to borrow funds as needed, making it suitable for projects where the final cost of a new roof isn't fixed. With a HELOC, the interest rate is typically variable, which can be an advantage or disadvantage depending on market conditions.
Homeowners with excellent credit can often secure better terms, making it an attractive alternative to personal loans or credit cards. Ensure you understand the repayment terms and potential risks, such as the possibility of losing your home if you can't pay for your roof. Exploring home equity options can lead to affordable financing for your roof needs.
Many homeowners have common questions about roof loans and how to finance your new roof. One frequent query involves understanding the credit requirements and how your credit score impacts the interest rate. Another common concern is whether to choose a secured loan, like a home equity loan, or an unsecured personal loan.
Homeowners also wonder about the benefits of working with roofing companies that offer financing versus securing a loan independently. Addressing these questions is crucial for making informed decisions, ensuring you choose the best roof financing options that align with your financial situation and helps you replace your roof effectively. Understanding what types of roof loan is best for you is key.
Before you finance your new roof, there are several important factors to consider. First, assess your roof needs and get multiple quotes from roofing contractors to understand the potential cost of a new roof. Check your credit score to anticipate the loan products and interest rates you might qualify for.
Compare roof financing options such as home equity loans, personal loans, and credit cards, evaluating the terms, fees, and monthly payment obligations. Also, research roofing company financing to see if it offers competitive rates. Thorough preparation ensures you find affordable financing that fits your budget and helps you pay for your roof responsibly, avoiding financial strain and getting the best deal.
To successfully finance your roof project and get the best roof financing options, start by establishing a clear budget. Get multiple quotes to understand the true cost of a new roof. Improve your credit score to secure better interest rates on loan products. Explore different roof financing options, including home equity options and personal loans.
Evaluate the fine print of each loan offer, paying close attention to interest rates, fees, and repayment terms. Also, consider roofing company financing, but always compare it to other loan offers. Successfully navigating the process ensures you finance your new roof affordably and manage your roof needs efficiently. By following these tips, you can pay for your roof without financial stress.
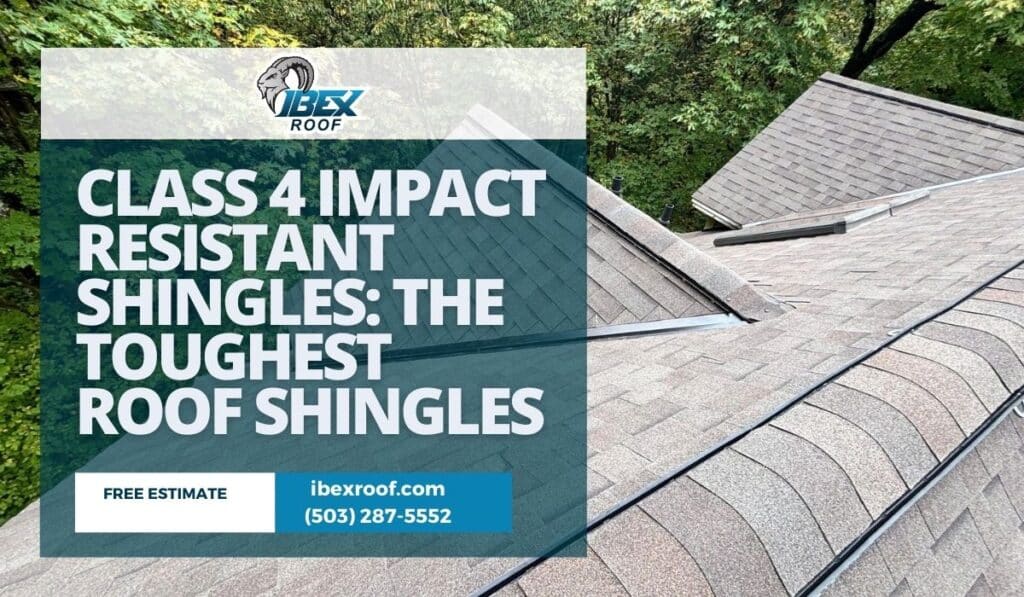
Class 4 impact resistant shingles are roofing shingles tested and rated to withstand severe impact from hail and debris. The Class 4 designation — the highest impact rating under UL 2218 testing, means these shingles offer superior protection against cracking, tearing, and punctures compared to standard asphalt shingles.
Class 4 impact resistant shingles are typically made with reinforced fiberglass matting and a thicker asphalt overlay, sometimes with an added polymer or rubberized backing to absorb impact. Manufacturers may include specialized granules and adhesive sealant strips to improve durability and wind resistance.
Proper installation is critical to get the full benefit of class 4 impact resistant shingles. Key points:
The upfront cost for class 4 impact resistant shingles is higher than standard asphalt shingles, but the long-term value often outweighs the initial expense. Savings can come from reduced repair bills, longer service life, and potential insurance premium reductions. When evaluating cost, compare product warranties, expected lifespan, and local hail/storm risk.
Maintenance for class 4 impact resistant shingles is similar to other roofing materials: regular inspections, clearing debris, checking for loose or damaged shingles after storms, and keeping gutters clean. With proper care, many Class 4 roofs can last as long as premium architectural shingles — often 20–30 years depending on climate and installation quality.
Yes, especially in hail-prone or high-wind areas. They reduce storm damage and can lower insurance costs, offering strong long-term value.
No, manufacturers produce Class 4 shingles in a range of styles and colors that mimic traditional architectural shingles and designer profiles.
Many insurance companies provide discounts for impact-resistant roofing. Check with your insurer for specific eligibility and required certifications.
When selecting class 4 impact resistant shingles, compare UL 2218 test ratings, warranty terms, manufacturer reputation, and color/texture options. Ask for product samples and request references for installed projects in your area.
Class 4 impact resistant shingles are among the toughest roof shingles available, offering exceptional protection against hail and storm damage. For homeowners in vulnerable climates, they deliver durability, potential insurance savings, and peace of mind that your roof can withstand severe weather.
Contact a qualified roofing contractor to evaluate whether class 4 impact resistant shingles are the best choice for your home.
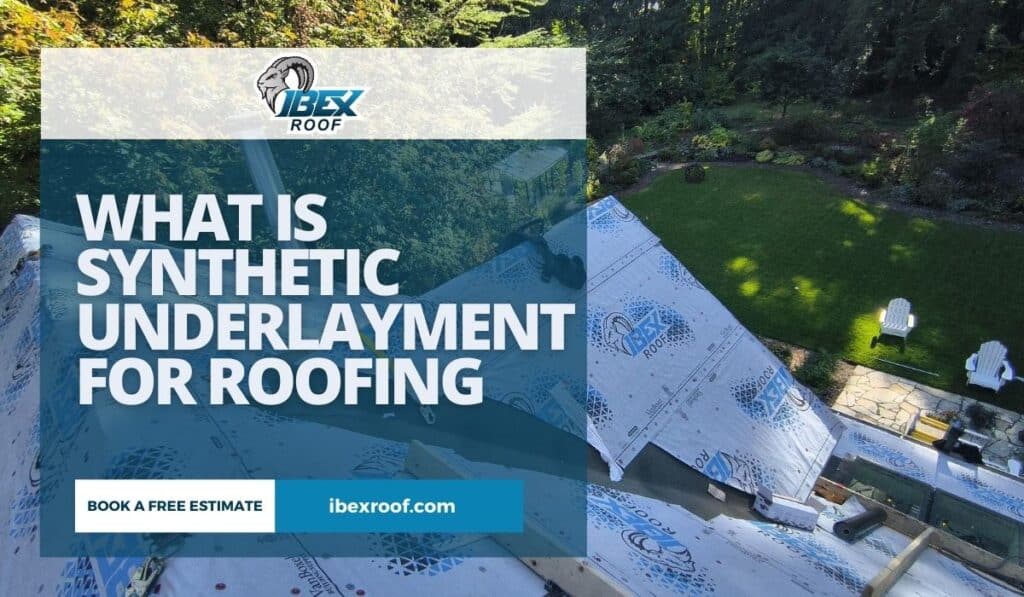
When installing a new roof, or replacing an old one, it's easy to focus solely on the visible materials like shingles or metal roofing. However, a crucial component that often goes unnoticed is the roofing underlayment. Synthetic roof underlayment has become a popular choice, providing key benefits, such as:
Synthetic underlayment is a type of roofing underlayment manufactured from synthetic materials like polypropylene or polyethylene. These materials are woven or spun-bonded to create a strong, water-resistant sheet that is then coated to enhance its properties.
Unlike traditional felt products, synthetic roofing underlayment is designed not to absorb moisture, preventing issues like mold growth and material degradation, while also providing better tear strength and overall durability, contributing to the longevity of roofing systems.
Here's how synthetic underlayment provides improvements over traditional felt:
Synthetic underlayments also often require fewer overlaps due to their width, decreasing material usage and labor time.
Synthetic underlayments must meet specific ASTM standards to ensure their quality and performance. These standards address key features such as water resistance, tensile strength, and UV resistance. Compliance with ASTM standards ensures that the synthetic roofing underlayment will provide reliable protection against moisture and other environmental factors.
A roofing contractor will make sure the selected material meets all necessary standards for the specific roofing project and local building codes, ensuring a proper and long-lasting installation.
The installation process of synthetic underlayment on a shingle roof is straightforward but requires precision. The roofing contractor begins by ensuring the roof deck is clean and dry. The synthetic roofing underlayment for sloped roofs is then rolled out, starting from the lower edge of the roof, overlapping each course according to the manufacturer's specifications. Fasteners, such as nails or staples, are used to mechanically attach the underlayment to the roof deck, ensuring it is secure. The anti-skid bottom layer of the synthetic underlayment also improves walkability and safety during the installation.
Synthetic underlayment exhibits excellent compatibility with various types of roof decks, including plywood or OSB. Its design ensures that it does not react negatively with the deck material, preventing degradation or corrosion over time. Unlike traditional felt, synthetic underlayment does not absorb moisture, which is critical in preventing mold growth and maintaining the integrity of the roof system. This feature ensures that the roof deck remains dry and structurally sound, thereby prolonging the lifespan of the entire roofing system.
One of the key advantages of synthetic underlayment is its exceptional performance across a wide range of weather conditions. It is UV resistant, which means it can be left exposed for a certain period without deteriorating. The synthetic roofing underlayment provides a reliable barrier against rain and wind, preventing moisture from penetrating to the underlying structure. Its tear strength ensures it can withstand high winds, offering superior protection. The underlayment is designed to maintain its properties across a broad temperature range, ensuring long-term durability and performance.
The pricing of synthetic roof underlayment is influenced by several factors. Here's a breakdown of some key elements:
| Factor | Impact on Pricing |
|---|---|
| Material Composition (Polymer type, UV resistance coatings) | Affects the cost. |
| Tear Strength and Thickness | Thicker, more durable underlayment generally has a higher price. |
| Brand Reputation, ASTM compliance, Anti-skid bottom layer | Further influence pricing per roll or per roll on a pallet. |
When comparing costs, synthetic underlayment is often more expensive upfront than traditional felt. However, its superior performance can offer long-term savings. While asphalt shingle and metal roofing each have unique material expenses, synthetic roofing underlayment for sloped roofs typically requires fewer laps during installation, reducing the amount of material and labor needed. Consider the cost of potential repairs or replacements due to moisture damage when evaluating traditional felt, a key consideration that often balances out the pricing advantages of synthetic roofing underlayment for sloped roofs.
Investing in synthetic underlayment provides long-term value through increased roof longevity and reduced maintenance. Its resistance to UV exposure means it won't degrade as quickly as traditional felt, which can dry out or leach over time. The synthetic roofing underlayment’s ability to withstand harsh weather conditions, including heavy rain and high winds, ensures that the roofing systems remains well-provided and protected. This durability minimizes the need for frequent repairs, making synthetic underlayment a cost-effective choice in the long run for roof protection.
One of the primary advantages of synthetic underlayment is its exceptional moisture resistance. Unlike felt products, which can absorb water and become saturated, synthetic roof underlayment is manufactured to repel water, preventing moisture from penetrating the roof deck. This feature is crucial in preventing mold growth and maintaining the structural integrity of the roofing systems. The water-resistant nature of the synthetic roofing underlayment ensures that the underlying structure remains dry and protected, regardless of weather conditions.
The synthetic roofing underlayment plays a vital role in extending the lifespan of a roof. By preventing moisture accumulation, it safeguards the roof deck from rot and decay. This protection is particularly important in environments with high humidity or frequent rainfall. The durability and tear strength of synthetic underlayment ensure it remains intact over time, even when exposed to extreme weather, enhancing the overall longevity of the shingle, asphalt shingle or metal roofing system.
Selecting the right synthetic underlayment is essential for effective mold growth prevention. Look for products that are specifically designed with enhanced water resistance and vapor permeability, allowing any trapped moisture to escape without compromising the material's integrity. Consider the climate and typical weather conditions in your area; for example, synthetic roofing underlayment for sloped roofs is preferable in areas with heavy rain or snow. Ensure the product meets relevant ASTM standards and comes with a reliable warranty, offering added assurance of its performance and durability when installed by a professional roofing contractor.
Ever looked at your roof after a storm and wondered if it’s built to take another hit? You're not alone, a lot of homeowners ask if upgrading to impact resistant shingles is really worth the extra cost.
If you’ve been weighing whether an impact resistant roof could actually save you from surprise repairs or help with insurance, this guide breaks down everything clearly. We’ll explore how these shingles work, what sets them apart, and whether companies like IBEX Roof recommend them based on where you live and what kind of protection you need.
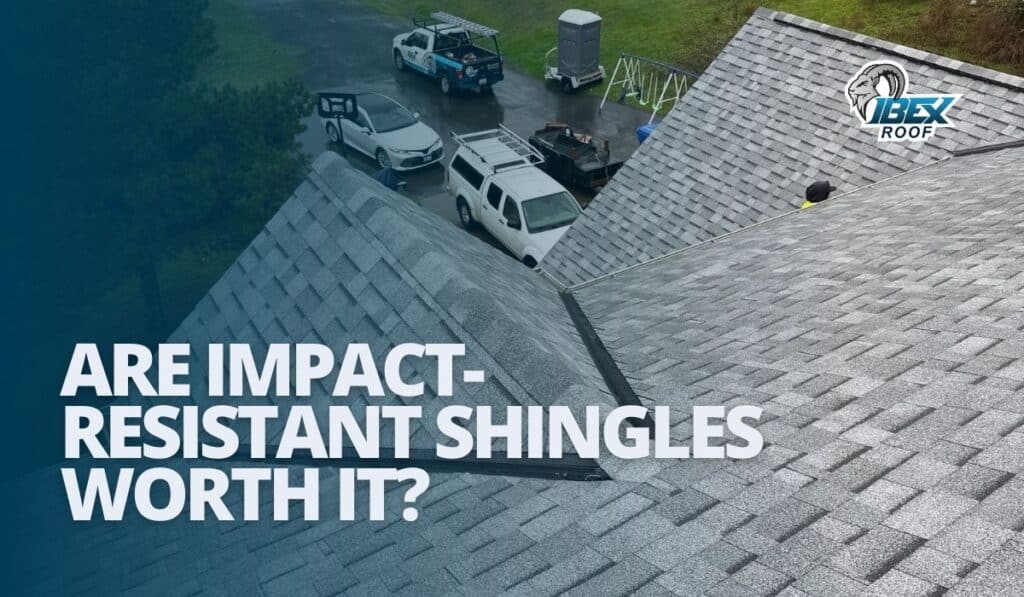
Impact resistant shingles are built to take a harder hit than the typical roof shingle. They’re made to stand up better when hail, branches, or debris land on your roof, so you’re less likely to see cracks or loose granules after a storm.
Regular shingles still get the job done, but they’re easier to bruise or break when the weather turns rough. Big brands like GAF, Owens Corning, CertainTeed, and DaVinci all make impact resistant options, so you can choose a tougher shingle without giving up the style you want for your home.
Roofing manufacturers use a test called UL 2218 to rate how well a shingle handles impact. The ratings run from Class 1 to Class 4, and Class 4 is the top level, meaning the shingle held up better under controlled hits in the lab.
For a homeowner, a Class 4 impact resistant shingle means a roof that’s built with extra protection in mind. Groups like FM Approvals and IBHS also run their own testing that looks more like real storms, which helps confirm whether a product can hold its own when the weather gets rough.
Choosing impact resistant shingles is really about avoiding headaches after bad weather. Instead of wondering how much damage the last storm caused, you’re giving your roof a better chance to come through in good shape.
For many homeowners, especially those working with a contractor like IBEX Roof, these benefits add up to a roof that feels like a smarter long-term move. You’re not just changing how your roof looks, you’re changing how it stands up to the weather year after year.
When you’re looking at impact-resistant shingles, it helps to see both sides of the decision. There are clear benefits in protection and peace of mind, but there are also trade-offs that matter for your budget and your home.
Pros: You get tougher roof shingles that are built to handle harsher weather and can cut down on future repairs. Some homeowners also see better long-term value when they choose a class 4 shingle as part of a full roof replacement.
Cons: You’ll usually pay more up front, and not every home or climate truly needs impact-resistant roof shingles. The extra cost only makes sense if it lines up with your local weather and how long you plan to stay in the home.
Whether impact-resistant shingles are worth it comes down to your specific situation, not just what looks good on paper. Your local hail and storm risk, the age and condition of your current roof, and how much room you have in your budget all play a big role.
If you’re in an area that sees frequent hail, strong winds, or heavy storms, a class 4 impact-resistant roof can feel like a smart upgrade rather than a luxury. On the other hand, if weather risks are low and your current roof still has life left, it may make more sense to plan ahead and save for a future replacement instead of rushing into a premium system today.
When you’re picking impact-resistant materials, think about three things: how much you want to spend, how you want the roof to look, and what your weather is really like. Asphalt options usually keep costs lower and blend in easily with nearby homes, while synthetic products lean more premium and can offer extra durability and style.
It also helps to hear straight from the roofer what they’d actually install on a house like yours. Ask which brands have done well in your area, whether the product is truly tested as a Class 4 shingle, and how long they typically see those roofs last. Follow up with simple questions on the warranty and any upkeep you should plan for so you’re not guessing later
Reach out to a roofing pro when the roof is starting to age, shingles are curling or missing, or storms have been rougher than usual. A visit like that can tell you whether a repair is enough or if it’s smarter to plan on impact-resistant shingles with your next new roof.
During an inspection, the roofer can look at the shingles, flashing, and decking, check for hidden leaks, and note anything that might matter for insurance. If you’re on the fence, scheduling a simple quote or roof check with a local contractor gives you real numbers and clear options instead of guessing what to do next.
Is your roof due for an upgrade and you're wondering which shingles will actually hold up and look good for years to come? Whether you're replacing an old roof or building new, choosing the best roofing shingles isn’t just about looks or price.
The right shingles protect your home from harsh weather, affect energy efficiency, and can even influence resale value. With so many shingle brands and options, knowing where to start can save you money and stress.
In this post, you'll get straight answers: quick picks for different needs, types of shingles explained, top brands compared, and what to ask your residential roofing contractor before signing anything.
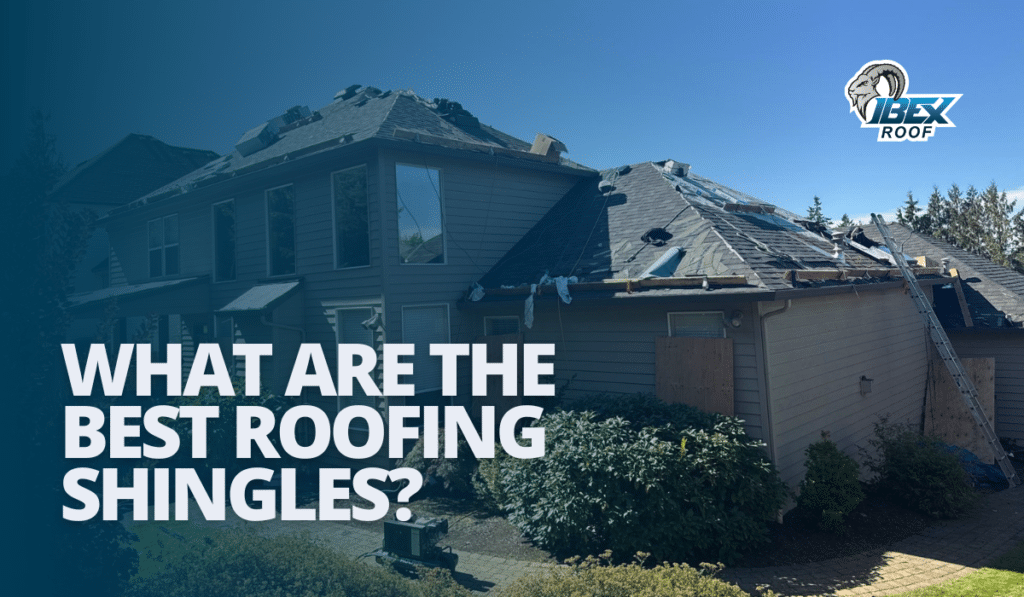
If you're just looking for a quick recommendation, this section helps you narrow it down fast. Not every homeowner has time to research every detail, so we've broken it into simple categories based on what most people care about.
Some shingles are made to give you the best mix of looks, strength, and price. Others focus more on weather resistance, premium appearance, or keeping your budget in check. It really comes down to what your home needs and what you expect from your roof over the years.
Whether you live in a storm-prone area, want something that stands out in your neighborhood, or just need a reliable fix that fits your budget, there’s an option here that makes sense. This list takes into account performance, lifespan, and what homeowners typically ask about first.
These aren’t just “best on paper” these are the kinds of shingles people ask residential roofing contractors about every day when trying to make the right call for their homes.
Not all shingles are created equal, and picking the right type matters more than many homeowners realize. Each option has trade-offs depending on how long you plan to stay in the home, the look you’re going for, and your local weather.
This breakdown helps you match what you want from your roof with the material that fits your needs, not just what's trending or popular.
Not every home needs the same kind of roof. What works great in one region or on one house style might not be the right fit for yours. This section helps break things down so you can focus on what matters most to your situation.
If you're dealing with tough weather or strict neighborhood rules, your roofing choice needs to reflect that. Your roof shingles should be picked with your local climate, your budget, and even the shape and structure of your roof in mind.
Instead of trying to sort through every product out there, start with where you live and what your home needs to handle. This list makes it easier to focus on the best shingles based on how you live, not just how they look on a shelf.
It’s not just about the type of shingle, it’s about choosing the right one that checks the boxes for your weather, roof size, budget, and even your HOA’s guidelines.
By climate:
By budget:
By roof pitch & weight limits:
By HOA/architectural style:
When homeowners ask about the best shingles, they’re usually talking about trusted brands with proven track records. Some brands are known for durability, others for color selection, and a few for standout warranties.
Choosing a brand also means choosing the system that comes with it—many offer certified installers, matching components, and better warranty terms when everything is used together. These details matter more than people often realize.
You’ll also want to look at ratings like UL 2218 for impact resistance and ASTM D3161 for wind. Don’t forget to check what the warranty actually covers—some offer longer non-prorated periods or better transfer options if you sell the home.
Here's a breakdown of top options that homeowners consistently ask residential roofing contractors about:
How to choose between lines:
These are the names contractors mention often because they've been tested in different regions and real-world conditions. It's not just the brand nam, it’s how the product holds up on a real roof, season after season.
Choosing the right shingle isn’t just about materials or brand names. It’s about making sure your roof can handle the weather and conditions where you live. A good choice keeps your home protected longer and helps prevent early repairs.
Finally, contractor quality is one of the biggest factors. Hiring someone who is certified with the brand you choose helps ensure the shingles perform as intended and keeps your warranty intact.
If you're unsure which shingles fit your home best, a professional inspection makes the decision much easier. A licensed contractor can look at your roof’s structure, the weather patterns in your area, and your plans for the home before giving a clear recommendation.
Scheduling an inspection or quote helps you understand what your roof actually needs instead of guessing. It also gives you a chance to compare options and choose what feels right for your home.
A full roofing system is key to performance, not just the shingles. Underlayment, flashing, ridge venting, and starter strips all play a role in how well the roof holds up over time.
For the best results, consider working with IBEX Roof or another trusted contractor who can walk you through the materials, show product samples, and help match colors and styles to your home.
You’ve just gotten quotes from a few roofers in Portland, and now they’re talking deposits, schedules, and payment terms. One contractor says 50% upfront. Another wants everything before the job starts. You’re thinking: Should I really hand over that much money before anyone even climbs a ladder?
Knowing when and how much to pay can make or break your roofing experience. And here's one rule every homeowner should know: never pay for a roofing job upfront. Let’s walk through how payment schedules should actually work, what’s normal in the industry, and how to protect your investment.
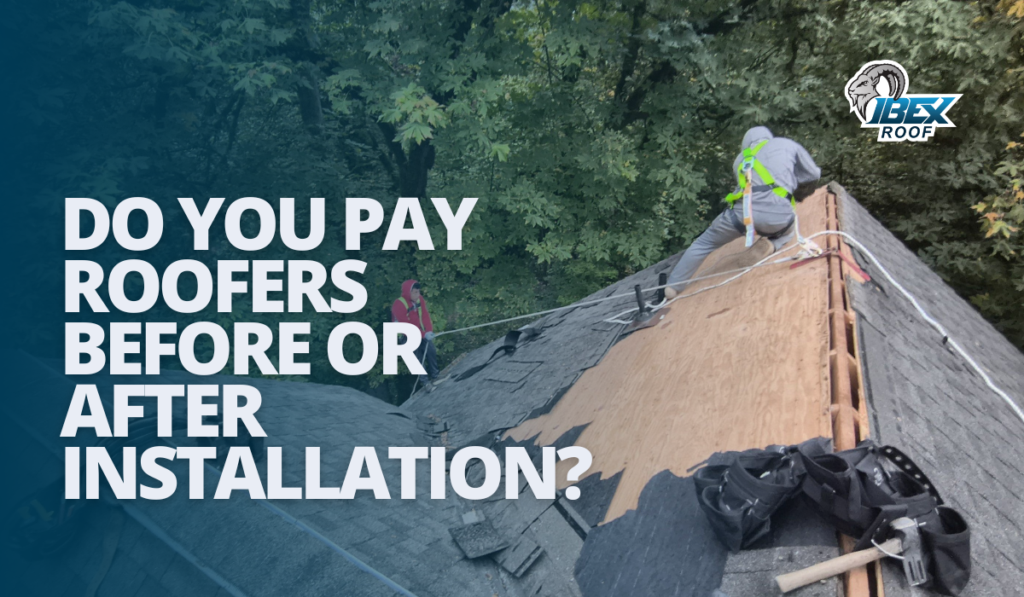
When you’re planning a roof replacement, understanding the payment schedule is just as important as choosing the right shingles. Many homeowners aren’t sure how much to pay and when, and that’s where a clear payment plan comes in.
A reliable contractor will break down the payment terms before any work starts. That usually means splitting the total cost into stages so you’re not paying too much too soon.
This setup protects both you and the contractor. It gives you control over your investment while making sure the roofer has what they need to move forward. Always ask for this kind of breakdown before signing anything.
Note: According to Angi, most reputable contractors request no more than 30% upfront. Avoid contractors asking for full payment before any work begins.
Not every roofing job follows the same payment plan. The structure depends on a few key things, and knowing them helps you ask the right questions before you agree to anything.
Larger projects with more work involved often come with more steps in the payment schedule. The type of materials used and how quickly they can be delivered can also change how and when you’re asked to pay.
If your roof is part of an insurance claim, there may be delays or split payments coming through. Some roofers also offer financing options, which can change how you structure payments. Talk through these details with your contractor so you’re not surprised later.
Tip: Insurance-funded jobs may have split checks, mortgage company involvement, or escrowed funds. Discuss these upfront.
Some roofing offers sound great until you look closer. Knowing what red flags to watch for can save you money and stress in the long run.
If a roofer asks for full payment or cash upfront, that’s a big warning sign. A reputable contractor will never pressure you to pay before any work is done.
A clear contract, valid insurance, and references should be standard. If any of these are missing, it's best to walk away. Trust matters, and a scam often starts with cutting corners on paperwork.
Bonus Insight: According to the BBB, roofing contractors are among the most complained-about service providers due to scams and poor practices.
When you hire a roofer, you want to know your money and your home are safe. The best way to do that is by making sure every detail is clear before the first nail goes in. A reputable contractor will be open about the payment schedule, materials, and start dates.
The terms of the contract should spell out exactly what you’re paying for and when payments are due. Having this in writing protects both you and the contractor, and it leaves no room for confusion.
Secure payment methods like check or credit card are safer than cash. And remember, never pay the full amount upfront. Pay as the work moves along and only release the final balance once the project is completed to your satisfaction.
Pro Tip: Request a copy of the contractor’s general liability insurance and check expiration date and coverage amounts.
Before you hand over the final payment, take time to do a careful walk-through with your roofer. This is your chance to make sure everything was completed to your satisfaction and that your home is left in good condition.
Use this step to review any small fixes or clean-up tasks. A good contractor will handle these without hesitation. Hold onto the remaining balance until the list is complete.
Only release the final payment when the work is finished, the warranties are in your hand, and the payment terms have been met. This step keeps the contractor motivated to follow through on every detail.
Checklist: Include confirmation of debris removal, proper ventilation installation, manufacturer registration, and visual inspection.
Paying your roofer isn’t just about writing a check. It’s also about protecting yourself from future claims. That’s why lien waivers and proper documentation are so important in every contractual agreement.
Each time you make a payment, ask for a conditional waiver. Once the funds clear, request an unconditional waiver. This proves that the contractor and any subcontractors have been paid and can’t file a lien on your home.
Keep all documents organized. Signing a contract, tracking when payments are due, and storing receipts can save you stress later if you sell your home or file a warranty claim. Paying by check or credit card also helps you keep a clear record.
Filing Tip: Organize documents digitally and physically. These may be needed for future home sales or warranty claims.
Every homeowner’s situation is a little different. That’s why it helps to talk with a roofing contractor about which payment method works best for you. Whether you’re paying by credit card, cash, or check, the right contractor will explain the payment schedule in detail.
Some companies even offer financing options to spread the cost of a new roof into manageable monthly payments. Asking upfront can help you plan your budget and avoid surprises.
We’ll walk you through deposits, milestones, and final payment, no pressure, no surprises.
Call IBEX Roof today for a free estimate. We’ll explain your payment schedule, review financing options, and make sure you feel confident before the project begins.
Ever notice a dark stain on your ceiling after heavy rain or hear something flapping on the roof during a windstorm? These are the small warnings homeowners often miss, until they turn into expensive problems. Regular roof maintenance is how you avoid that scenario entirely.
A professional roof maintenance company handles routine roof inspections, roof and gutter cleaning, and roof repairs that keep your roof performing at its best. It’s not just about fixing what’s broken, maintenance is about preventing the damage before it starts. Services typically include clearing debris, sealing flashings, checking for loose or missing shingles, inspecting vents, and treating moss or algae buildup. Staying proactive extends the lifespan of your roof, protects your home's value, and ensures you stay covered under manufacturer warranties.
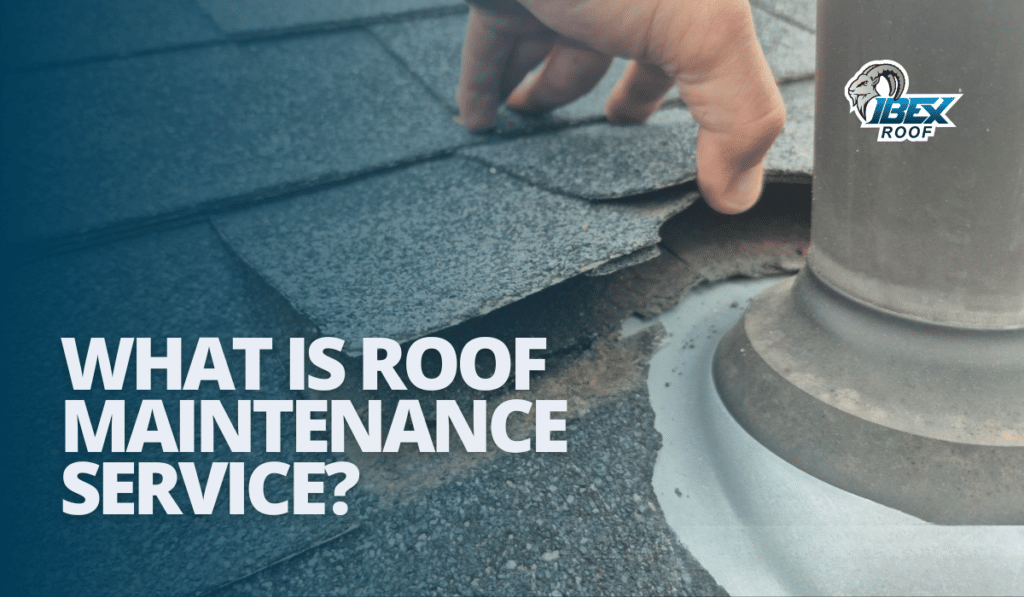
A roof maintenance service is not just a quick check, it is a way to make sure your home stays protected year after year. It is about keeping your roof strong, so you do not have to worry about leaks or surprise repairs.
Residential roof maintenance includes small but important steps like cleaning, repairs, and inspections that keep your roof working the way it should. By staying on top of these tasks, you help prevent small issues from becoming expensive problems later.
Preventative roof maintenance is like giving your roof regular care before it asks for it. Instead of waiting for damage to show, you are protecting your home and saving money in the long run.
If you have ever wondered what is roof maintenance, the answer is simple. It is proper roof maintenance done on a regular schedule that extends the life of your roof, keeps your home safe, and helps avoid costly replacements.
When you schedule maintenance, you want to know exactly what you are paying for. A good roof maintenance checklist makes sure no detail is missed, and every part of your roof gets the attention it needs.
These maintenance tasks are designed to extend the life of your roof and give you peace of mind, knowing it is well cared for by a professional.
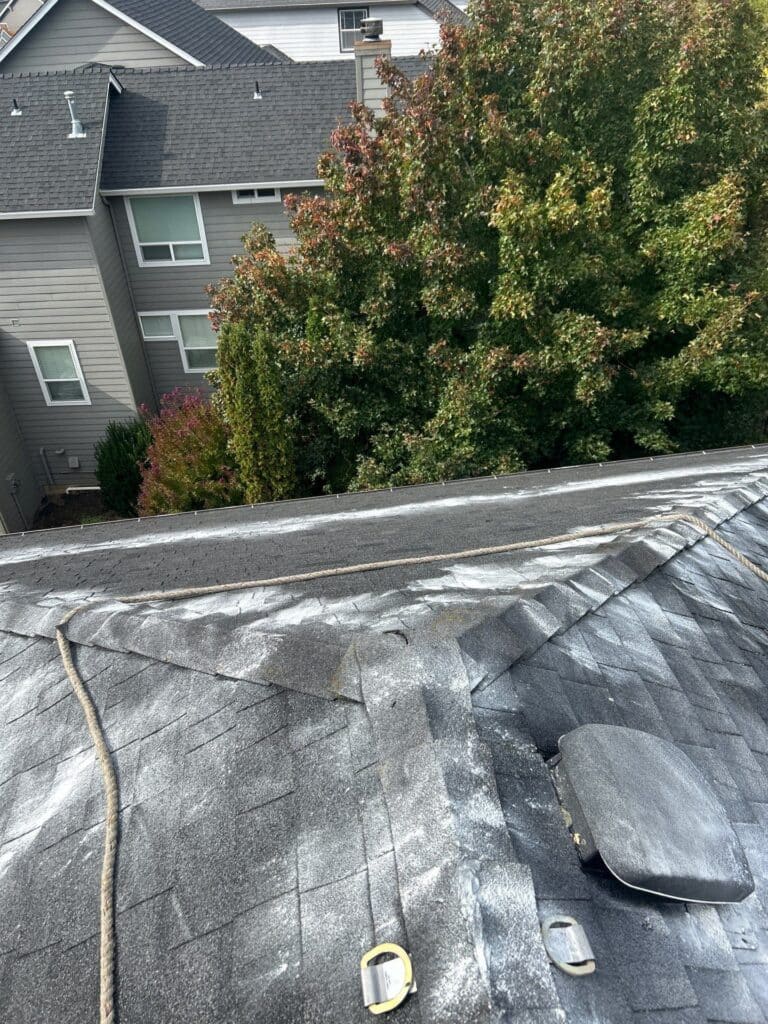
Keeping up with regular roof maintenance may not seem urgent, but it can make a big difference in how long your roof lasts and how much you spend on it over time. These small checks and repairs help avoid bigger problems that cost more and take longer to fix.
Preventative roof maintenance gives you peace of mind by catching issues early. You are not just protecting your roof, you are protecting your entire home from leaks, mold, and damage.
Extended Lifespan: Taking care of your roof through regular checks and cleaning helps extend the lifespan of your roof. You will get more years out of it before needing a replacement.
Preventative Care: It’s easier and cheaper to fix a small crack or loose shingle than deal with major leaks. Maintenance helps you avoid costly repairs by fixing things early.
Maintained Property Value: A clean, well-maintained roof keeps your home looking great and can boost its value if you ever decide to sell.
Improved Safety: A strong roof keeps your home safe from water damage, mold, and other problems that can grow if left untreated.
Insurance & Warranty Protection: Many roofing warranties and home insurance plans require proof of regular maintenance. Skipping it can leave you without coverage if something goes wrong.
Roofs need care just like anything else in your home. Following a routine maintenance schedule helps keep small problems from turning into big ones. It also helps you plan ahead so you are not caught off guard.
Different roofs and locations may need different care plans. Weather, roof age, and how your home is built all play a part in how often roof inspections and maintenance should happen.
Roofing experts recommend more frequent maintenance checks as your roof gets older to stay ahead of problems.
The cost of maintenance depends on a few things, like how big your roof is, what it’s made of, and how easy it is to access. A small home with basic shingles will usually cost less than a large or steep roof.
Roofing services may seem like an extra expense, but they help you avoid bigger bills down the road. Staying ahead of issues is almost always cheaper than fixing major leaks or replacing the roof early.
Basic maintenance services may range from $150 to $400. This includes cleaning, inspection, and small fixes.
Complex tasks like moss removal, sealing flashings, or working on high-pitched roofs may raise the price to $600 or more.
The total price depends on your roof's pitch, the type of material, local labor rates, and whether past damage needs attention. Good roofing contractors can give you a clear estimate before starting work.
Since 2022, roof repair and maintenance prices have gone up due to labor and material costs, making preventive care from an experienced roofing company a smart move.
Taking care of your roof is part of being a homeowner, but not every task is safe or easy to do alone. There are some simple roof maintenance tips you can follow yourself, while other jobs are better left to the pros.
You can maintain your roof by doing light tasks like removing leaves or cleaning out gutters on a safe, low roof. These small steps help keep your roof clear and working the way it should.
DIY-friendly tasks include gutter cleaning and light debris removal from low-sloped roofs.
But when it comes to bigger issues or a high roof, hiring a professional makes more sense. A roofer can inspect your roof properly and find hidden damage that’s easy to miss.
Professional roofers are recommended for detailed inspections, structural repairs, sealing, and work on steep or high roofs.
Hiring a pro ensures:
Good home roof maintenance is about knowing when to step in and when to call for help. That balance leads to proper maintenance and fewer surprises over time.
Both a roof maintenance program and a tune-up are good ways to keep your roof in shape, but they serve different purposes. Knowing the difference helps you plan what kind of roofing care your home really needs.
Maintenance is ongoing care to keep your roof in good shape year-round and is typically scheduled twice a year.
Regular maintenance includes many aspects of roof maintenance, like checking flashings, cleaning gutters, and fixing small issues. It’s part of a long-term maintenance plan to extend your roof’s life.
A tune-up is more of a quick fix when your roof needs a little attention, not a full checkup.
A tune-up is a one-time service that addresses wear and tear, often including:
Both options support your roofing system, but regular maintenance helps prevent more problems than a one-time tune-up. Choosing the right service depends on the condition of your roof and how long you want it to last.
Sometimes your roof gives you clear signs that it needs attention. Knowing what to look for can help you stop small problems from becoming big ones.
If your roof hasn’t been checked in a while, it’s smart to thoroughly inspect your roof or schedule a professional visit. Keeping your roof in good condition means watching for common signs of wear.
Look for these red flags that your roof may need attention:
These are signs of roof damage or even early roof leaks. If you notice any of them, it’s a good time for a checkup. Regular roof inspections help protect your home and are a big reason roof maintenance is so important.
You might have questions about taking care of your roof, especially if you’re trying to avoid future roofing problems. Here are answers to some of the most common ones we hear from homeowners.
Most visits take about 1 to 3 hours, depending on your roof type and its current shape. Bigger homes or roofs with more issues may take a little longer.
Yes. Even new roofs need roof maintenance tips to stay in good shape. Skipping early care can lead to problems later, and it might also affect your warranty.
It can help. Staying on top of maintenance and repairs shows that you’re doing your part to care for your home, which can support insurance claims if something does go wrong.
In many cases, yes. A lot of roof warranties require proof of regular upkeep as part of their maintenance needs. Without it, you could lose your coverage.
Keep a simple record that includes inspection reports, photos, and receipts from your contractor. This helps show your roof has been properly maintained and is in good condition.
Your roof works hard every day to shield your home from the weather. With the right care, it can last longer, look better, and cost you less over time.
Choosing a trusted local roofing contractor means your roof gets the care it really needs. A professional can spot small problems early and give you a clear plan for proper maintenance.
Whether you need a full roof maintenance service or just want a quick checkup, we’re here to help keep your roofing system strong and safe.
Call IBEX Roof today at 360-529-3606 to schedule your next check-up or request a free roof inspection online.
We proudly serve Vancouver, Portland, Lacey, Camas, Ridgefield, and nearby areas to help you protect your home with confidence.
If you're looking up roof installation costs, you're probably at a point where your roof is showing signs of wear, or worse, letting water in. You might be wondering if it’s time to call a roofing company or whether that “minor repair” is really enough.
At IBEX Roof, we hear this all the time. Homeowners want straight answers and a free estimate they can actually use to plan ahead, without the pressure, the upsell, or vague numbers. In this post, we’ll break it all down in clear terms: how much a new roof typically costs, what affects the price, and how to get the best value for your home.
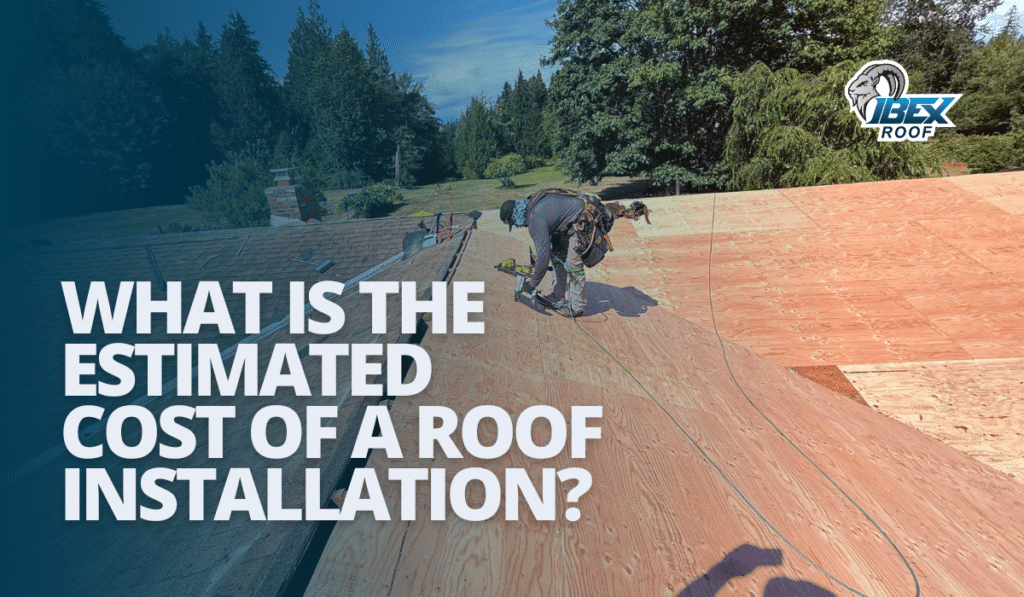
When people think about getting a new roof, one of the first questions is, “How much is this going to cost me?” It’s a fair question, especially when prices can vary so much depending on where you live and what your roof looks like.
On average, the cost of a new roof can range from $8,000 to $30,000 or more, with most homeowners paying somewhere in the middle. The national average cost helps as a starting point, but it’s just that, a starting point. Your actual price depends on your home’s size, materials, and who you hire.
For example, a small home with basic shingles may cost far less than a large, multi-level roof with metal panels. Some homeowners are surprised by how quickly the numbers go up once labor, removal, and materials are factored in.
That’s why it’s important to get clear numbers before making a decision. A solid roof installation cost estimate from a trusted contractor can help you plan ahead and avoid surprises.
The cost to replace a roof doesn’t come from just one place. A few key factors work together to shape your total price. Knowing these helps you ask better questions and understand your quote.
Here’s what usually affects the price:
Roof Size & Complexity: Larger roofs need more materials and time. A steep or complex roof takes longer to install, so the roof size and pitch directly impact the final cost.
Choice of Materials: Asphalt shingles are common, but metal, tile, or wood come with higher price tags. The type of roof you choose changes both material and labor costs.
Labor Costs: These vary by region and how tough the job is. A simple one-layer install costs less than a full tear-off with repairs. Labor can be a big part of your final bill.
Location Differences: In areas where the cost of living is higher, roof jobs are more expensive. The same job might cost thousands more depending on your zip code.
Prep/Removal Work: If your old roof needs to be removed or there’s damage under the surface, expect the price to go up. Prepping the roof takes time and adds to the labor cost.
To sum it up, your total roof installation cost is shaped by what’s on your house now and what you want it to become. That’s why no two quotes are ever the same.
What you choose to put on your roof has a big impact on how much the project will cost. Some roofing materials are simple and affordable, while others are made to last longer but cost more upfront.
Let’s break it down by material type:
Knowing the cost per square foot helps you compare options and find the right fit for your home and budget. Picking the right roofing material is about balancing looks, durability, and what you’re comfortable spending.
It’s easy to focus only on shingles and square footage, but a roof replacement often includes smaller costs that can add up fast. These aren’t always listed upfront, so homeowners are sometimes caught off guard.
Some of these extra expenses come from the condition of your current roof or the specific layout of your home. If there’s damage hiding under your shingles or hard-to-reach sections of the roof, it can increase labor and material costs.
Here are a few common charges that can add to the overall cost of your roof replacement:
Knowing about these ahead of time can help you prepare and make better choices when reviewing your quote. Always ask your roofer to explain what might be added once work begins.
Getting a new roof is a big investment, but there are smart ways to lower the cost without cutting corners. It starts with planning, comparing options, and knowing where you can safely reduce spending.
One way to save is by scheduling your project during slower months when roofing companies may offer off-season discounts. Choosing durable materials that don't break the bank is also a good way to balance cost and quality.
You can reduce the cost of replacing your roof by doing things like:
By looking at your options with a clear plan, you can manage your roof replacement cost more confidently and get the most value for your budget.
Roof installation pricing can vary depending on local permit fees, weather, and material availability. If you want a quote that reflects your specific needs, there are a few simple steps to follow.
Start by finding a local roofing contractor who offers a free roof inspection. They’ll help you determine the cost based on your roof’s size, slope, and condition.
Here’s how to get a clear and accurate cost estimate:
A well-prepared estimate takes the guesswork out of the process and helps you feel confident in your decision. It’s not just about price, it’s about getting the right roof for your home.
When it comes to roofing, people usually have the same key questions. Getting honest answers makes it easier to plan your budget and know what to expect before the work starts.
How much does a new roof cost per square foot?
The cost per square foot depends on the material, slope, and location. Most roofs fall between $4 and $12 per square foot, but it can go higher with premium options or complex layouts.
How long will my new roof last?
A roof’s lifespan depends on what it's made of and how well it's installed. Asphalt shingles may last 20 to 30 years, while metal or tile roofs can last 40 years or more if maintained properly.
How long does it take to install a new roof?
Most roof replacements take 1 to 3 days, depending on the size, shape, and weather. Bigger or more detailed jobs may take a bit longer.
Does the size of my roof affect the total cost?
Yes, the larger your roof’s square footage, the more you’ll pay. More space means more materials and more labor, which directly affects the cost.
Are labor costs included in the quote?
Most quotes include roof replacement labor costs, but always double-check. If it’s not clearly listed, ask your contractor to break it down for you.
Choosing to replace your roof is a big step, but it's also a smart one when your current roof is no longer doing its job. A new roof protects your home and can even boost its value.
It helps to understand what goes into the cost of a roof replacement, from materials and labor to extra fees that can come up during the project. Knowing these details gives you more control over your choices.
Always get multiple quotes, ask clear questions, and check what's included in the price. That way, you can make the best decision for your home and budget.
In the end, a well-installed roof does more than cover your house. It gives you peace of mind, knowing your home is ready for the seasons ahead.
Wondering what it’s really going to cost to replace your roof? You’re not alone. Whether your shingles are curling at the edges or a leak just showed up during the latest Portland rain, the question comes up fast, how much is this going to set me back?
In Portland, Oregon, the price for a residential roof replacement can range anywhere from $8,400 to $16,500 for asphalt shingles, and $20,400 to over $42,000 for metal roofing. But those numbers can shift depending on the size of your roof, its slope and shape, and whether there are any issues hiding beneath the surface like rotten decking, outdated insulation, or damaged gutters.
This guide breaks it all down. You’ll learn what affects the cost of roof replacement in Portland, how different materials compare, what kind of extras to expect, and how to get a fair, accurate quote from a trusted residential roof replacement contractor in your area.
When you're budgeting for a new roof, it's easy to feel unsure about what’s normal or fair. The average roof replacement cost in Portland can be higher than in other regions due to labor and local code requirements. Understanding the going rates helps you avoid surprises when you start collecting estimates.
Here’s what Portland homeowners are typically paying right now for a full roof replacement based on the material type:
Labor rates in the Portland area tend to run 10 to 20 percent higher than the national average. That’s mostly due to transportation, material availability, and regional building standards. When reviewing a roof replacement estimate, keep in mind that material is only part of the equation, labor makes up a significant portion of the total.
The size of your roof has one of the biggest impacts on the cost to replace a roof. A larger surface means more materials, more labor, and often more complexity. That’s why quotes are usually tied closely to square footage.
Beyond just size, your roof pitch and layout also affect the final price. A steep or multi-angle roof requires more time and safety setup, which can raise your estimated roof replacement cost.
In roofing terms, contractors often use “squares” each square equals 100 sq. ft. Knowing this makes it easier to compare estimates and understand how the cost per square foot adds up for your home.
Not every roof costs the same to replace. What your neighbor paid for theirs may not reflect what yours will cost. That’s because several key details like your roof size, design, materials, and even the time of year, can all change the price.
These are the key factors that affect roof replacement costs the most. Understanding what goes into the price helps you ask better questions and make smarter choices.
Each of these cost factors plays a role in shaping the quote you’ll get from a residential roofing contractor. Some are easy to control, others depend on what’s uncovered during the job.
The bigger your roof is, the more it’s going to cost. But it’s not just about square footage, the shape and layout matter too.
A roof with lots of angles, dormers, or steep slopes takes more time and labor to complete safely. The complexity of your roof increases not just the time needed but also the number of materials and safety setups involved.
If your roof is easy to access and has a simple layout, that usually means a lower price. But anything that makes the job harder like multiple levels or chimneys, can add to the overall roof replacement cost.
The roof material you choose can swing your costs up or down, so it helps to know what each option brings to the table.
Each material type impacts not just the price but also the weight, lifespan, and look of your roof. Picking the right one means balancing cost with what matters most to you.
Labor cost is a major part of your total project, sometimes even more than materials. In Portland, roofing contractors typically charge more than the national average due to demand, local building codes, and seasonal pressure.
The roofing labor cost per square can change depending on the time of year and how many skilled workers are available. Jobs during the busy summer months tend to be priced higher than those done in the off-season.
Hiring a local, licensed team that understands Portland’s climate and code requirements may cost more, but it usually pays off in quality and reliability.
Sometimes a roof replacement uncovers problems you couldn’t see beforehand. These hidden issues are part of why roof replacement cost can change from the original estimate.
These upgrades can add to your cost, but they also help prevent future issues like leaks or mold. If your contractor brings them up, it’s often because they’re needed to protect the rest of your home.
Even after selecting materials and estimating labor, there are still a few more items that affect the total roof replacement costs. These extra pieces can sneak up if you're not prepared, which is why it’s helpful to know them ahead of time.
Your contractor might mention fees that don’t seem related to shingles or nails, but they’re still part of the process. Things like local permits and inspection costs are often required for a proper roof installation.
There can also be additional cost factors like removing old roofing layers or fixing damaged wood underneath. These aren’t always visible until work starts but can add to the overall cost.
These items don’t always apply, but when they do, they can shift the cost of a roof replacement more than expected. Being aware of them helps you understand where your money is going and why your estimate might look different from your neighbor’s.
If you’re dealing with leaks or roof damage, it’s not always clear whether you need a full replacement or just a smaller repair. This is one of the first questions homeowners ask, and knowing what to look for can help make the choice easier.
In some cases, a roof repair might be enough to keep things watertight and safe, especially if the problem is minor or caught early. But when wear is widespread or the roof is near the end of its lifespan, it may be time to plan for a full roof replacement project.
Understanding when it’s worth fixing and when it’s smarter to start over can save you money and stress in the long run. The cost to replace a roof is higher than a repair cost, but it often brings more lasting value and fewer ongoing issues.
If you're unsure, a trusted contractor can inspect your roof and walk you through whether a partial roof replacement or full project makes the most sense. Catching these signs early can also help avoid bigger costs later.
Getting a clear, fair roof replacement estimate doesn’t have to feel confusing. The more prepared you are going into the process, the easier it becomes to compare quotes and spot the real value.
Not every quote will be the same, even for the same house. That’s why understanding how contractors build their pricing can help you know what to expect when asking how much a roof replacement costs.
Taking time to review details and ask questions is the best way to determine the cost that truly fits your home and your goals.
You’ll want to gather at least three quotes from licensed roofing companies in Portland. This gives you a good comparison of pricing, timelines, and materials.
Many residential roof replacement contractors offer free estimates and will walk your roof before providing one. These usually take a few days to schedule, especially in busy months.
Don’t just glance at the bottom line look at what’s included. A solid roofing estimate should list materials, labor, warranties, and the proposed timeline.
Check for details like the cost per square, the type of underlayment, ventilation, or disposal methods. These pieces help you understand what’s behind the price.
Before saying yes to anyone, make sure your contractor is licensed and insured. Look for online reviews, ask for recent local jobs, and check how long they’ve worked in the Portland area.
A contractor who understands the regional weather and building codes is more likely to give you a smooth project and reliable results.
Choosing the right roofing contractor is about more than finding the lowest quote. You want someone who knows the area, uses quality materials, and stands behind their work.
A good residential roof replacement contractor should be familiar with Portland’s climate like how rain and moss affect roofs here over time. That knowledge helps them recommend materials and methods that hold up better.
They should also offer clear warranty options and explain what’s covered. Whether it’s a manufacturer guarantee or labor warranty, make sure you know how long protection lasts and what it includes.
Before work begins, make sure everything is in writing from cost and materials to start date and completion timeline. That way, everyone’s on the same page.
Replacing a roof is a big project, but there are ways to bring down the total cost without cutting corners. Asking the right questions and planning at the right time can make a real difference.
Some homeowners don’t realize that insurance might cover part of the job if the damage is from a storm or another covered event. That alone can reduce your roof replacement cost significantly.
You can also look into financing plans or local rebates. Some energy-efficient upgrades may qualify for tax credits or incentives, especially in Oregon.
Planning ahead and working with a contractor you trust can help you save on roof replacement without sacrificing quality.
When you're planning for a roof replacement, it’s normal to have questions. Whether you're comparing prices or figuring out the right time to start, these answers can help clear up what to expect.
When is the best time of year to replace a roof in Portland?
Late fall or early spring tends to be ideal. You’ll likely find more flexible scheduling and potentially lower roof replacement prices during the off-season.
How long does a typical roof replacement take?
Most residential projects are completed in one to three days. The actual time to replace depends on the size and complexity of your roof.
Does insurance cover full or partial replacement costs?
If your roof was damaged by wind, hail, or another covered event, insurance might pay part or all of the roof replacement cost. An roof inspection and documentation are often required.
How does a new roof affect home value and curb appeal?
A new roof can improve both the look and resale value of your home. It also makes buyers feel more confident about the condition and quality of your roof.
Can I stay home during the roofing process?
Yes, most homeowners remain at home. Just be prepared for noise and some vibration as materials are removed and installed.
Do I need a permit for roof replacement in Portland?
Yes, a permit is required for most roof replacements. Reputable contractors will handle this as part of your project.
How long do asphalt, metal, and tile roofs last?
Asphalt shingle roofs usually last 20 to 30 years, metal roofs can last 40 to 70 years, and tile roofs often exceed 50 years with proper care. Longevity affects how much your roof will cost over time.
The cost of roof replacement depends on many factors, from the materials you choose to the size and shape of your home. Portland's climate, local labor rates, and seasonality also influence the final price.
Getting multiple quotes from experienced contractors is one of the best ways to understand what your average cost of a roof might be. Make sure each estimate includes materials, labor, and any extra services that could affect the total roof replacement costs.
If you're starting to think about replacing the entire roof, a professional inspection is a smart first step. At IBEX Roof, we offer a free estimate to help you get clear on your options, timeline, and pricing. Let’s make sure your roof is ready for whatever Portland weather brings.