Maintaining a well-maintained roof is essential for the longevity and safety of your home. One common issue that homeowners face is damaged or worn-out shingles. It is crucial to replace these damaged shingles promptly to prevent further damage and costly repairs. In this blog post, we will guide you through the step-by-step process of replacing roofing shingles, ensuring that your roof remains in great condition.
Before starting the shingle replacement process, gather all the necessary tools and materials to ensure a smooth experience. Here's a list of what you'll need:
Choosing appropriate replacement shingles is also crucial. Consider the following factors:
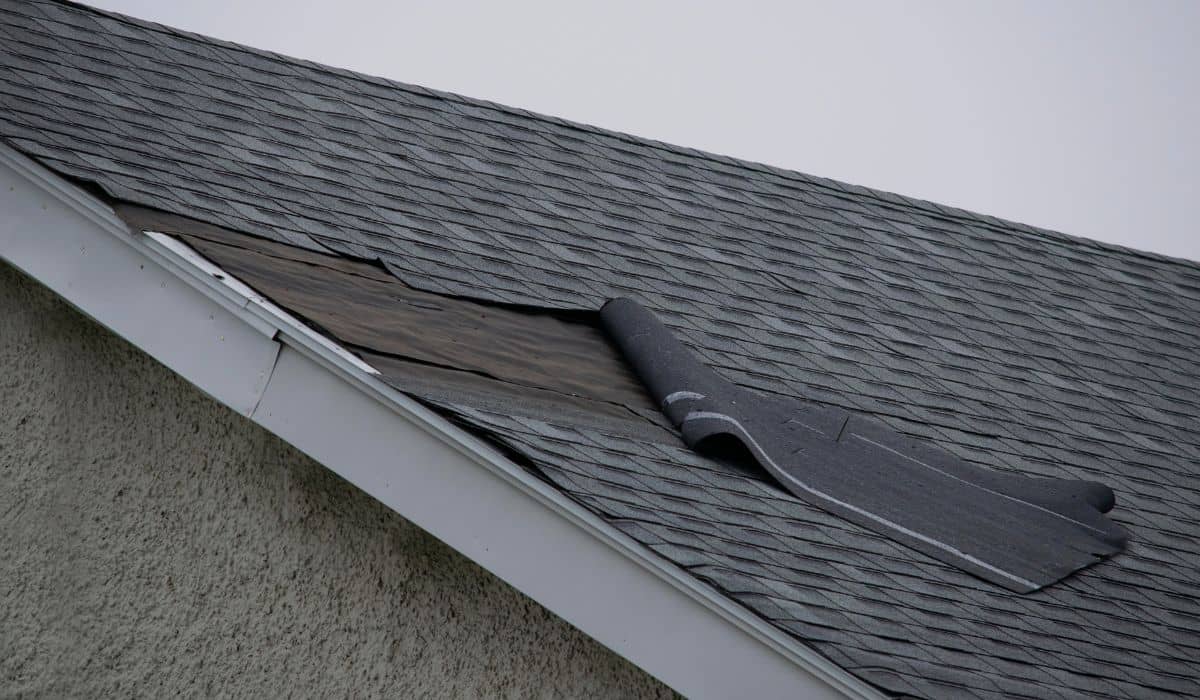
Before starting the shingle replacement process, conduct a thorough inspection of your roof to identify damaged or missing shingles. Additionally, check for any underlying issues such as rot, mold, or leaks.
Ensure that you can safely access the roof by following these steps:
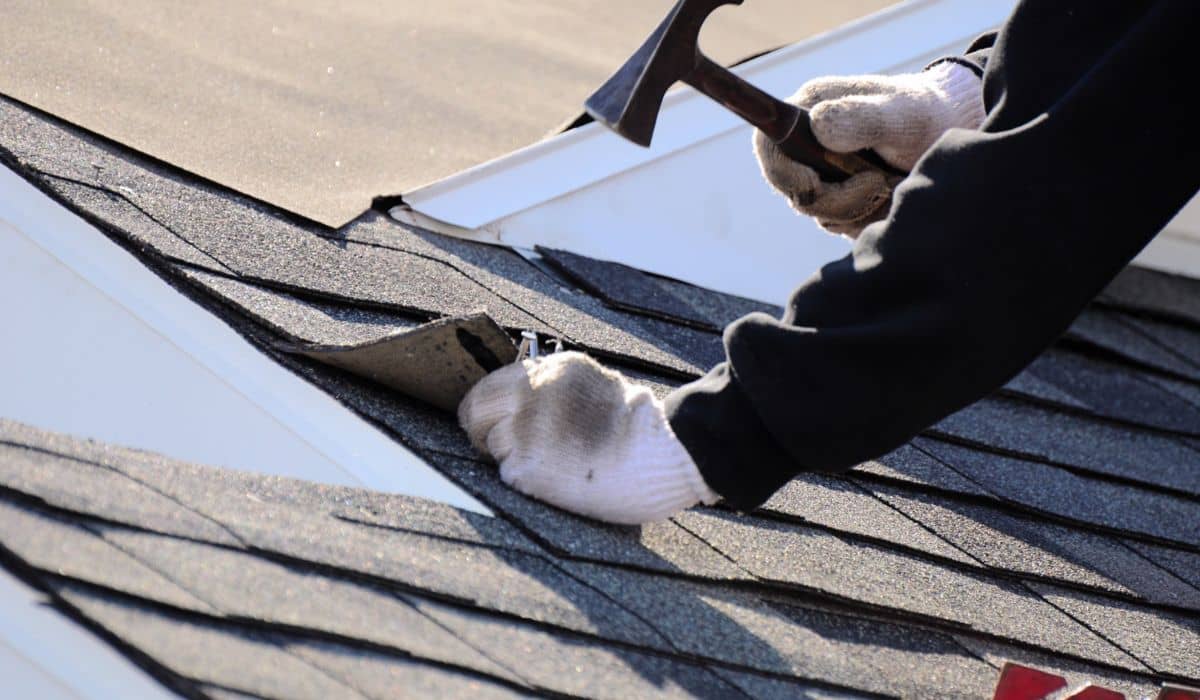
Start the shingle replacement process from the top of the roof, working your way down. Follow these steps to safely remove damaged shingles:
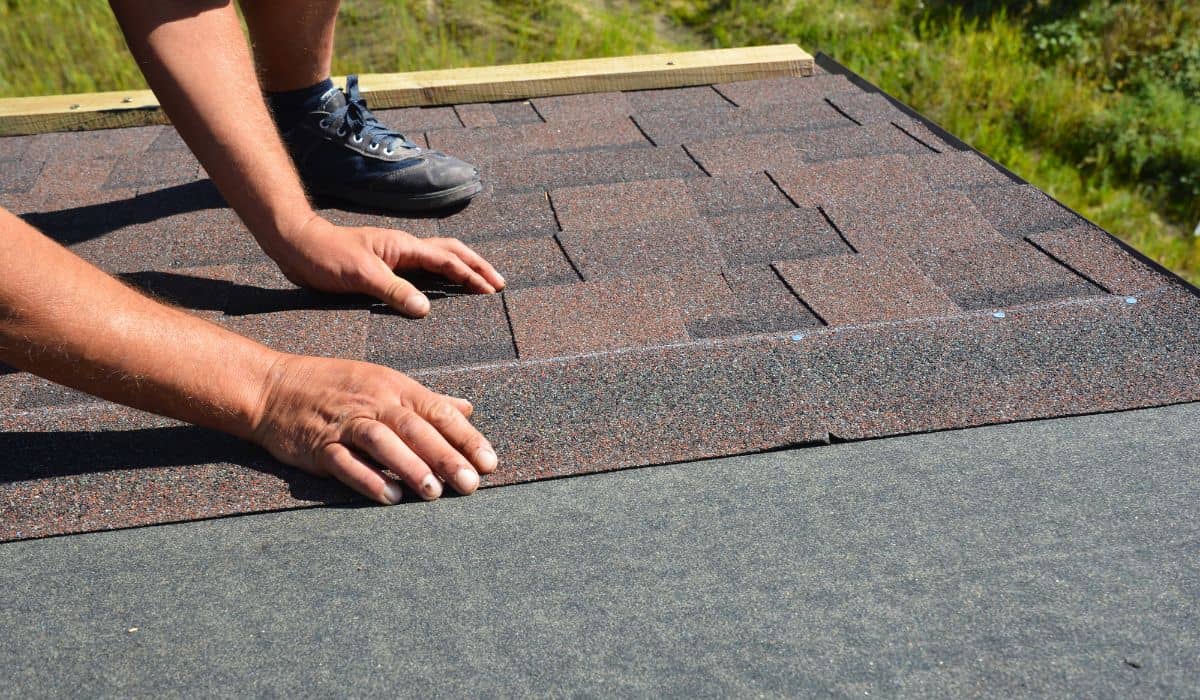
With the damaged shingles removed, it's time to install the replacement shingles. Follow these steps for a successful installation:
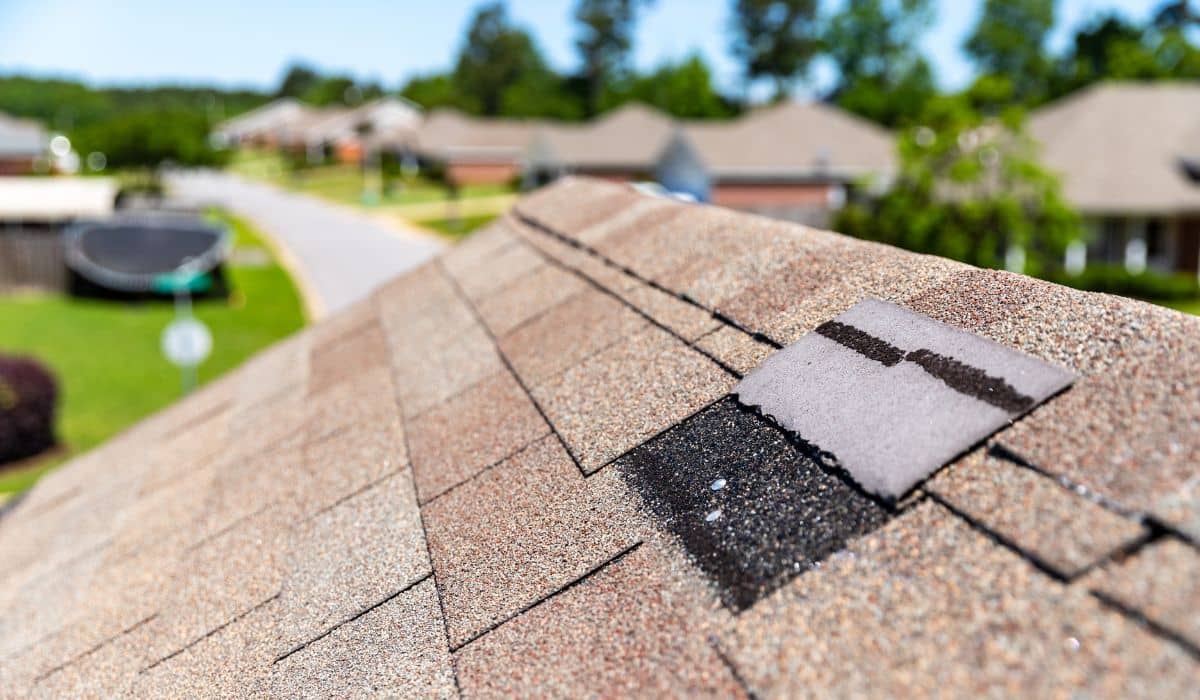
Once the shingle replacement is complete, it's important to inspect the replaced shingles for any issues. Clean up the work area and dispose of old shingles properly. Additionally, ensure that the roof looks even and aesthetically pleasing.
After completing the shingle replacement, it's important to continue regular roof maintenance to prolong its lifespan. Here are some tips:
The lifespan of roof shingles can vary depending on the material and the climate in which they are installed. In general, asphalt shingles can last anywhere from 15 to 30 years, while metal, wood, and slate shingles can last 50 years or more. It is recommended to inspect your roof annually, and after any severe weather, to check for any damage or signs of wear and tear.
If you notice missing, cracked, or curling shingles, or if your roof is approaching the end of its expected lifespan, it may be time to consider replacing them. Regular maintenance and prompt replacements can help extend the lifespan of your roof and prevent any potential water damage or leaks.
Replacing damaged shingles on your roof is an essential part of roof maintenance. By following the step-by-step process outlined in this blog post, you can ensure that your roof remains in good condition, protecting your home from water damage and maintaining its aesthetic appeal. Remember to prioritize roof maintenance and promptly replace damaged shingles to avoid further issues down the line.
They were very responsive to a couple of installation issues and followed through with the business philosophy of finding a solution that would work. Thanks Jeff for your work... read more
 Jerry Willey
I wont to thank all of the people that worked extremely hard on both in being honest and doing a great job, and in fast in have enough... read more
 Jody Koelling
Nick and Jeff E. were great. They both took the time to make sure we understood our options, answered our questions and we were able to make the best choice... read more
 Donavan Anderson
Good price for good work. Crew did full strip and reroof for our two story house in 2 days. Looked great when done. Important to work with a roofing company... read more
 Steve Wetterling
Jeff Eason did a fantastic job and found cost effective ways to avoid high costs
 John Bonomi Jr.
We actually stumbled across IBEX at the Tigard Festival of Balloons and scheduled a free estimate to have our roof cleaned. And I'm so glad we did! Miguel... read more
 Amanda Case
Jeff Eason, our project manager, made sure to handle our project with care and attention. He kept us in the loop of what was happening and was generous with providing... read more
 Rory Parsons
Jeff Eason took great care of me. He kept me up to date each step of the way. I added gutter replacement to my reroofing job and have me regrets!... read more
 Michelle Huffman
Jeff Eason project manager did a wonderful job and gave me the best deal on gutters
 Allen Kosin
Jeff Eason and his crew are professionals who care about the customer. He and his crew arrived promptly at scheduled times. The crew worked efficiently and the roof was installed... read more
 Laura Guerra